
Non-Conformance Report (NCR)
8.0 Non-Conformance Report (NCR)
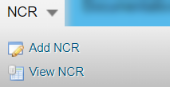
NCR used to document the details of a non-conformance identified in a quality audit or other process review. The NCR menu helps to add an NCR in the Structural project. Once you click the NCR menu, the following tabs open,
8.1 Add NCR
The Add NCR tab in the NCR menu used to add an NCR. Do the following steps to add an NCR,
- Click the Add NCR tab.
The NCR page opens.

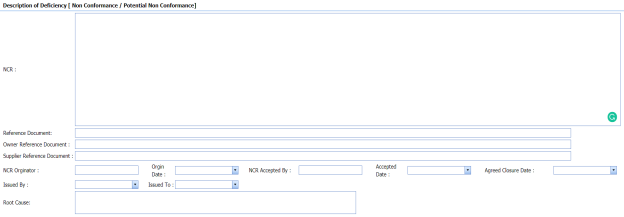


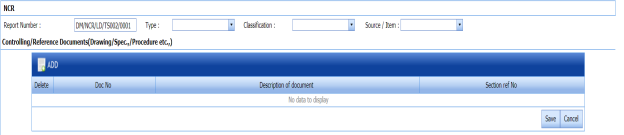
Figure 8.1: NCR page
 Tip: A report number for a new NCR will be updated automatically in the Report Number box.
 -
In the Type box, select the type of non-conformance from a drop-down list.
-
In the Classification box, select whether minor classification or major classification from a drop-down list.
-
In the Source/ Item box, select the source of NCR from a drop-down list.
-
To add controlling/ reference documents,

-
-
-
Click
 (ADD button) in the Controlling/ Reference documents box.
A new window opens in the Doc No column.
-
Enter the document number in the new window of the Doc No column.
-
Enter the description for the document in a box of the Description of document column.
-
Enter the section reference number in a box of the Section ref No column.
-
Click Save.
-
-
-
- In the NCR box, enter the description for the identified deficiency of the selected non-conformance type.
-
In the Reference Document box, enter the reference document detail.
-
In the Owner Reference Document box, enter the owner reference document detail.
-
In the Supplier Reference Document box, enter the supplier reference document detail.
-
In the NCR originator box, enter the originator of NCR.
-
In the Origin Date box, select the origin date of NCR.
-
In the NCR Accepted By box, enter the name of a person who has accepted the NCR.
-
In the NCR Accepted Date box, select the NCR accepted date.
-
In the Agreed Closure Date box, select the agreed closure date.
-
In the Issued By box, select the company who has issued the NCR.
-
In the Issued To box, select the company for which the NCR has issued.
-
In the Root Cause box, enter the root cause detail.
-
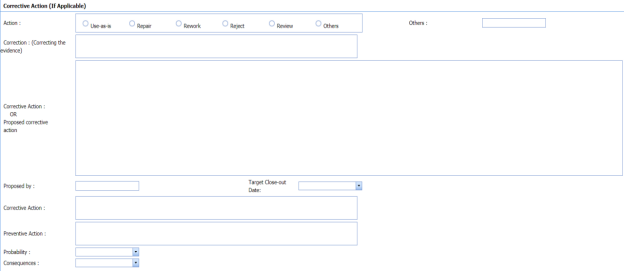
If you want to add the corrective action detail, do the following,
-
-
-
In the Action box, select any corrective action from the given options.
-
In the Corrective Action box, enter the corrective action detail.
-
In the Proposed by box, enter the name of a person who has proposed the corrective action.
-
In the Target Close-out Date box, select the target close out date.
-
In the Preventive Action box, enter the preventive actions.
-
In the Probability box, select the probability percentage of non-conformance.
-
In the consequences box, select the consequences level you have faced.
-
-
-
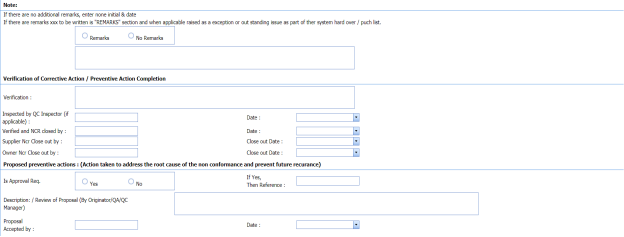
- If you want to add any remarks, click Remarks option and enter your remarks, otherwise click No Remarks option.
- In the Verification box, enter the verification detail on completion of corrective action/ preventive action.
-
In the Inspected by QC Inspector, and Date boxes, enter the name of the QC inspector who has inspected the NCR, and date, respectively.
-
In the Verified and NCR closed by, and Date boxes, enter the name of a person who has verified and closed the NCR, and date, respectively.
- In the Supplier NCR Close out by, and Close Out Date boxes, enter the name of a person who has closed the supplier NCR, and close out date, respectively.
- In the Owner NCR Close out by, and Close Out Date boxes, enter the name of a person who has closed the owner NCR, and close out date, respectively.
- In the Approval Req box, if you need approval, click Yes, otherwise click NO.
- If you have selected Yes, you must enter the reference detail in the If Yes, Then Reference
-
In the Description box, enter the description of proposal.
-
In the Proposal Accepted by, and Date boxes, enter the name of a person who has accepted the proposal, and date, respectively.
-
In the NCR Close Notes box, enter the NCR close notes.
- In the Disposition Completed by, and Date boxes, enter the name of a person who has completed the disposition, and date, respectively.
-
Click Save.


The NCR is successfully added.
8.2 View NCR
The View NCR tab helps you to add, view, and edit the NCR, which is added by using the Add NCR tab.
- Click the View NCR tab in the NCR menu.
The View NCR page opens with added NCR.

Figure 8.2: View NCR page

8.2.1 Add an NCR
If you want to add an NCR, do the following,
- Click
 (ADD button) in the View NCR page.
The View NCR page redirects you into the NCR page. Follow the same procedure in the topic, “Add NCR” to add an NCR.

8.2.2 Print an NCR
If you want to print an NCR, click  (Print button) provided in the upper side of the View NCR page. See Fig 8.2.
8.2.3 Attach a File into an NCR
If you want to attach any file with any NCR listed in the View NCR page, follow the procedures given in the topic “Attach a file into a client master drawing” in the Client Master Drawing section.
8.2.4 Update Any NCR
If you want to update any existing NCR in the View NCR page, click  (Update icon) in the Update column for the respective NCR. See Fig 8.2. Edit the details in the respective box you want.
8.2.5 Export NCR
You can export the NCR added in the View NCR page in the pdf and excel formats. To know how to export, see the topic, “Export Areas list” in the Area option.
8.2.6 Delete NCR
If you want to delete any NCR in the View NCR page, click (Delete icon) provided in the Delete column of the View NCR page, See Fig 8.2.
No Comments