
Home
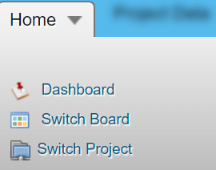
2.1 Dashboard
The Dashboard tab in the Home menu displays graphs, charts, and tables, which helps you to monitor and track the summary reports of various inspection and welding progress in the piping module.
 Note: The dashboard displayed on the app is linked to a database that allows the report to be constantly updated.
The Dashboard page shows the following graphs, charts, and tables:
- Piping – Weld Rejection Rate (Cumulative)
- Piping Drawing Status
- Piping – Weekly Weld Rejection Rate
- Piping Dia Inch
- Piping Status by System
- Piping Welding Progress by Date
- NDT Progress Status
- NDT Number of Joint Status

2.2 Switch Board
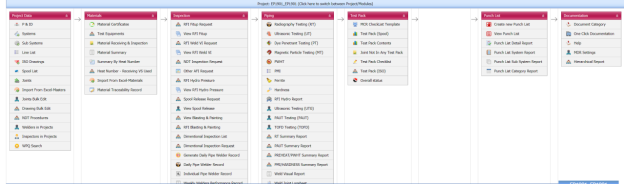
The Switch Board tab in the Home menu show the consolidated view of various tabs listed in multiple menus in the menu bar.
Once you have successfully logged in into the cuteQM app, you can view the Home Page. In the Home Page, the menu bar appears with multiple menus, otherwise you can select the Switch Board tab to view all the menus.
To select the Switch Board tab,
The Switch Board tab includes multiple options such as Project Data, Materials, Inspection, Piping, Test Pack, Punch List, and Documentation.
2.3 Switch Project
The Switch Project tab in the Home menu helps you to add a new project/module and switch between various projects and modules added in the app.
2.3.1 Switch between Various Projects and Modules
The switch project window opens with a list of projects and modules that are already added in the web.

Figure 5.1: Switch project window
3. If you want to switch between various projects and modules,
- Select a project you want from multiple projects listed in the left side of the window.
Once you have selected the project, a list of modules related to the project is displayed.
-
Select a module you want from multiple modules listed in the right side of the window.
4. Click Select.
2.3.2 Add a New Project
If you want to add a new project, do the following
|
If you want to add a new project, you must have been assigned as an administrator or a power user otherwise you cannot add any new project. |
- Click New Skid/ Module. See Fig 2.1.
The add project/module page opens with two options such as Projects and Skid/ Module.
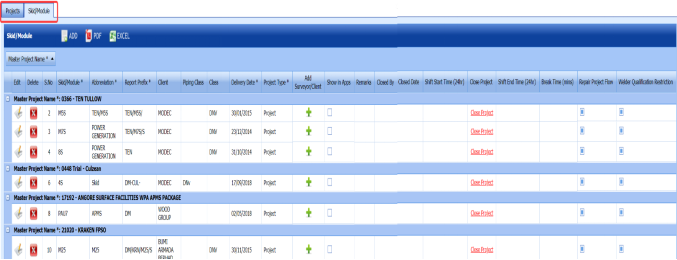
Figure 2.2: Add project/module page
2. Click Projects.
The Projects page opens.
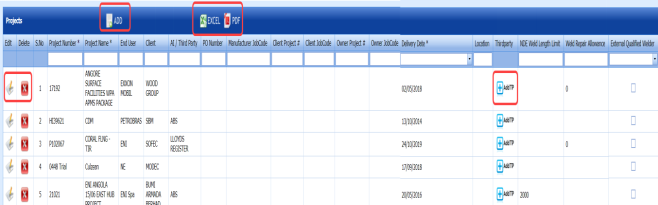
Figure 2.3: Projects page
3. Click  (ADD button) in the upper side of the Projects page.
A new window opens to add a new project.
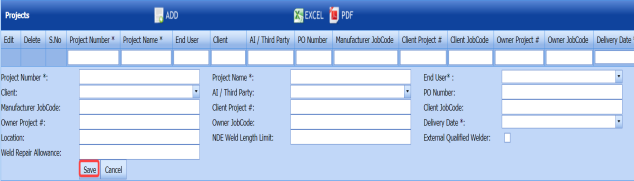
 Note: The fields notified with a symbol (*) are mandatory. You must enter the relevant details in that fields before saving.
- In the Project Number box, enter the project number.
- In the Project Name box, enter a project name.
-
In the End User box, select an end user from a drop-down list.
- In the Client box, select a client from a drop-down list.
- In the AI/ Third Party box, select an AI or a third party from a drop-down list.
 Note: If you want to add multiple third parties, add third parties by clicking
 (Add TP button) in the Third party column of the Projects page.
 - In the Purchase Order (PO) Number box, enter the PO number.
- In the Manufacturer Job Code box, enter the manufacturer job code number.
- In the Client Project box, enter the client project code.
- In the Client Job Code box, enter the client job code.
- In the Owner Project box, enter the owner project code.
- In the Owner Job Code box, enter the owner job code.
- In the Delivery Date box, choose the delivery date.
- In the Location box, enter the location detail.
- In the Non-Destructive Examination (NDE) Weld Length Limit box, enter the length limit of NDE welding.
- If you need an external qualified welder, click the check box provided with the External Qualified Welder option.
- In the Weld Repair Allowance box, enter the amount for weld repair.


4. Click Save.
A new project is added successfully.
2.3.3 Edit a Project
If you want to edit any existing project details from the list of projects in the Projects page, do the following,
1. Click  (Edit icon) in the Edit column for the respective project. See Fig 2.3.
A new window opens to edit the project.
2. Click any box where you want to edit the details, and then edit the details in the respective box in the Projects page.
3. Click Save.
2.3.4 Delete a Project.
If you want to delete any specific project from the list of projects, you can use (Delete icon) provided in the Delete column of the Projects page, See Fig 2.3.
1. Click  (Delete icon) for the corresponding project.
You receive a notification message “Do you want to delete this row?”.
2. Click OK.
2.3.5 Export Projects List
You can export a list of projects in the pdf and excel formats.
- If you want to export the projects list in the pdf format, click
 (PDF button). See Fig 2.3.
The project list will be downloaded in the pdf format.
-
If you want to export the projects list in the excel format, click
 (Excel button).
 The project list will be downloaded in the excel format.


2.3.6 Add a New Module
If you want to add a new module, do the following
|
If you want to add a new module, you must have been assigned as an administrator or a power user otherwise you cannot add any new module. |
- Click New Skid/ Module. See Fig 2.1. The add project/module page opens with two options such as Projects and Skid/ Module. See Fig 2.2.
- Click Skid/Module.
The Skid/Module page opens.
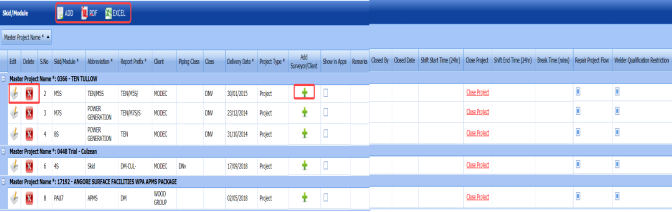
Figure 5.3.1: Skid/Module page
-
Click
 (ADD button) in the upper side of the Skid/Module page.
The skid/module box opens to add a new module.
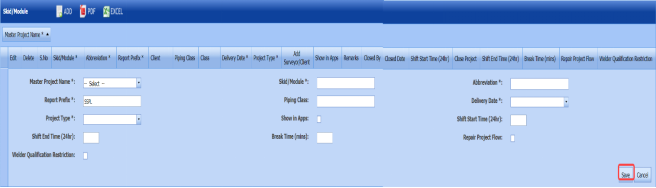
 Note: The fields notified with a symbol (*) are mandatory. You must enter the relevant details in that fields before saving.
-
- In the Master Project Name box, enter the master project name from a drop-down list.
- In the Skid/Module box, enter a module name.
- In the Abbreviation box, enter the abbreviation for the added module.
- In the Report Prefix box, the report prefix will be entered automatically. If you want change, you can edit the report prefix.
- In the Piping Class box, enter the piping class name.
- In the Delivery Date box, choose the delivery date.
- In the Project Type box, select the type of project from a drop-down list.
-
If you want to show this module in the cuteQM mobile app, click the check box provided with the Show in Apps option.
- In the Shift Start Time (24hr)box, enter the shift starting time.
- In the Shift End Time (24hr)box, enter the shift ending time.
- In the Break Time (mins)box, enter the break time duration.
- If you want to enable the repair project flow option, select the check box provided with the Repair Project Flow column.
- If you want to enable the welder qualification restriction option, select the check box provided with the Welder Qualification Restriction column.
- Click Save.
A new module is added successfully.
-
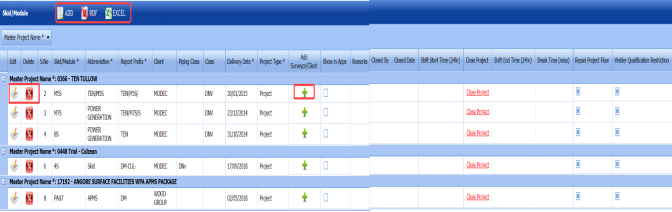


2.3.7 Add a Surveyor, a Client or Other Role for Module
If you want to add a surveyor, a client or other role for any added module,
-
Click a respective
 (Add icon) provided in the Add Surveyor/Client column. The Add Surveyor/Client/Others window opens.
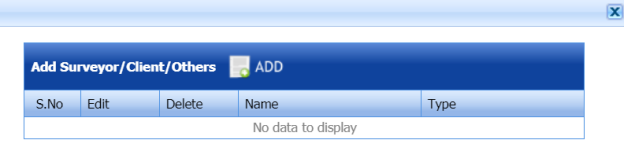
-
Click
 (ADD button). A new window opens to enter the name and type of a role.
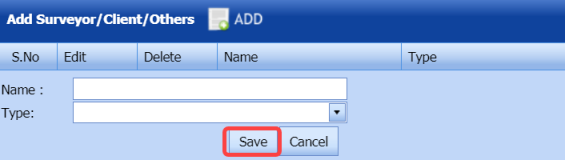
-
In the Name box, enter the name of the person to whom you want to add a role.
-
In the Type box, select the type of role from a drop-down list.
- Click Save.


2.3.8 Edit a Module
If you want to edit any existing module details from the list of modules in the Skid/Module page, do the following,
-
Click
 (Edit icon) in the Edit column for the respective module. See Fig 2.3.1.
 A new window opens to edit the module.

- Click any box where you want to edit the details, and then edit the details in the respective box in the Skid/Module page.
-
Click Save.


2.3.9 Delete a Module
If you want to delete any specific module from the list of modules, you can use  (Delete icon) provided in the Delete column of the Skid/Module page, See Fig 2.3.1.
-
Click
 (Delete icon) for the corresponding module.
 You receive a notification message “Do you want to delete?”.
-
Click OK.

2.3.10 Export Modules List
You can export a list of modules added in the Skid/Module page in the pdf and excel formats.
- If you want to export the modules list in the pdf format, click
 (PDF button). See Fig 2.3.1.
 The modules list will be downloaded in the pdf format.
-
If you want to export the modules list in the excel format, click

(Excel button).
The modules list will be downloaded in the excel format.


2.3.11 Close a Project
If you want to close any project from the app, do the following
|
Make sure that once you have closed any project, you cannot even open or access the closed project. |
- Click Close Project in the Close Project column for the corresponding module and project type. See Fig 2.3.1.
You receive a notification message “Are you sure want to close this project? You will not be able to access/reopen this project again”.
-
Click OK to close the project.
No Comments