
HRM Master Data
Masters
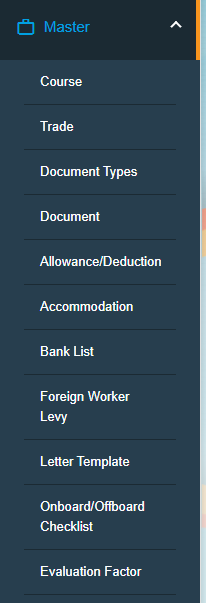
- Course
- Trade
- Document Type
- Document
- Addition/Deduction
- Bank list
- Foreign Worker Levy
- Letter Template
- Onboard/Offboard Checklist
- Evaluation Factor
Course
The Course tab in the Masters submenu helps you to add the course details. Once you have added the course, you can assign the added course for the for the respective employees while adding the employee course details. Click the Course tab in the Masters submenu. The Course Master page opens. 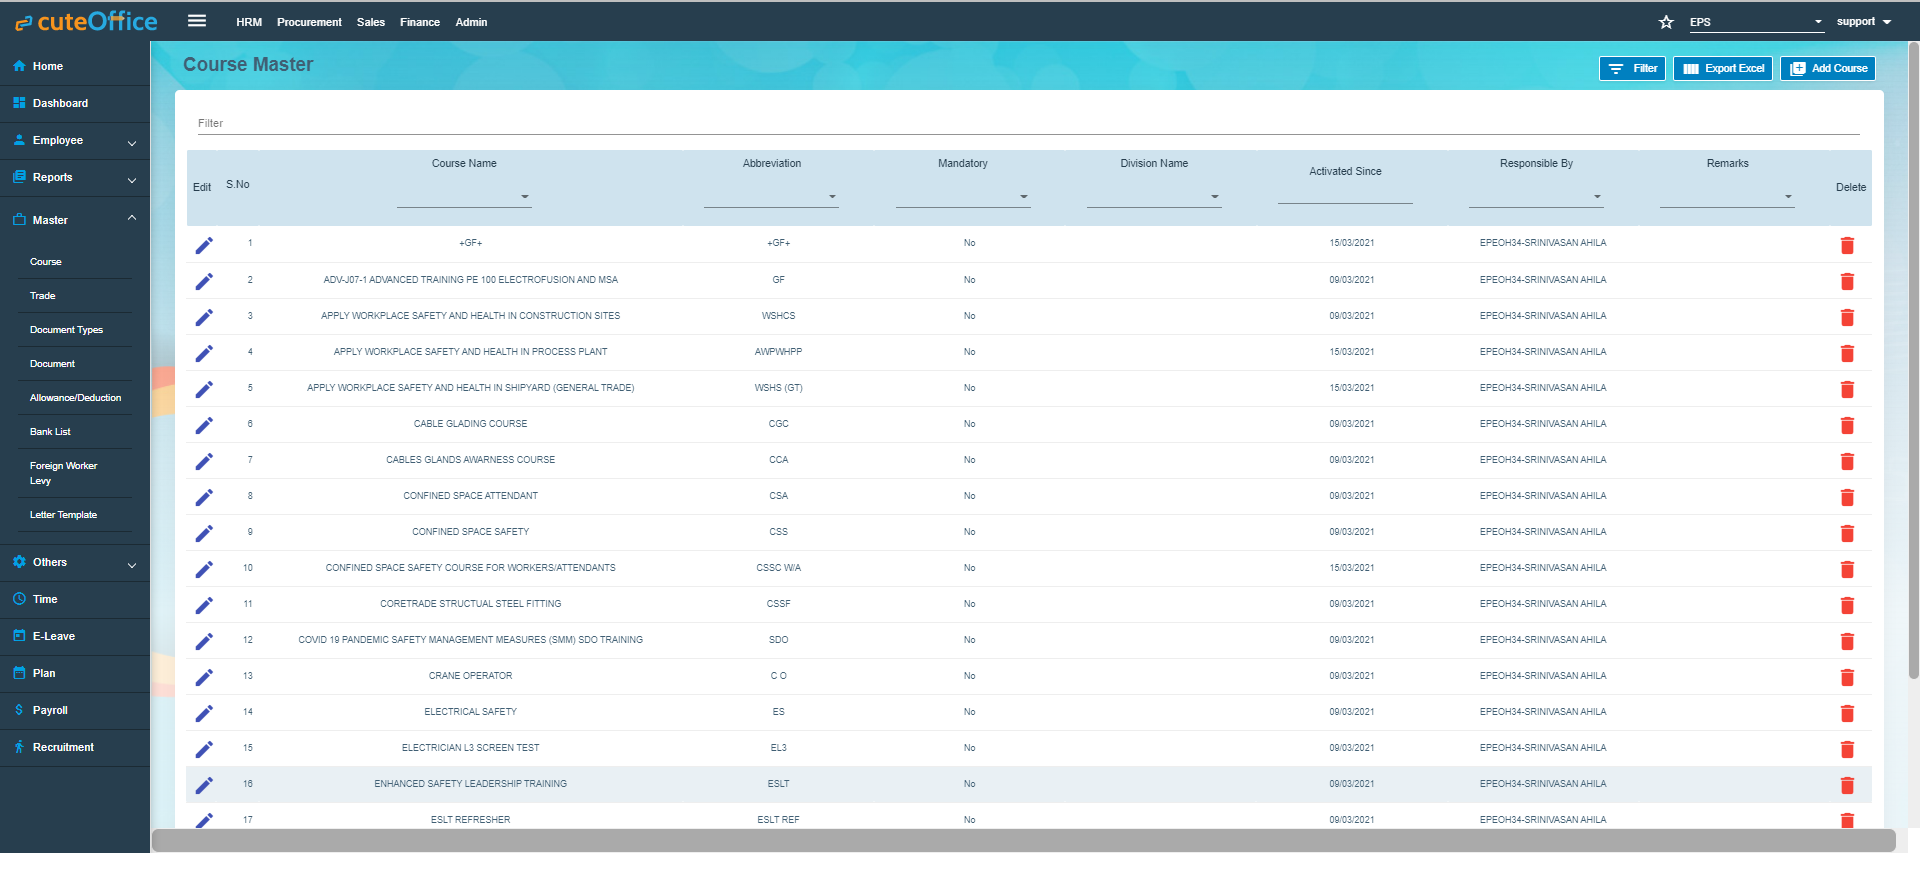
Add Course.
To add a new course,
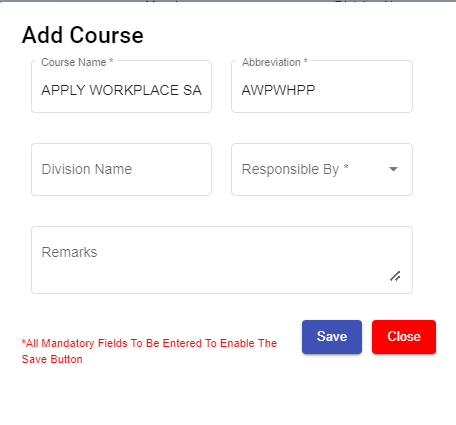
- Click (Add Course button) in the Course Master. The Add Course window opens.

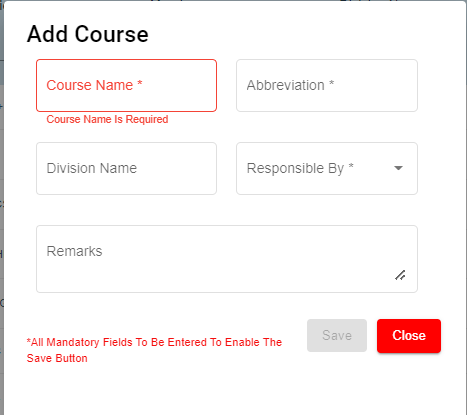
Note: The fields notified with a symbol (*) are mandatory. You must enter the relevant details in that fields before saving.
- In the Course Name box, enter the name of course.
- In the Abbreviation box, enter the abbreviation for the course name.
- In the Division Name box, enter the division name.
- In the Responsible By box, select the name of a person who is responsible for the course.
- In the Remarks box, enter your remarks if any.
- Click Save. The course is successfully added and listed in the Course Master page.
Edit Course
You can edit the details of the added course by using (Edit icon) provided in the Edit column of the Course Master page. Click (Edit icon) of the respective course you have added. The Add Course window opens with the added course details. Edit the course details where you want. Then click Save.
Delete Course
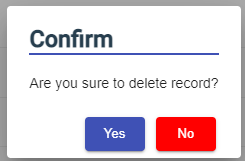
You can delete the added course by using (Delete icon) provided in the Delete column of the Course Master page. Click ![]() (Delete icon) of the respective course. The Confirm dialogue box opens with the following notification: “Are you sure to delete record?”. If you want to delete the course, click Yes otherwise click No.
(Delete icon) of the respective course. The Confirm dialogue box opens with the following notification: “Are you sure to delete record?”. If you want to delete the course, click Yes otherwise click No.
Filter Course
If you want to view any specific course details among multiple courses listed in the Course Master page, you can use the filter option provided in the upper left corner of the Course Master page. Click ![]() (Filter button). The filter option opens. Type any one of the details of course name, abbreviation, division name, active date, responsible by, and remarks which you know. The course which you want to view is filtered now.
(Filter button). The filter option opens. Type any one of the details of course name, abbreviation, division name, active date, responsible by, and remarks which you know. The course which you want to view is filtered now.
Export Course
The application has a feature to download the added course details as an excel file. You can use (Export Excel button) to download the added course details. Click ![]() (Export Excel button). The course details in the Course Master page will be downloaded as an excel file.
(Export Excel button). The course details in the Course Master page will be downloaded as an excel file.
Trade
The Trade tab in the Masters submenu helps you to add the trade (Job category of employee) details. Once you have added the trade, you can assign the added trade for the respective employees while adding the employee details. If you want to add a trade, click the Trade tab in the Masters submenu. The Trade Master page opens.

Add Trade
To add a new trade,
- Click (Add Trade button) in the Trade Master. The Add Trade window opens.

Note: The fields notified with a symbol (*) are mandatory. You must enter the relevant details in that fields before saving.
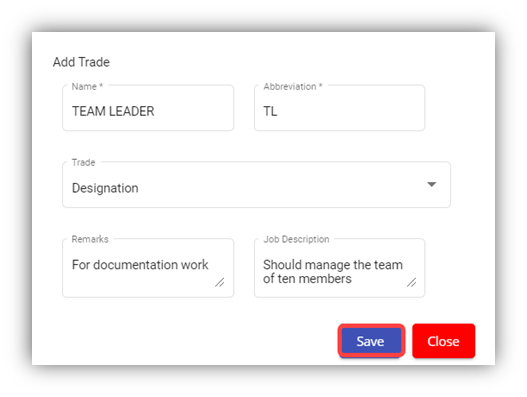
- In the Name box, enter the name of trade.
- In the Abbreviation box, enter the abbreviation for the trade name.
- In the Trade box, select the type of trade from a drop-down list.
- In the Remarks box, enter your remarks if any.
- In the Job Description box, enter the job description detail.
- Click Save. The trade is successfully added and listed in the Trade Master page.
Edit Trade
You can edit the details of the added trade by using (Edit icon) provided in the Edit column of the Trade Master page. Click (Edit icon) of the respective trade you have added. The Add Trade window opens with the trade details. Edit the trade details where you want. Click Save.
Delete Trade
You can click the ![]() (Delete icon) in the Delete column of the Trade Master page. The Confirm dialogue box opens with the following notification: “Are you sure to delete record?”. If you want to delete the trade, click Yes otherwise click No.
(Delete icon) in the Delete column of the Trade Master page. The Confirm dialogue box opens with the following notification: “Are you sure to delete record?”. If you want to delete the trade, click Yes otherwise click No.
Filter Trade
If you want to view any specific trade details among multiple trades listed in the Trade Master page, you can use the filter option provided in the upper left corner of the Trade Master page. Click ![]() (Filter button). The filter option opens.
(Filter button). The filter option opens.
Export Trade
The application has a feature to download the added trade details as an excel file. You can click ![]() (Export Excel button) to download the added trade details. The trade details in the Trade Master page will be downloaded as an excel file.
(Export Excel button) to download the added trade details. The trade details in the Trade Master page will be downloaded as an excel file.
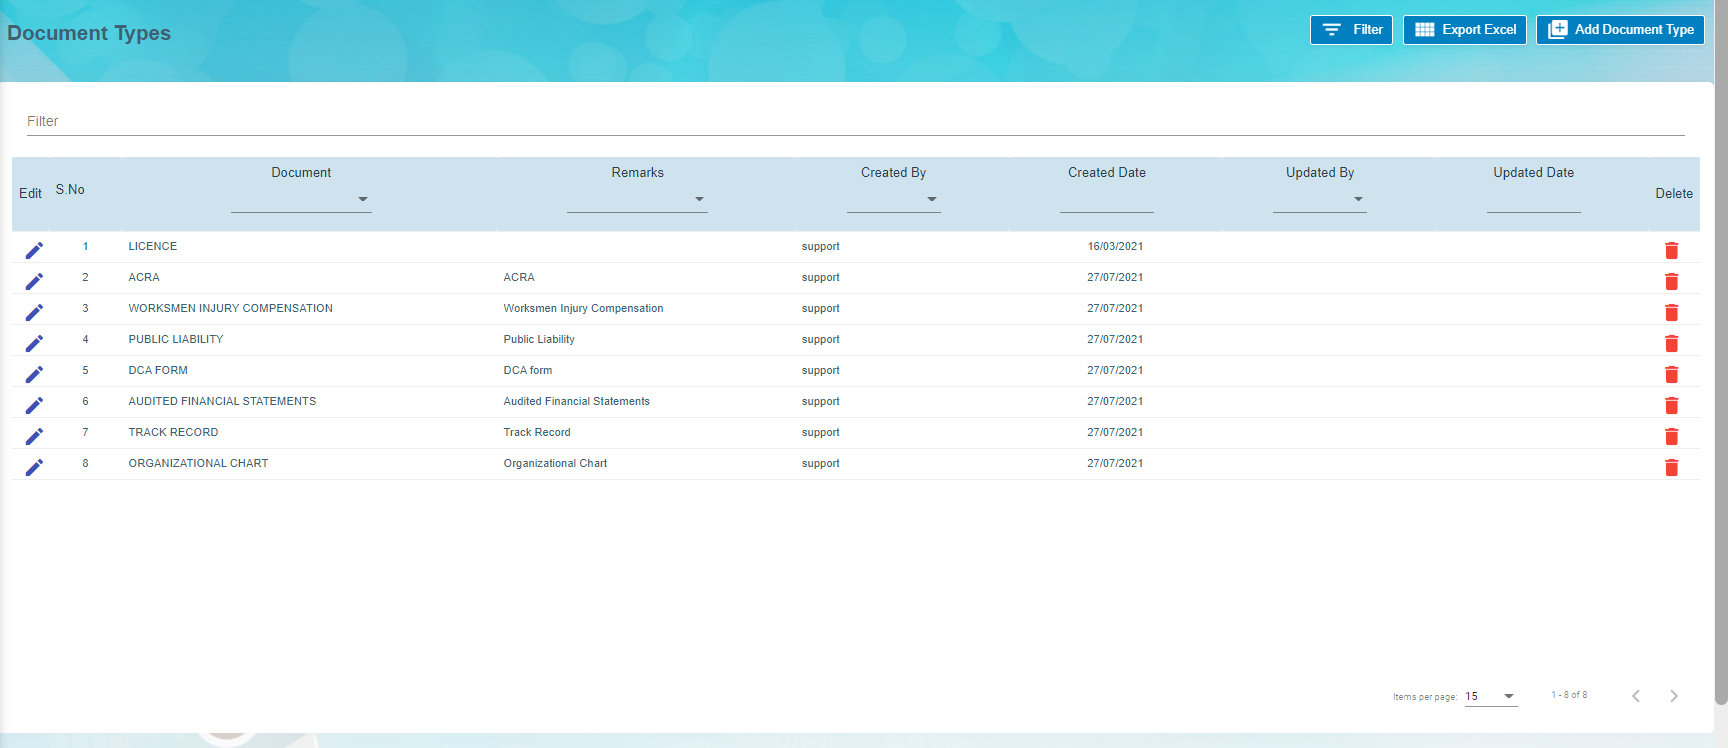
Document Types
Document types manages the types of documents to be added to system. Click Document Types in the Master menu, the document types opens,
Add Document Type
To add a new document type,
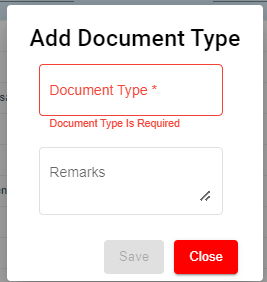
- Click
 , the document type window opens,

-
Enter document type name and any remarks if necessary. - Click Save. A new document type will be created and saved.

Edit Document Type
You can edit the details of a document type by using edit option provided in the Edit column of the Document Types page. Click  (Edit icon) of the respective document type. The Add Document window opens with the document details. Edit the document type details where you want. Click Save.
Delete Document Type
You can delete a document type by using (Delete icon) provided in the Delete column of the Document Types page. If you want to delete the document type, click Yes otherwise click No.
Filter Document Type
If you want to view any specific document type details among multiple document types listed in the Document Types page, you can use the filter option provided in the upper left corner of the Document Types page. Click ![]() (Filter button). The filter option opens.
(Filter button). The filter option opens.
Export Document Type
The application has a feature to download the added document type details as an excel file. You can use (Export Excel button) to download the added document type details. Click![]() (Export Excel button). The document details in the Document Types page will be downloaded as an excel file.
(Export Excel button). The document details in the Document Types page will be downloaded as an excel file.
Document
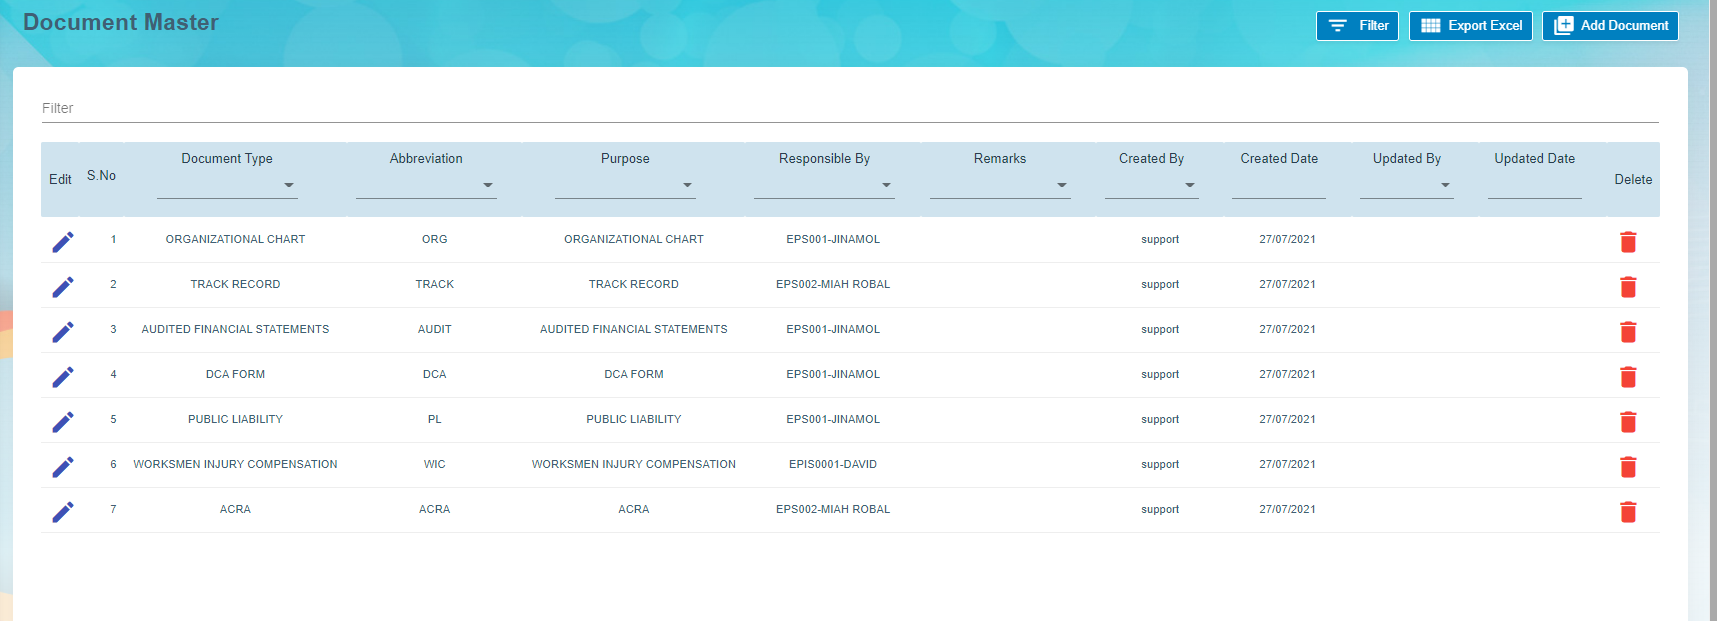
The Document tab in the Masters submenu helps you to add the type of company’s general documents like ISO certificates, product certificates and so on. The added document type will be used while adding the document name. Click the Document Master tab in the Masters. The Document Master page opens.
Add Document
To add any document,
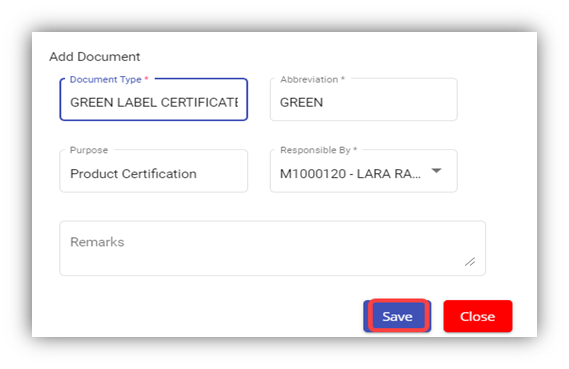
- Click (Add Document button) in the Document Master. The Add Document window opens.
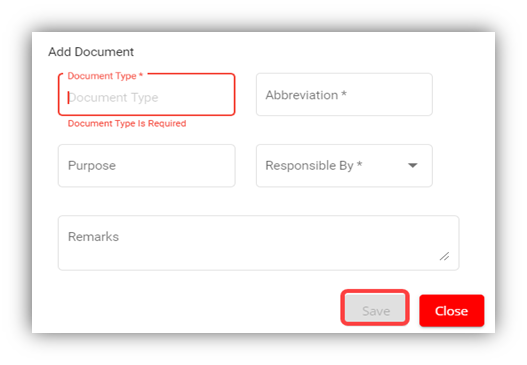
Note: The fields notified with a symbol (*) are mandatory. You must enter the relevant details in that fields before saving.
- In the Document Type box, select the type of document.
- In the Abbreviation box, enter the abbreviation for the document type.
- In the Purpose box, enter the purpose of adding the document.
- In the Responsible By box, enter the name of a person who is responsible for the document.
- In the Remarks box, enter your remarks if any.
- Click Save. The document type is successfully added and listed in the Document Master page.
Edit Document
You can edit the details of the added document type by using (Edit icon) provided in the Edit column of the Document Master page. Click (Edit icon) of the respective document type you have added. The Add Document window opens with the document details. Edit the document type details where you want. Click Save.
Delete Document
You can delete the added document by using (Delete icon) provided in the Delete column of the Document Master page. If you want to delete the document type, click Yes otherwise click No.
Filter Document
If you want to view any specific document type details among multiple document types listed in the Document Master page, you can use the filter option provided in the upper left corner of the Document Master page. Click ![]() (Filter button). The filter option opens.
(Filter button). The filter option opens.
Export Document
The application has a feature to download the added document type details as an excel file. You can use (Export Excel button) to download the added document type details. Click![]() (Export Excel button). The document details in the Document Master page will be downloaded as an excel file.
(Export Excel button). The document details in the Document Master page will be downloaded as an excel file.
Allowance/Deduction Master
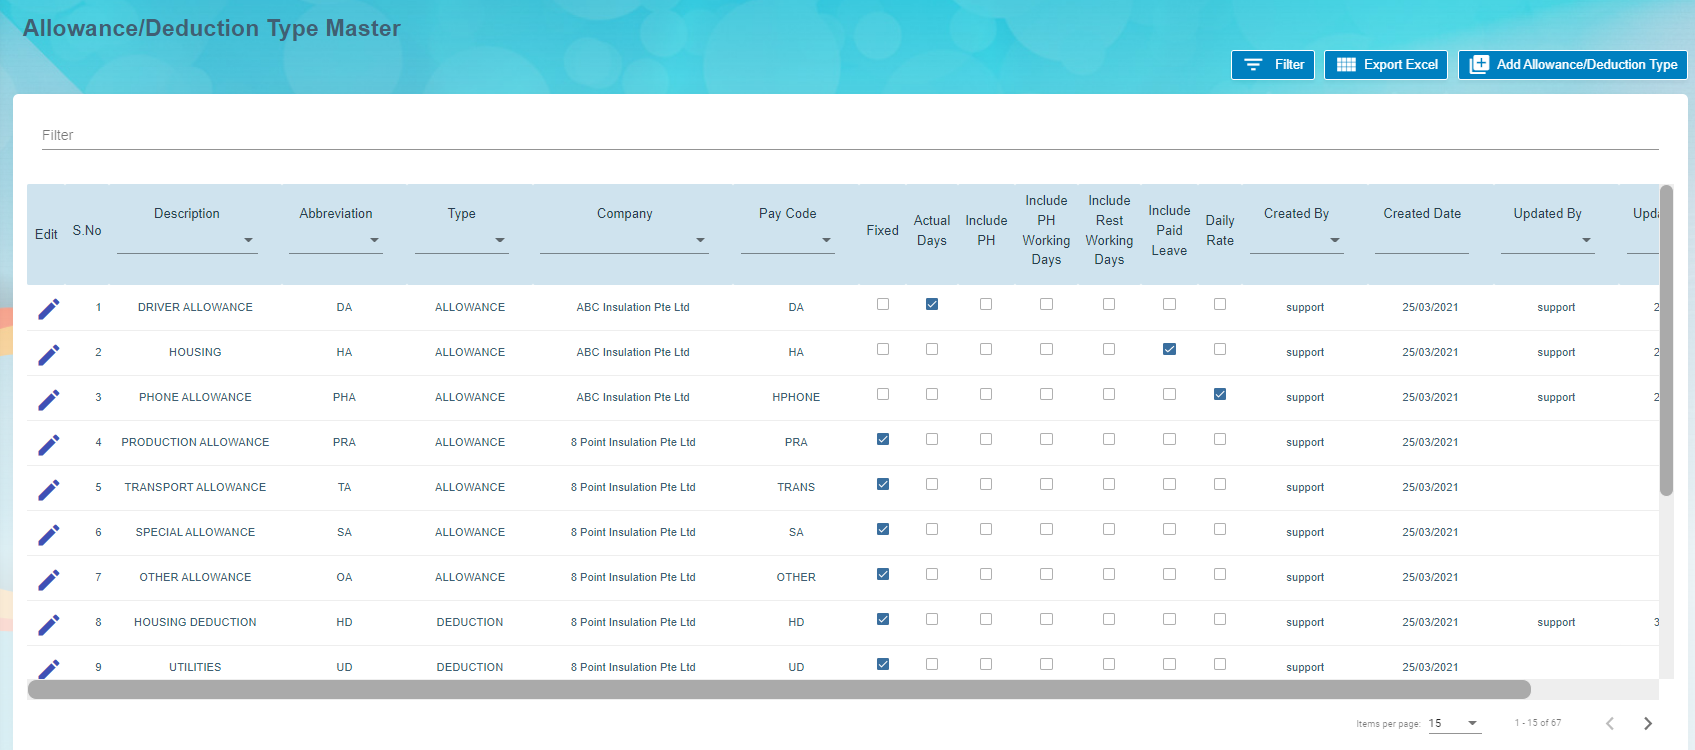
The Allowance/Deduction Master tab in the Masters submenu helps you to add the allowance, addition, or deduction type master data. Click the Allowance/Deduction Master tab in the Masters. The Allowance/Deduction Type Master page opens.
Add Allowance/Addition/Deduction Master
If you want to add allowance/deduction master, do the following steps,
- Click (Add Allowance/Deduction Type button) in the Allowance/Deduction Type Master. The Add Allowance/Deduction Type window opens.

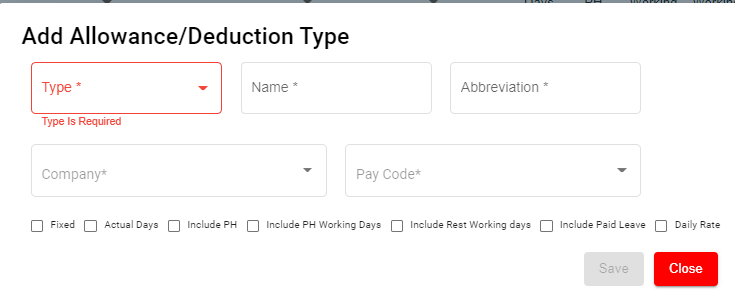
Note: The fields notified with a symbol (*) are mandatory. You must enter the relevant details in that fields before saving.
- In the Type box, select the type of master data you want to add whether Allowance, Addition, or Deduction.
- In the Name box, enter the name of the master type.
- In the Abbreviation box, enter the abbreviation for the added master type.
- In the Company box, select a company.
- In the Pay Code box, select the pay code from a drop-down list.
- If creating allowance master data, user must select one of the following option of pay period where applicable ,
-
-
- If the allowance is fixed one, select the checkbox of the Fixed
- If the allowance is paid only for actual working days, select the checkbox of the Actual Days
- If the allowance is paid for Public Holidays, select the checkbox of the Include PH
- If the allowance is paid when employee works in PH, select Include PH Working Days
- If the allowance is paid when employee works during rest days, select Include Rest Working days
- If the allowance is paid when employee on paid leave, select Include Paid Leave
- If the allowance is daily rate, select Daily rate.
-
-
- Click Save. The added master type is successfully added and listed in the Allowance/Deduction Type Master page.
Edit Allowance/Addition/Deduction Master
You can edit the details of the added master type by using edit option provided in the Edit column of the Allowance/Deduction Master page. Click ![]() (Edit icon) of the respective allowance type you have added. The Add Allowance/Deduction window opens with the added details. Edit the master details where you want. Click Save.
(Edit icon) of the respective allowance type you have added. The Add Allowance/Deduction window opens with the added details. Edit the master details where you want. Click Save.
Delete Allowance/Addition/Deduction Master
You can delete the added master type by using ![]() (Delete icon) provided in the Delete column of the Allowance/Deduction Master page. If you want to delete the Allowance/Addition/Deduction, click Yes otherwise click No.
(Delete icon) provided in the Delete column of the Allowance/Deduction Master page. If you want to delete the Allowance/Addition/Deduction, click Yes otherwise click No.
Filter Allowance/Addition/Deduction Master
If you want to view any specific master type details listed in the Allowance/Deduction Master page, you can use the filter option provided in the upper left corner of the Allowance/Deduction Master page. Click ![]() (Filter button). The filter option opens.
(Filter button). The filter option opens.
Export Allowance/Addition/Deduction Master
The application has a feature to download the added master type details as an excel file. You can use (Export Excel button) to download the added master details. Click ![]() (Export Excel button). The allowance type details in the Allowance/Deduction Master page will be downloaded as an excel file.
(Export Excel button). The allowance type details in the Allowance/Deduction Master page will be downloaded as an excel file.
Bank List
The Bank List tab in the HRM Masters menu helps you to add all the bank details of employees that are used to receive salary payment. Click Bank List in the Masters, the Banks List page opens.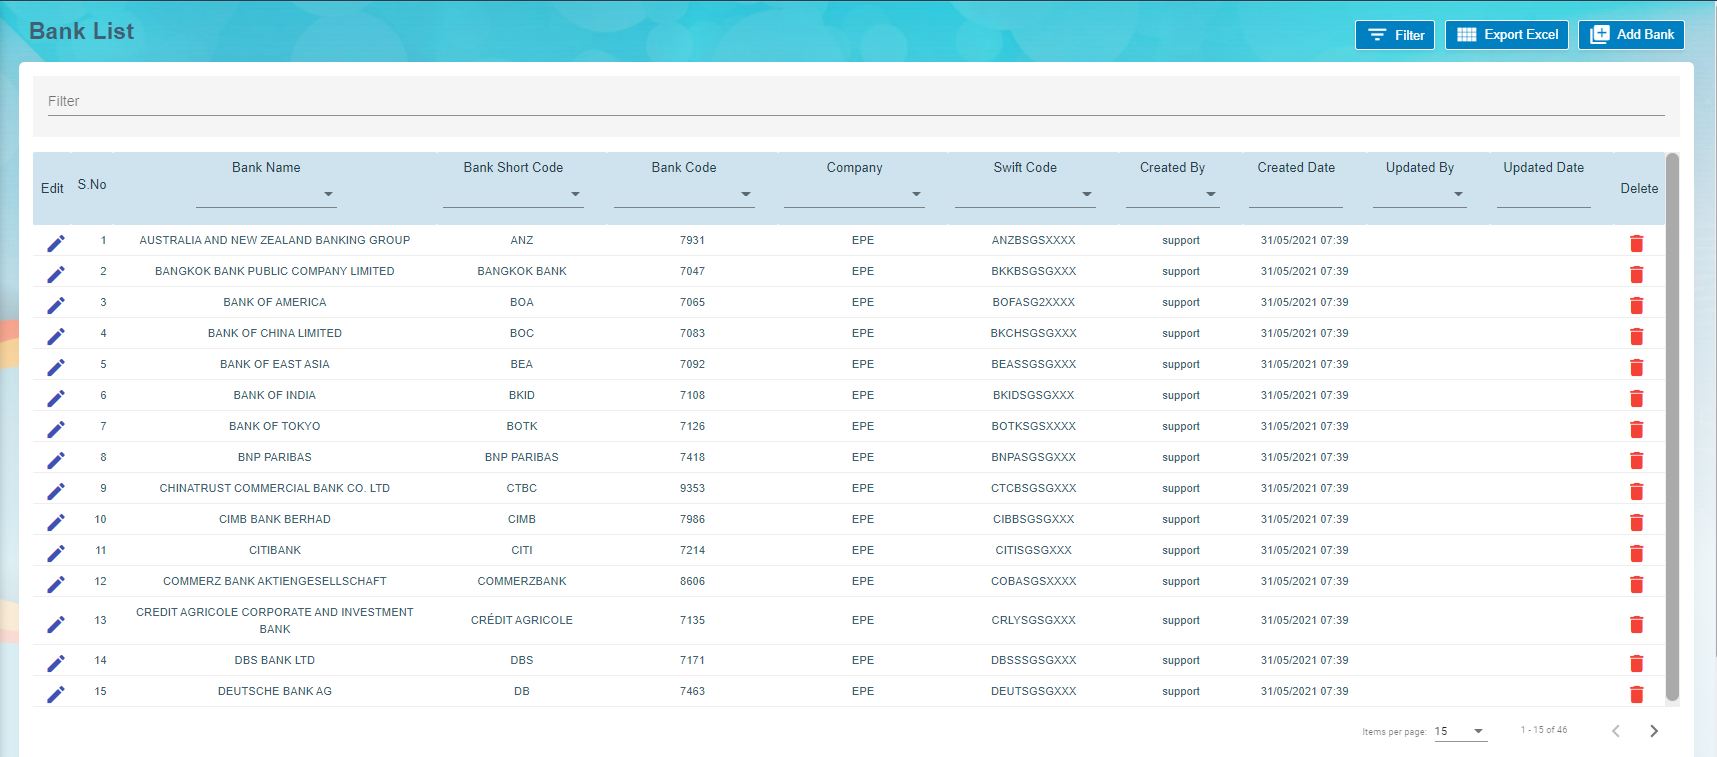
Add a Bank Account
To add a new bank account,
- Click
 (Add New Bank button) in the Banks List, the Bank window opens.

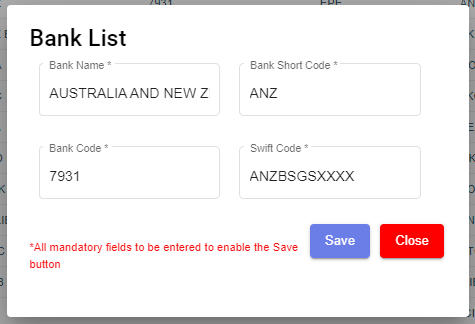
- Note: The fields notified with a symbol (*) are mandatory. You must enter the relevant details in that fields before saving.


- In the Bank Name box, enter the bank name.
- In the Bank Short Code box, enter the short code for the added bank.
- In the Bank Code box, enter the bank code.
- In the Swift Code box, enter the bank swift code.
- Click Save. The Bank Name is successfully added and listed in the Bank List Master page.
Edit the Bank Account Details
You can edit the details of the added bank account by using edit option provided in the Edit column of the Bank List page. To edit the added bank account details,
- Click
 (Edit icon) of the respective bank account you have added. The Bank window shows the added bank account details.
- Edit the bank account details where you want.
- Click Save.
Delete a Bank Account
You can delete any added bank account by using ![]() (Delete icon) provided in the Delete column of the Bank List page.
(Delete icon) provided in the Delete column of the Bank List page.
Filter a Bank Account
If you want to filter any bank account in the Bank List page, you can use (filter button) on the Bank List page.
Export to Excel
If you want to export the Bank List page, you can use (export button) on the Bank List page.
Foreign Worker Levy
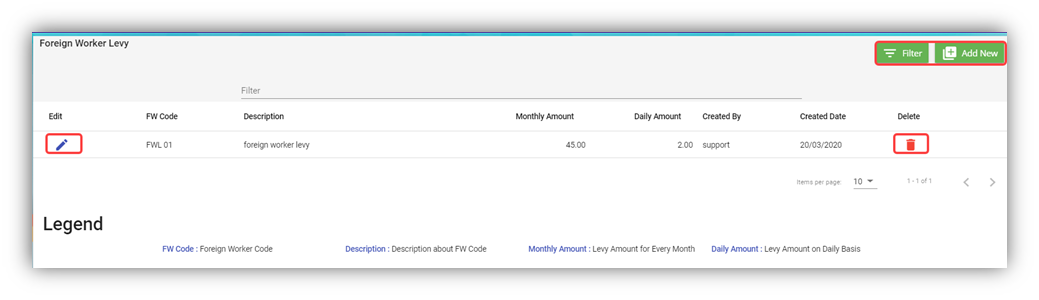
Foreign Worker Levy is a mechanism to regulate the number of foreign workers in Singapore. The employer need not to pay CPF contributions for their foreign workers. However, they must pay a monthly levy for Work Permit and S Pass holders to government.
The Foreign Worker Levy tab in the Masters submenu used to add a foreign worker levy code. The added foreign worker levy code will be used in the further payroll process. Click Foreign Worker Levy in the Masters, the Foreign Worker Levy page opens.
Add a Foreign Worker Levy Code
If you want to add a foreign worker levy code,
- Click
 (Add New button) in the Foreign Worker Levy. The Foreign Worker Levy Information window opens.
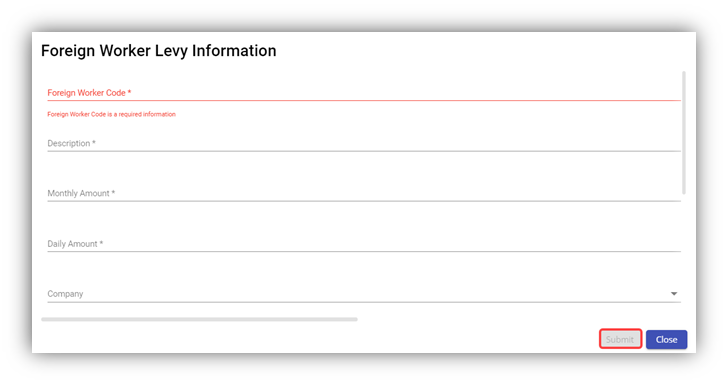
Note: The fields notified with a symbol (*) are mandatory. You must enter the relevant details in that fields before saving.
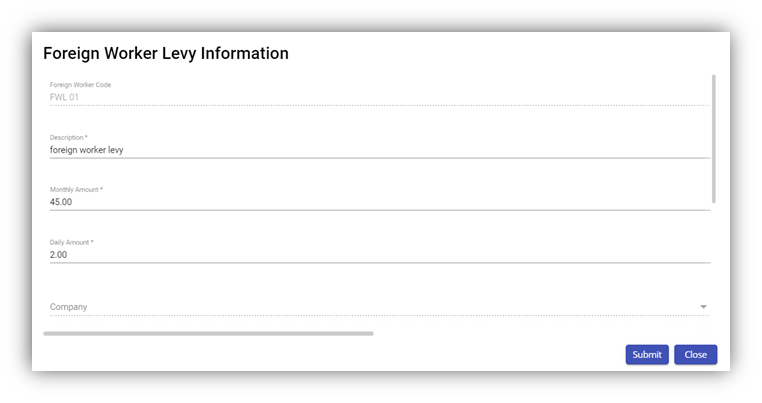
- In the Foreign Worker Code box, enter the code for the foreign worker levy you want to create.
- In the Description box, enter the description for the added foreign worker levy code.
- In the Monthly Amount box, enter the monthly amount to be paid for the foreign worker levy.
- In the Daily Amount box, enter the daily amount to be paid for the foreign worker levy.
- In the Company box, select a company from a drop-down list.
Note: If you want to select all the companies in the list, select the checkbox of the ALL.
- Click Submit. The foreign worker levy code is added and listed in the Foreign Worker Levy page.
Edit the Foreign Worker Levy Code
You can edit the details of the added foreign worker levy code by using edit option provided in the Edit column of the Foreign Worker Levy page. To edit the added foreign worker levy code details,
- Click
 (Edit icon) of the respective foreign worker levy code you have added. The Foreign Worker Levy Information window shows the added foreign worker levy code details.
- Edit the foreign worker levy code details where you want.
- Click Save.
Delete a Foreign Worker Levy Code
You can delete the foreign worker levy code by using![]() (Delete icon) provided in the Delete column of the Foreign Worker Levy page.
(Delete icon) provided in the Delete column of the Foreign Worker Levy page.
Filter Foreign Worker Levy Code
If you want to filter any foreign worker levy code in the Foreign Worker Levy page, you can use  (FILTER button) located on the Generate Payroll page.
Letter Template
All HR and admin related letter templates can be configured and managed in this section. Click Letter Template in Master menu, the current templates will show as below,
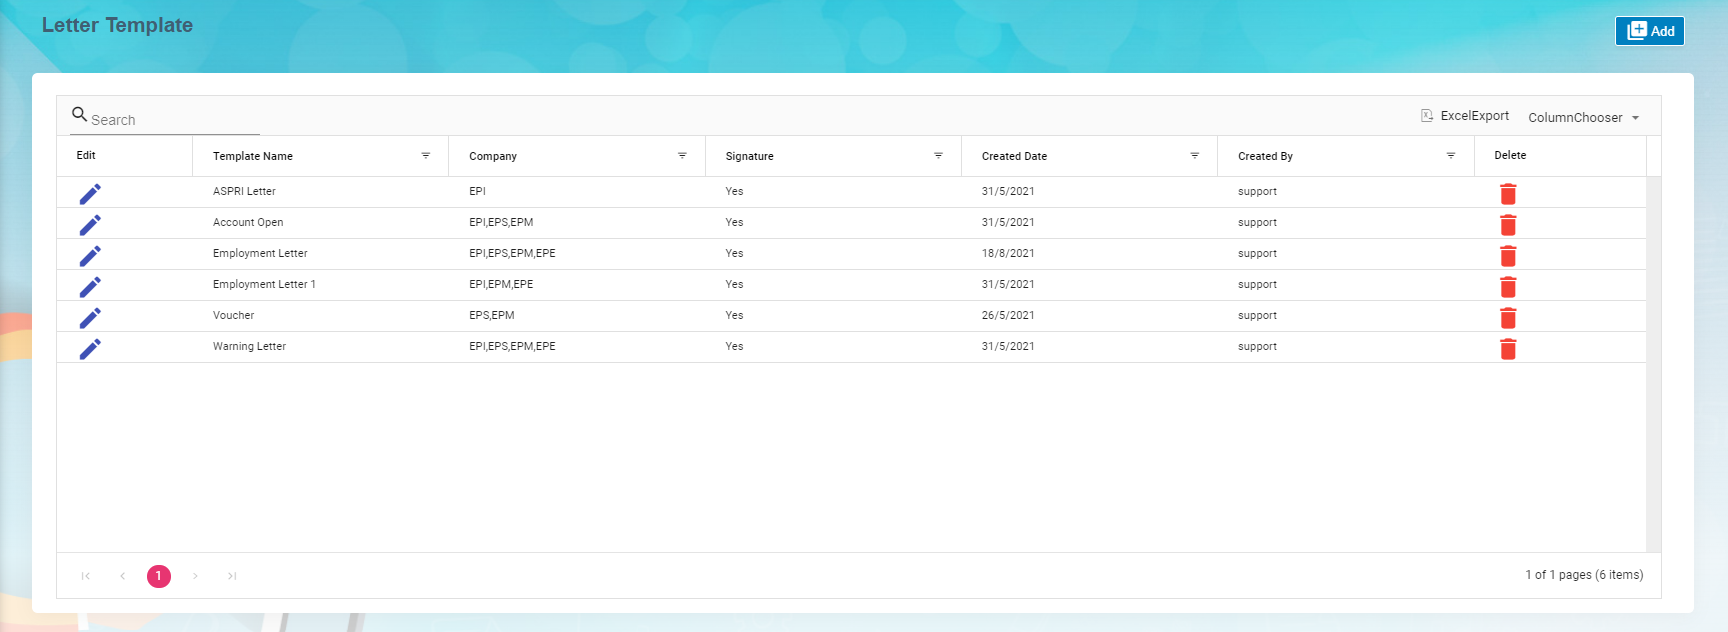
View Letter Template
To view current letter templates,
- Click
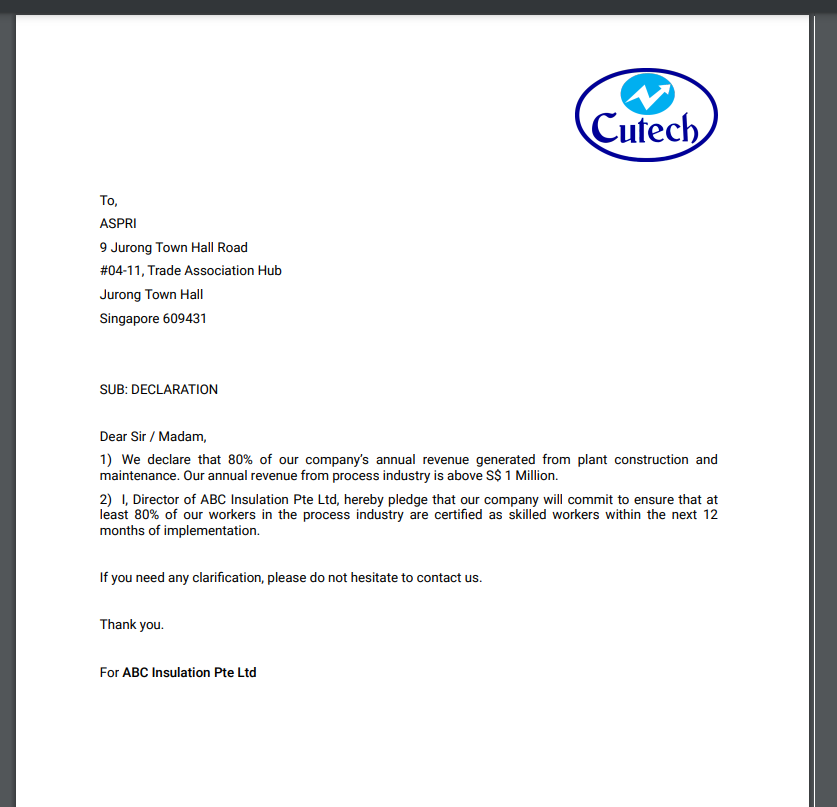
 edit icon of the template that user wants to view, the template will open,
 - Click Preview button or Download button in the top right corner to view or download the template as pdf file.

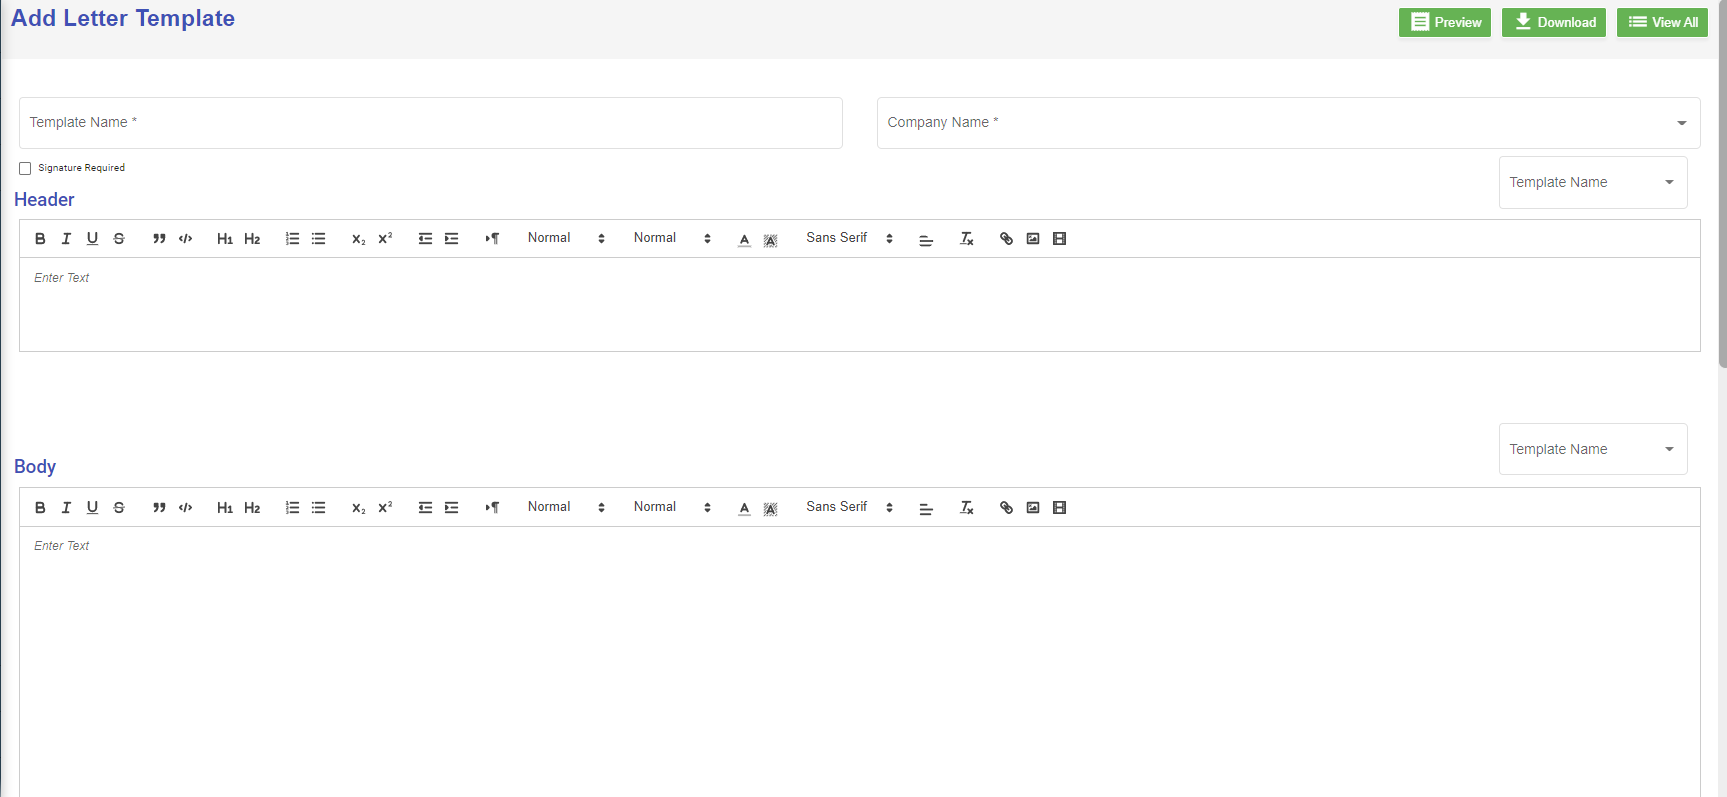
Add A New Letter Template
To add a new letter template,
- Click
 add button in the top right corner in the template list page, the template creation page opens,
- Enter the details of the new letter template:
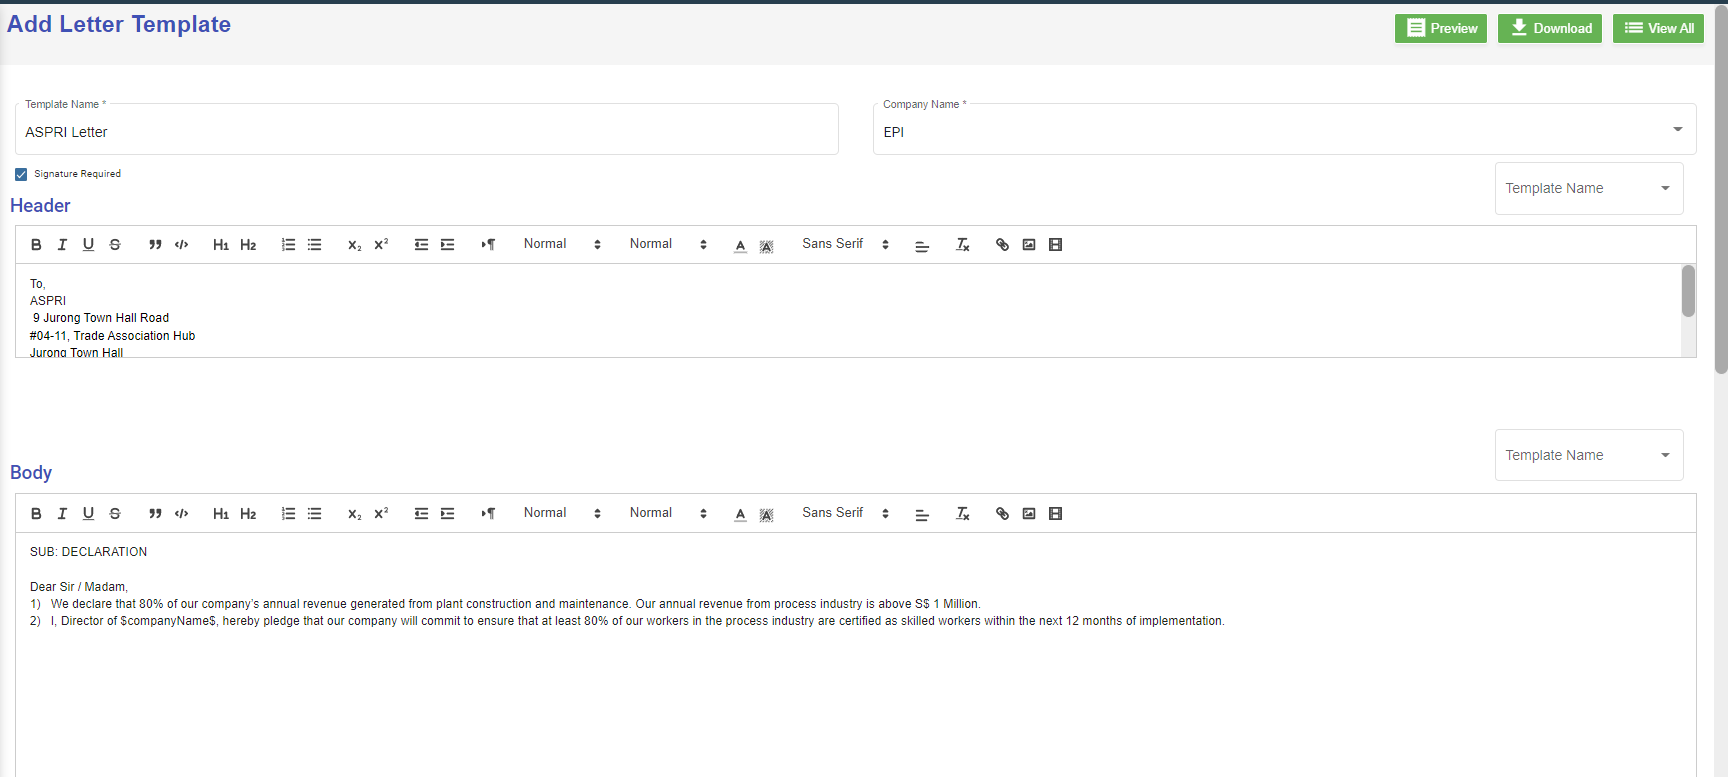
- In Template Name, enter the letter template name
- In Company Name, select company name from dropdown list
- If letter require signature, tick the Signature Required checkbox
- In Header section, enter the letter header content, or you can copy from existing template-select the template name, the header content of the selected template will automatically populated,
- In Body section, enter the body content, or you can copy from existing template-select the template name, the body content of the selected template will automatically populated,
- In Footer section, enter the footer content, or you can copy from existing template-select the template name, the footer content of the selected template will automatically populated,
- In Signature section, enter the signature format or you can copy from existing template-select the template name, the signature format of the selected template will automatically populated,
-
Click Save to create and save new letter template.
Edit Letter Template
To edit letter template,
- Click edit icon of the template that user wants to view, the template will open as below,
- Edit the details where needed.
- Click Save to save edits.

Delete Letter Template
User can use the delete option to delete letter template that is no longer in use or need to remove. Click ![]() in the delete column of the template. The template will be removed.
in the delete column of the template. The template will be removed.
Onboard/Offboard Checklist
Onboard/Offboard Checklist master manages different type of checklist which contains list of task that the employee needs to perform before onboarding process/offboarding process.
Add Onboard Checklist
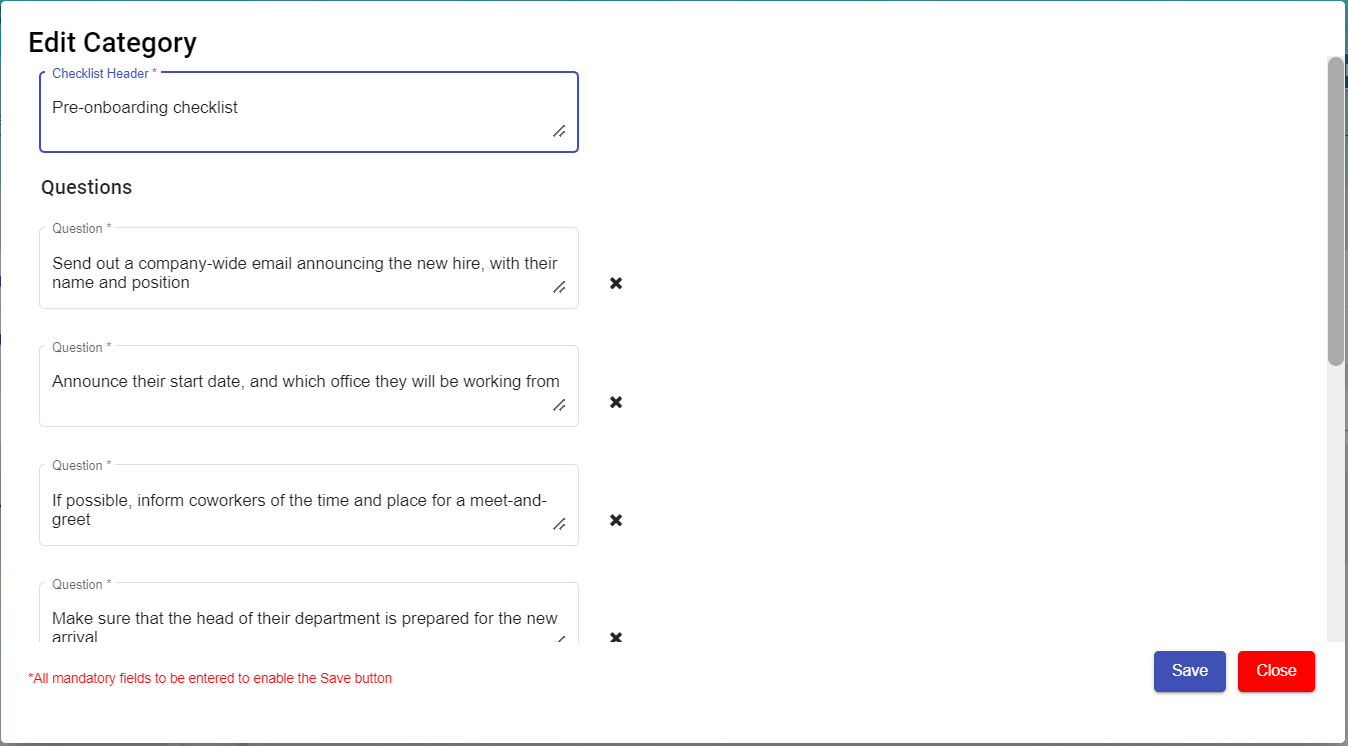
- Click add button in the top right corner in the Onboard Checklist page, the Edit category page opens to enter questions in checklist template.
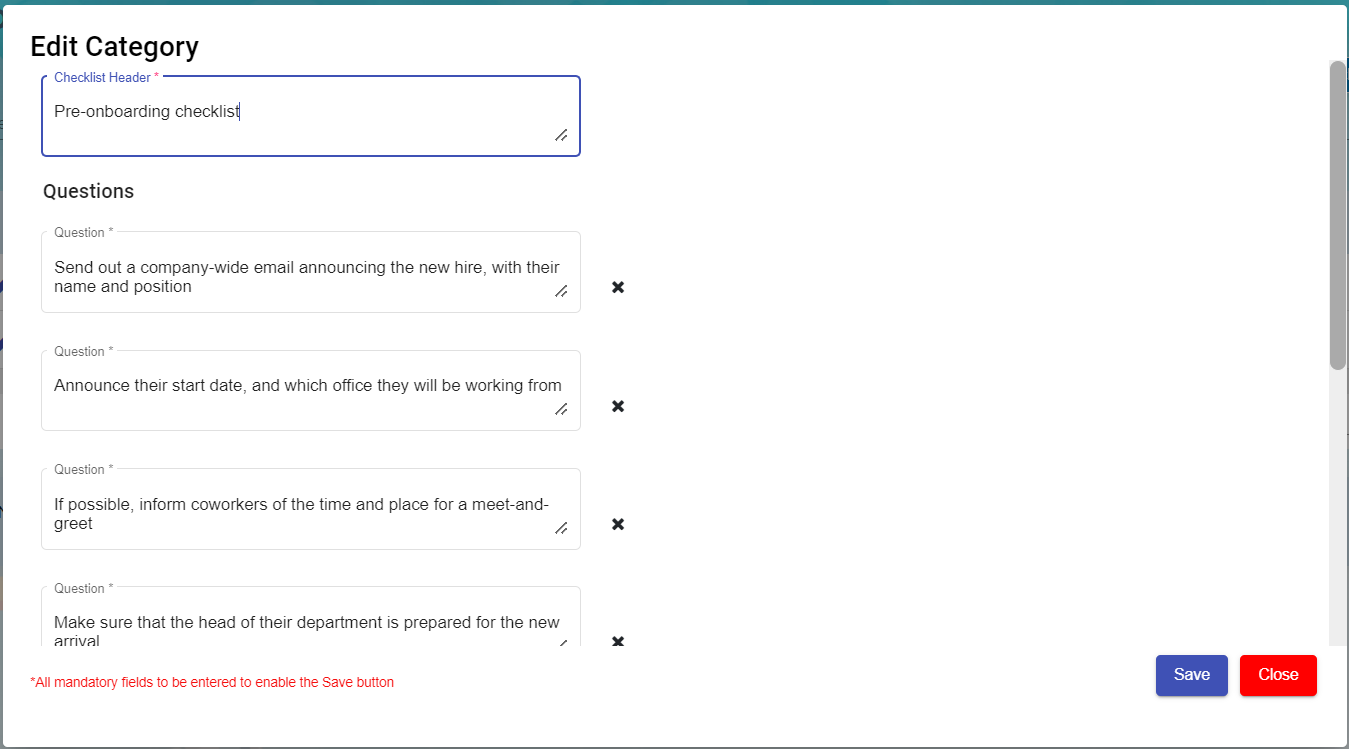
- Enter Checklist Header
- Add or Delete the mandatory questions to be asked during Onboard processing.
- Click save to create new Onboard checklist template.

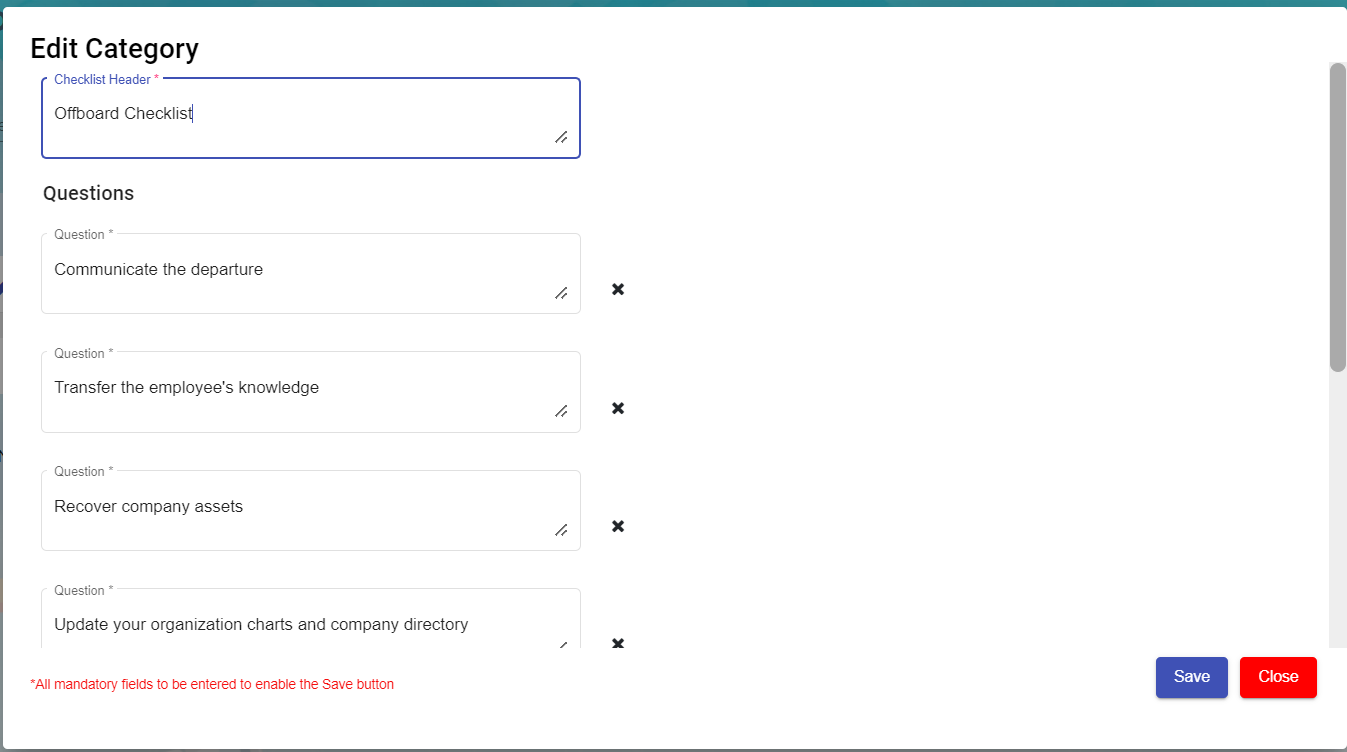
Add Offboard Checklist
- Click add button in the top right corner in the Offboard Checklist page, the Edit category page opens to enter questions in checklist template.

- Enter Checklist Header
- Add or Delete the mandatory questions to be asked during Offboard processing.
- Click save to create new Offboard checklist template.
Edit the Checklist
To edit the checklist, click![]() edit icon of the checklist to edit the questions in the edit category page. Then click Save to save edits.
edit icon of the checklist to edit the questions in the edit category page. Then click Save to save edits.
Delete Checklist
User can use the delete option to delete the Onboard/Offboard checklist which is not in use or need to remove. Click ![]() in the delete column of the checklist. The checklist will be removed.
in the delete column of the checklist. The checklist will be removed.
Filter a Onboard/Offboard Checklist
If you want to filter any checklist in the Onboard/Offboard Checklist page, you can use (filter button) on the page.
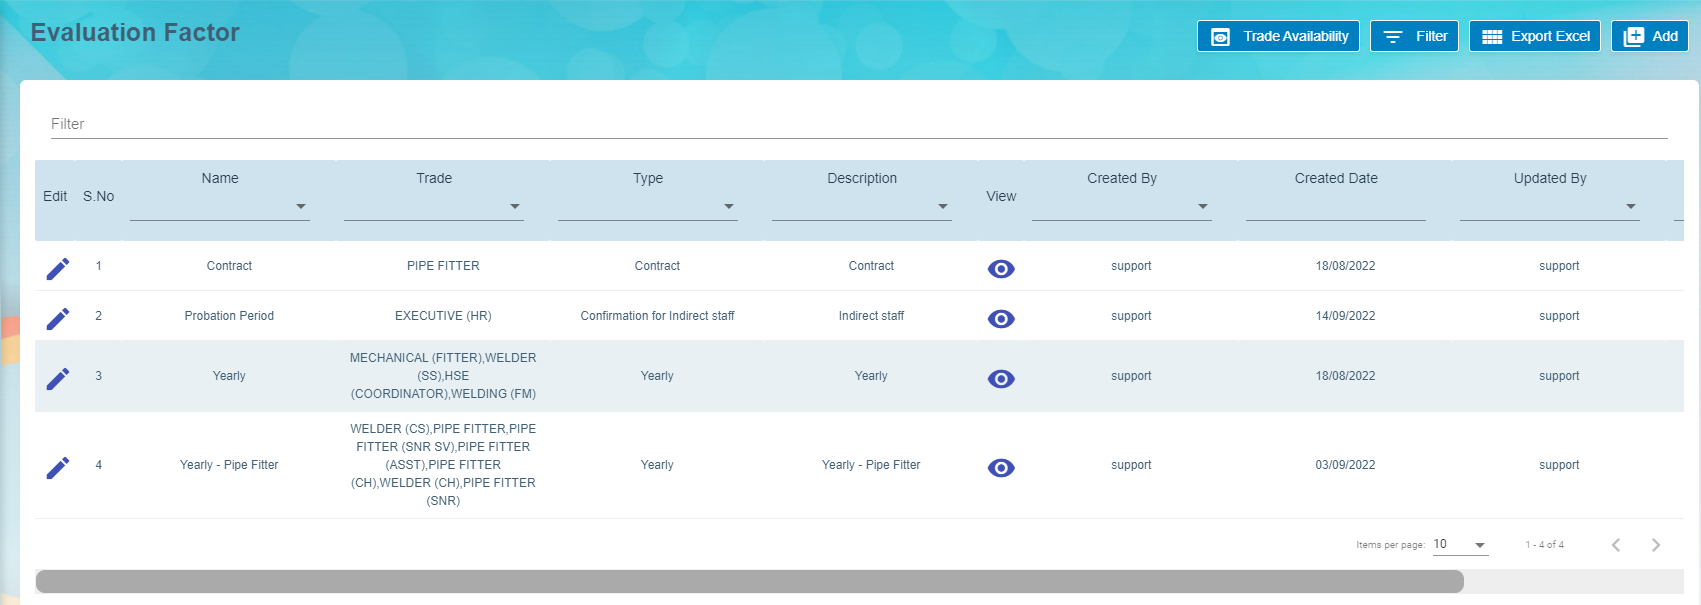
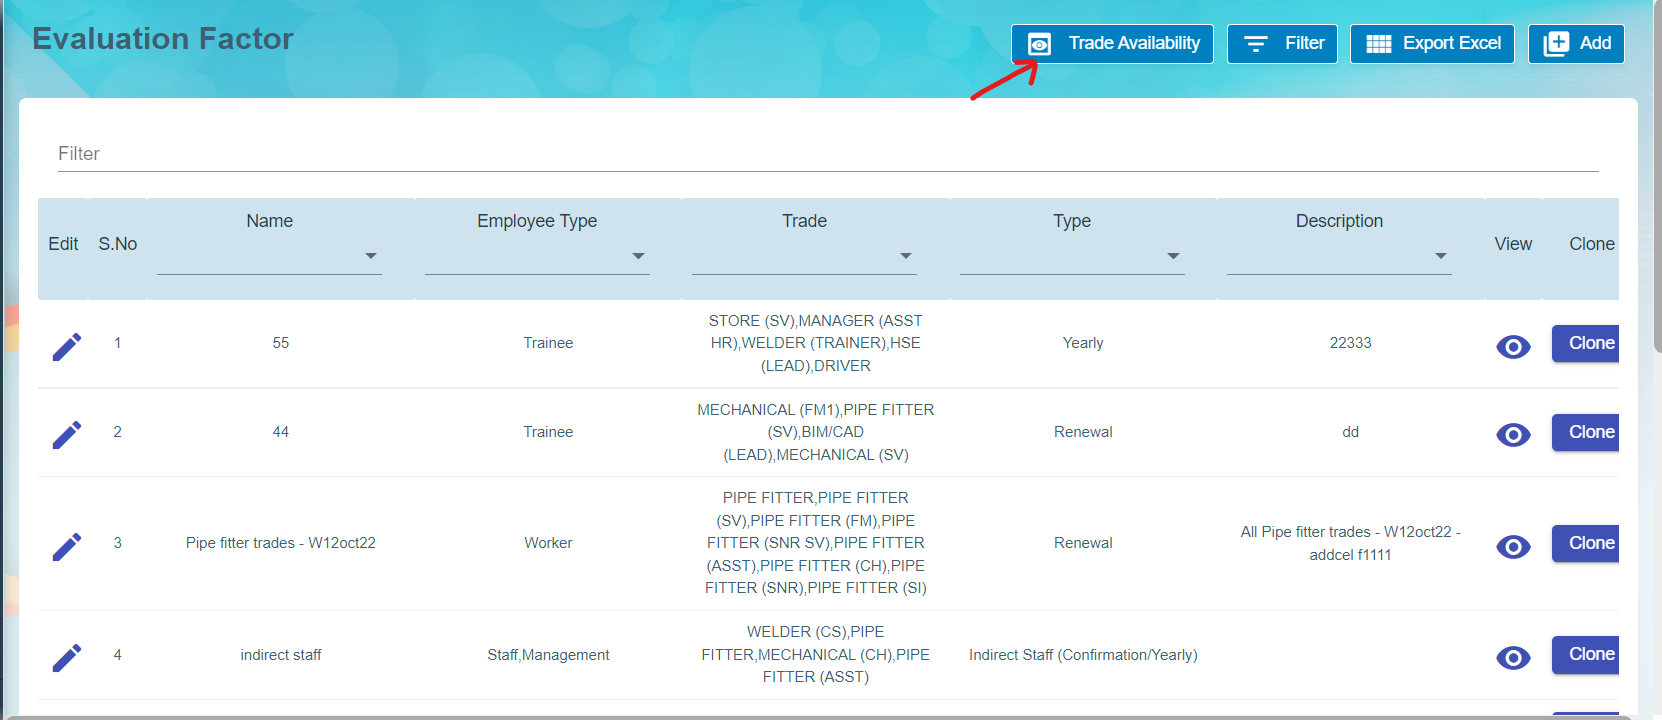
Evaluation Factor
Evaluation Factor master manages all the different evaluation factors based on period, type and trade. Click Evaluation factor, the created list will open as below,
Add A New Evaluation Factor
To add a new evaluation template,
-
Click the
, a new evaluation factor details window opens, 
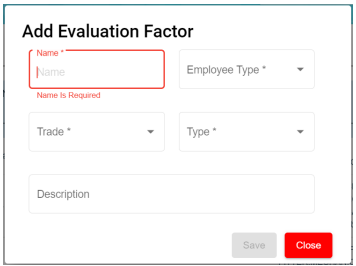
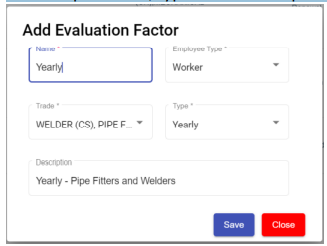
- Enter all the details of the new evaluation factor:
- At Name field, type the name of this new evaluation template.
- At Employee Type, select from the dropdown list i.e. Staff, Worker, Management
- At Trade field, select from the dropdown list of which trade is applicable for this new evaluation
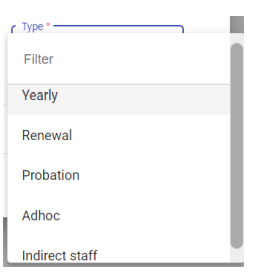
template. User can also use filter to search for the trade name. User can select more than 1 trade by ticking the given checkbox beside the trade. - At Type field, select the type for this new evaluation template. This list is setup at Admin ->
Options -> HRM - Evaluation Type.
-
- At Description field, type a brief description for this new evaluation template.
- At Description field, type a brief description for this new evaluation template.
- Click Save button to create the new evaluation template and it will be shown as below,
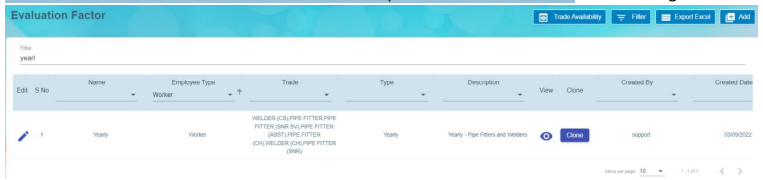
- The New Evaluation factor added on the main page. Click
 view icon to add details in Part I, Part II, Part III, Designation & Skill Level and Rating. Note: Part II and Part III are optional.


Add Details in New Evaluation Template
Part I of Evaluation Factor
Click on Part I tab, the part I detail page opens.
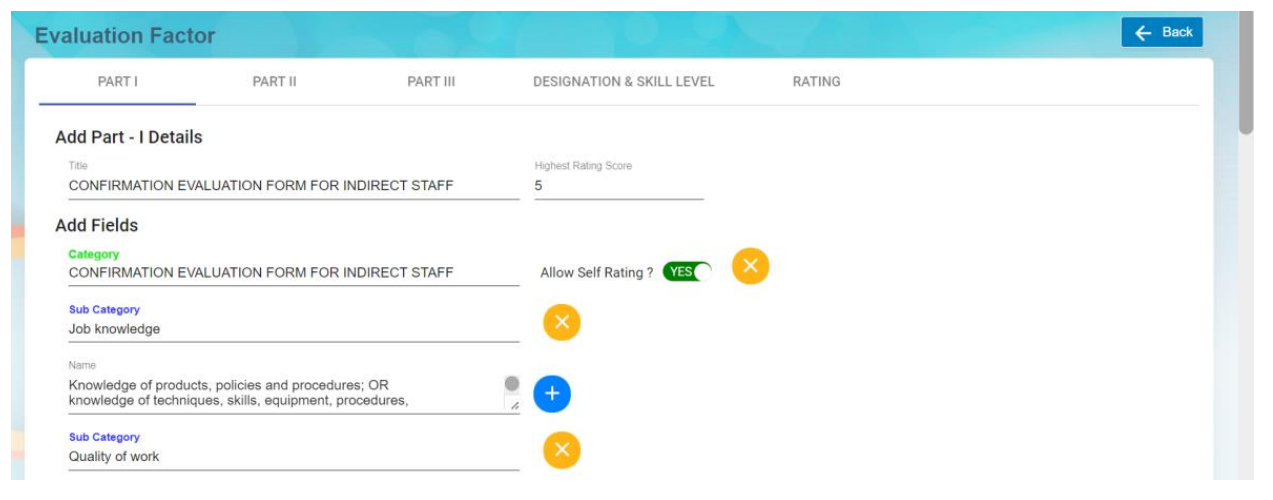
- In Add Part I Details, enter the Title and Highest Rating Score of this evaluation,
- Title – enter the title and this will display at the beginning of the evaluation form as
shown in the below screenshot highlighted in yellow of an employee evaluation form
using this evaluation factor template.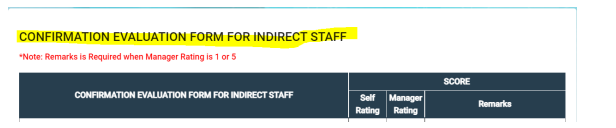
- Highest Rating Score – enter the number score columns in the evaluation form.
- Title – enter the title and this will display at the beginning of the evaluation form as
- In Add Fields, enter details as below:
- Category, it will be the column header in the evaluation table.
- Sub Category, it will be the sub Header of criteria setup in the evaluation form
- Name, it will be the detailed perspectives of each criteria under the sub category.
- Allow Self Rating, if set to Yes, it means employee needs to do self rating.
Note: Users can click
 add icon to add (category, subcategory and, name). If click add icon at the Category level, system will create a new category with new sub category and new name under this new category. If click add icon at sub category level, system will create a new sub category including the name that falls under this new sub category. If click add icon at name level, then system will create a new name.
Users can click
 delete icon to remove (category, subcategory and, name). If click the delete icon at the Category level, system will delete the entire category including
the sub category and name belonging to this category. If click the delete icon at sub category level, system will delete this sub category including the name that falls under this sub category. If click the delete icon at name level, then system will delete only this name.
- Click Save to save the Part I details.

Part II of Evaluation Factor
Click on Part II tab, it opens as below. If the "Add Part-II Details" is set to ON, system will display this Part II details as part of the
employee evaluation; If it's set to OFF, then the Part II details will be omitted from the employee evaluation form.
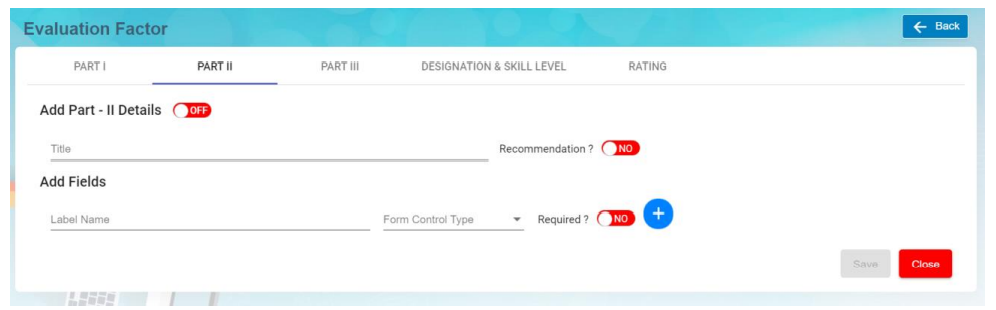
- In Add Part – II Details section, enter below details. Note: The flag "OFF" next to Part II details need to set to ON hence this Part II will be displayed in the employee evaluation form.
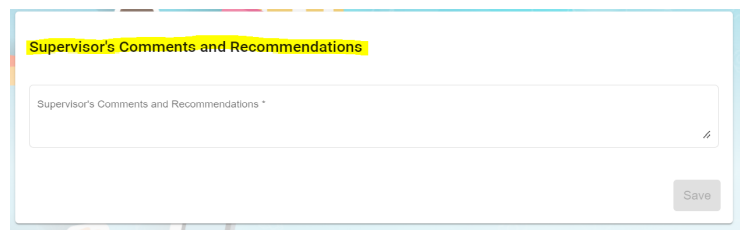
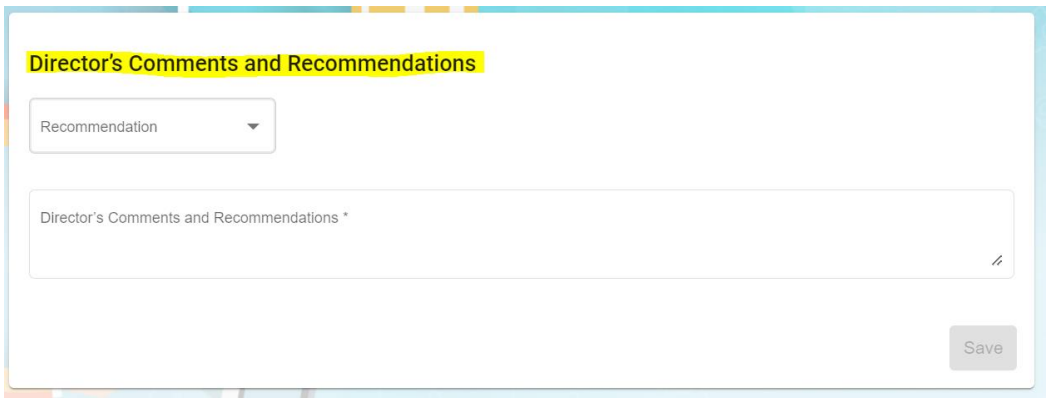
- Title – Input the title and this will be displayed as the header of the section in the employee
evaluation form as shown below.
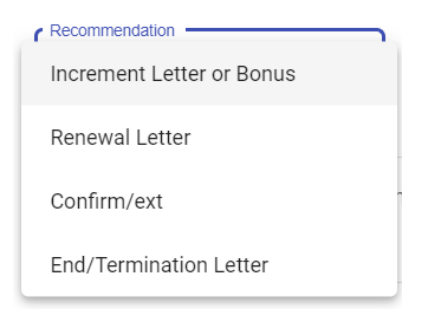
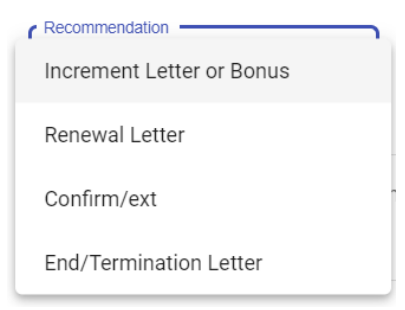
- When "Recommendation?" icon is set to YES, system will display this Recommendation with a list of dropdown values for user to select as shown below,

- Title – Input the title and this will be displayed as the header of the section in the employee
- In Add Felids, enter below details,
- Label Name-enter the label name.
- Form control type-choose type of control (Text/Text Area/Checkbox) for this Label Name
- Required?- if this icon is set to YES, it is mandatory for user to select or type some text into this form control
field. - Click icon to add more label name field if needed.
Note: Users can click
add icon to add (category, subcategory and, name). If click add icon at the Category level, system will create a new category with new sub category and new name under this new category. If click add icon at sub category level, system will create a new sub category including the name that falls under this new sub category. If click add icon at name level, then system will create a new name.Users can click
delete icon to remove (category, subcategory and, name). If click the delete icon at the Category level, system will delete the entire category including
the sub category and name belonging to this category. If click the delete icon at sub category level, system will delete this sub category including the name that falls under this sub category. If click the delete icon at name level, then system will delete only this name.
- Click Save to save the Part II details.
Part III of Evaluation Factor
Click on Part III tab, it opens as below. If the "Add Part- III Details" is set to ON, system will display this Part III details as part of the
employee evaluation; If it's set to OFF, then the Part III details will be omitted from the employee evaluation form.
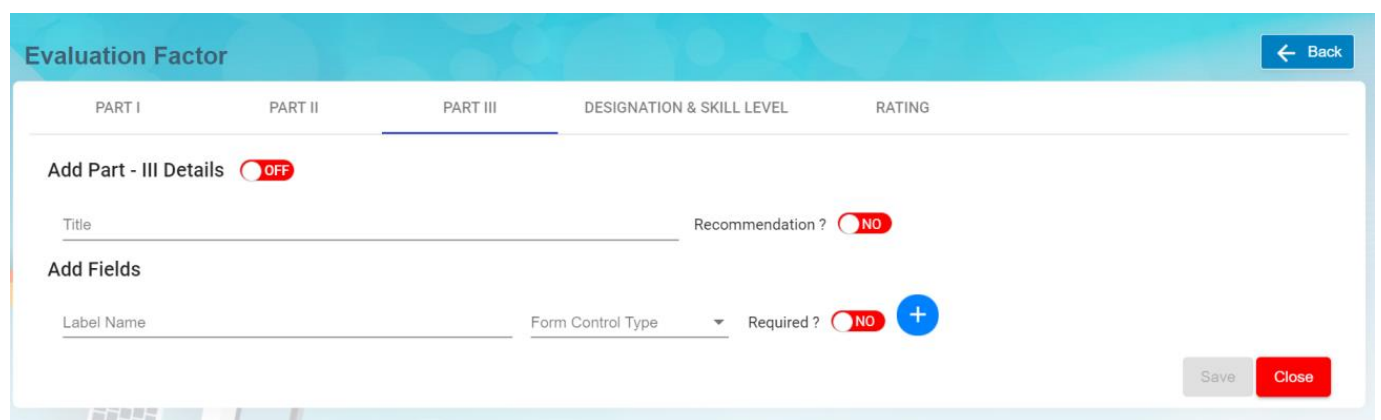
- In Add Part- III Details section, enter below details. Note: The flag "OFF" next to Part III details need to set to ON hence this Part III will be displayed in the employee evaluation form.
- Title – Input the title and this will be displayed as the header of the section in the employee evaluation form as shown below.

- When "Recommendation?" icon is set to YES, system will display this Recommendation with a list of dropdown values for user to select as shown below,

- Title – Input the title and this will be displayed as the header of the section in the employee evaluation form as shown below.
-
In Add Felids,
- Label Name-enter the label name.
- Form control type-choose type of control (Text/Text Area/Checkbox) for this Label Name
- Required?- if this icon is set to YES, it is mandatory for user to select or type some text into this form control
field. - Click icon to add more label name field if needed.
Note: Users can click
add icon to add (category, subcategory and, name). If click add icon at the Category level, system will create a new category with new sub category and new name under this new category. If click add icon at sub category level, system will create a new sub category including the name that falls under this new sub category. If click add icon at name level, then system will create a new name.Users can click
delete icon to remove (category, subcategory and, name). If click the delete icon at the Category level, system will delete the entire category including
the sub category and name belonging to this category. If click the delete icon at sub category level, system will delete this sub category including the name that falls under this sub category. If click the delete icon at name level, then system will delete only this name.
- Click Save to save the Part III details.
Designation & Skill Level
The Designation & Skill Level section is to show the salary guide and job description of the selected trade(s) and this will serve as a benchmark when supervisors conduct employee evaluations. Click on DESIGNATION & SKILL LEVEL tab, it opens as below,
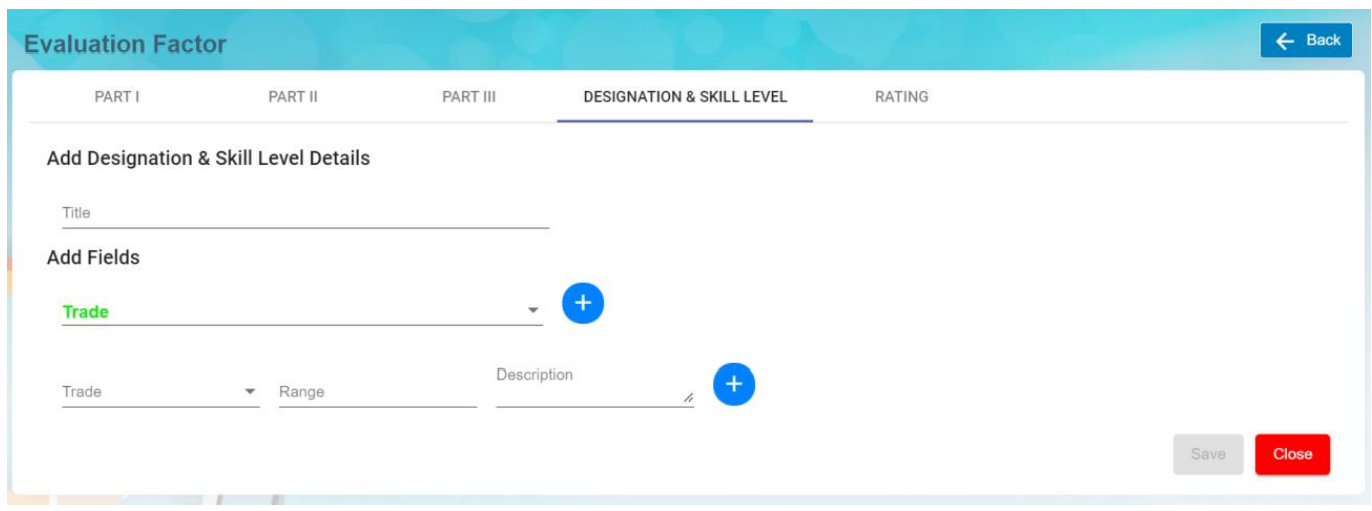
- In Add Designation & Skill Level Details section,
- Title – enter the title and this will be displayed as the header of this Designation & Skill Level
section in the employee evaluation form.
- Title – enter the title and this will be displayed as the header of this Designation & Skill Level
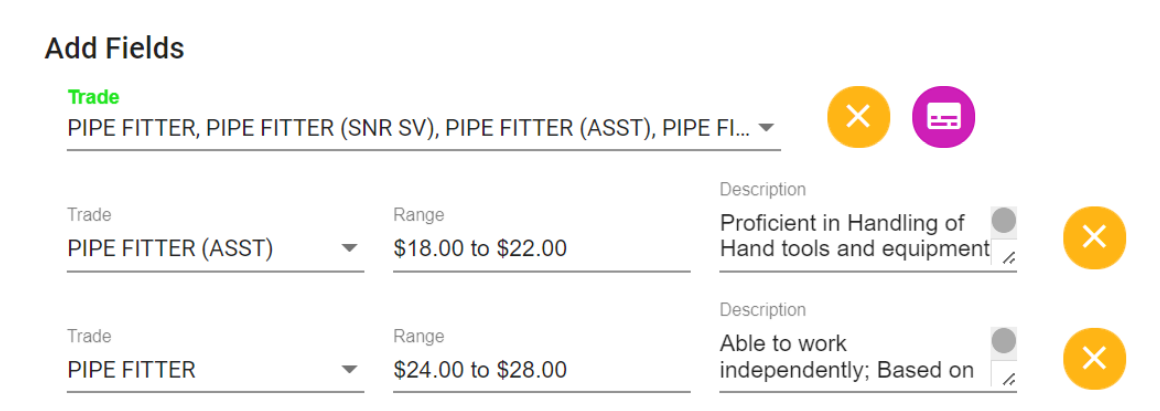
- In Add Fields section, enter below details,
- Trade
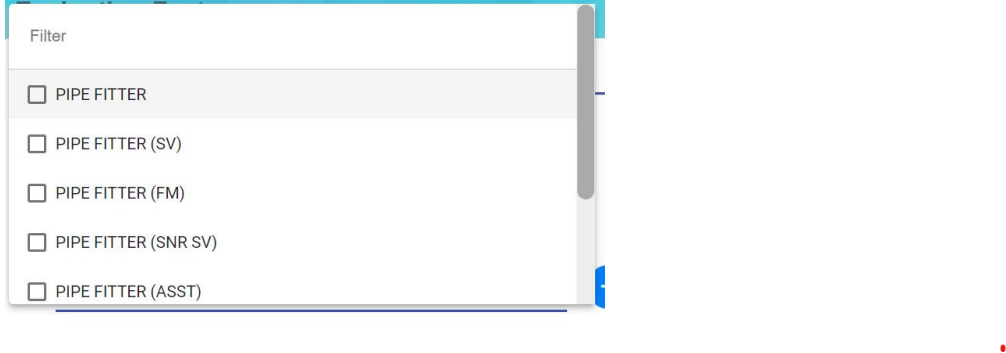
 -Click on the field to select trades in the dropdown list. Users can select multiple trades. Tick on the checkbox as shown in the below screenshot,
- After the above trade selection, you need to select each individual trade and input the
salary range for this selected trade and job description of this selected trade. Refer to
below screenshot,
Note: Users can click
add icon to add more trades is required.Users can click
delete icon to remove trade. If click the delete icon at the level, system will delete whole section within this Trade field. If click the delete icon at trade after this Trade , then system will delete this selected trade. -
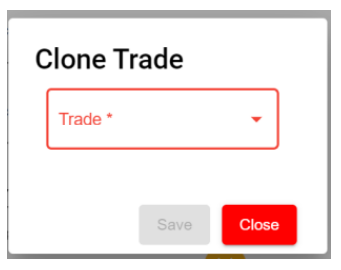
User can
 icon to clone a trade as shown in the below screenshot. Note that the dropdown list at this Clone Trade is based on the selected trades shown at the Evaluation Factor list page. This Clone Trade option is basically to duplicate the whole section of this selected and its sub trades (salary scale and job description). Once selected, click
 icon to save this clone trade and you will notice that system create another separate section
- Trade
- Click Save to save this Part of the evaluation factor.

Rating
The Rating section is optional to be setup. Based on your evaluation form format, if rating is required to be shown in the evaluation form then it can be setup as per below. Click on Rating tab, Rating details window opens,

-
In Add Rating Details section,
- Title – enter the title and this will be displayed as the header of this Rating section in the
employee evaluation form.
- Title – enter the title and this will be displayed as the header of this Rating section in the
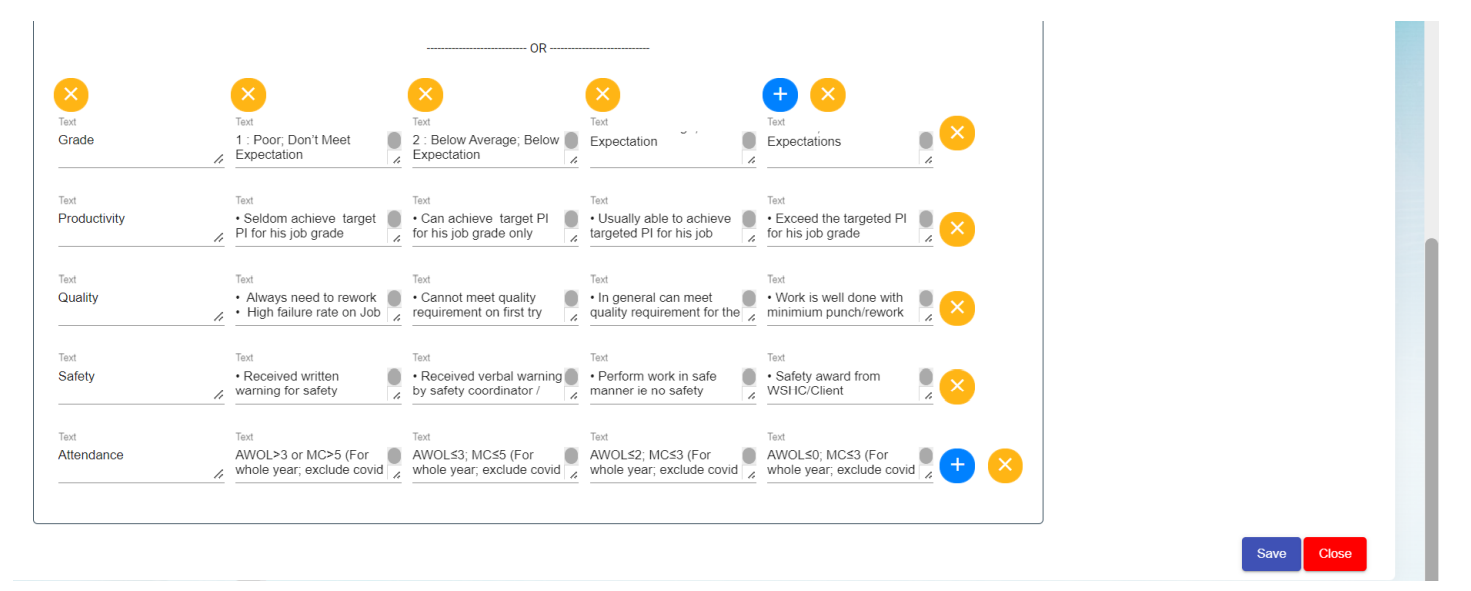
- In Add Fields section, there are three options to creating the rating section to be displayed in the
employee evaluation form.- Option 1: Rating Value – Input text to describe this rating value.

- Option 2

- Name – enter text to describe this name.
- Number – enter a numeric value.
- Description – enter long description to describe this name.
- Option 1: Rating Value – Input text to describe this rating value.


Click on ![]() add icon to add if a different name, number and description is required
add icon to add if a different name, number and description is required
-
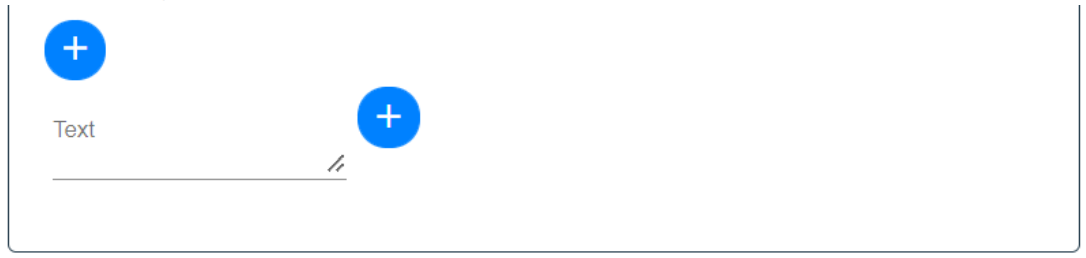
- Option 3

- Click on icon before the Text field to add column horizontally.
Click on icon after the Text field to add column vertically.
Click on icon above the Text field will delete the column horizontally.
Click on icon beside the Text field will delete the column vertically.
- Click on
- Option 3
- Click Save to save the rating setup of the evaluation factor.

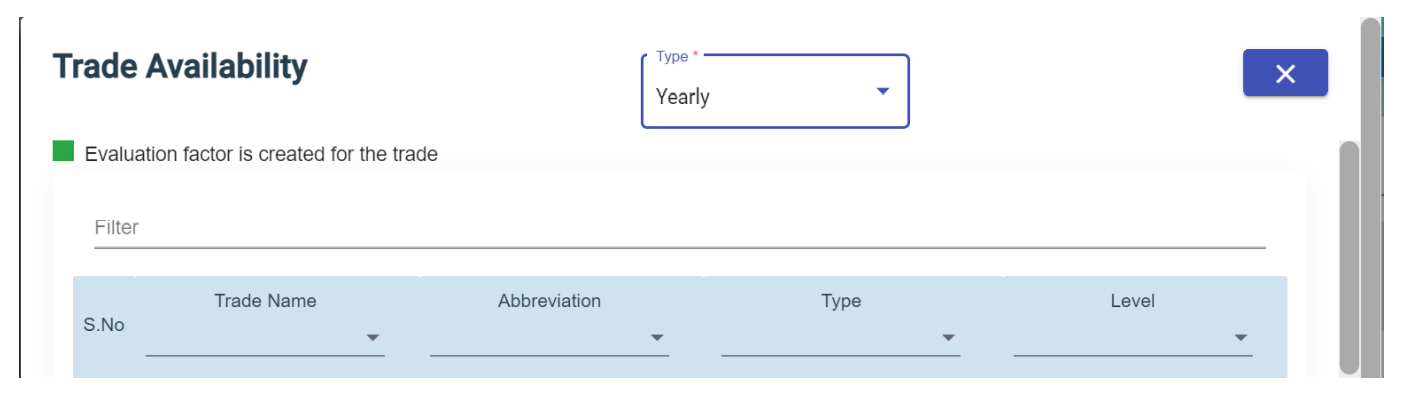
View Trade Availability
User can view the available trades used in evaluation by clicking on the Trade Availability icon in the Evaluation Factor page.
Click ![]() , below page opens for view,
, below page opens for view,
Filter Evaluation Factor
User can click ![]() icon in the evaluation factor page to filter evaluation factor on different columns.
icon in the evaluation factor page to filter evaluation factor on different columns.
Export Evaluation Factor
User can click ![]() icon to export this list of Evaluation Factor into an excel file.
icon to export this list of Evaluation Factor into an excel file.
No Comments