
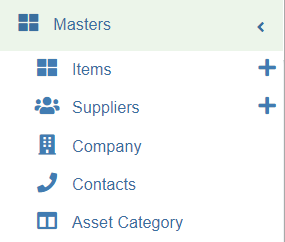
Master Data
The Masters menu in the procurement module helps to define and manage the master data like items detail, suppliers, company, contact, and asset category.
Items
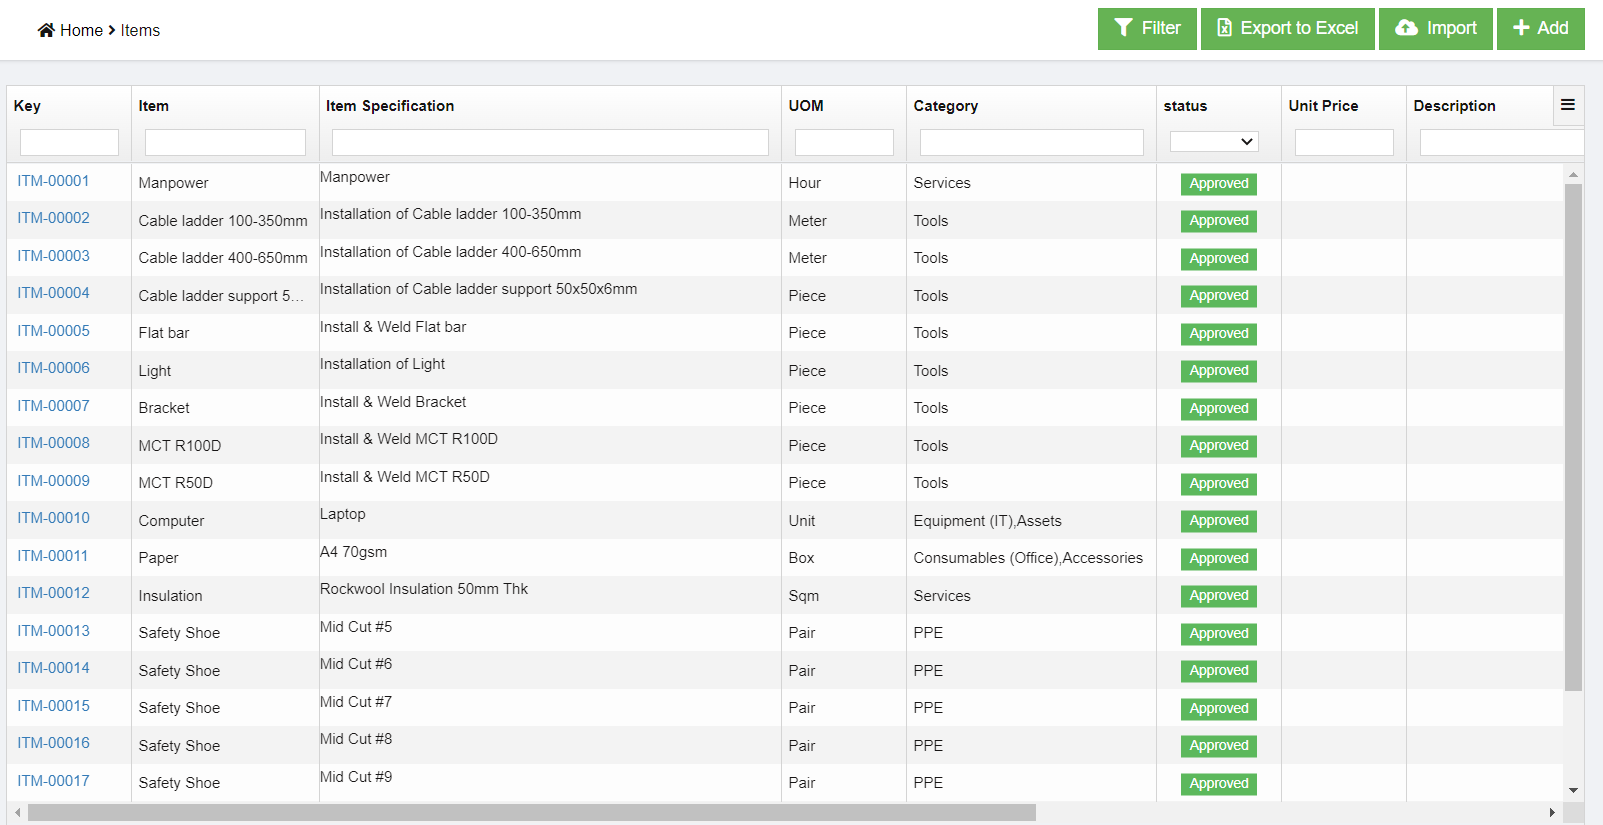
The list of items that will be used in procurement module is managed in cuteOffice Items master. They are managed centrally so that duplicate items are not entered into the system.
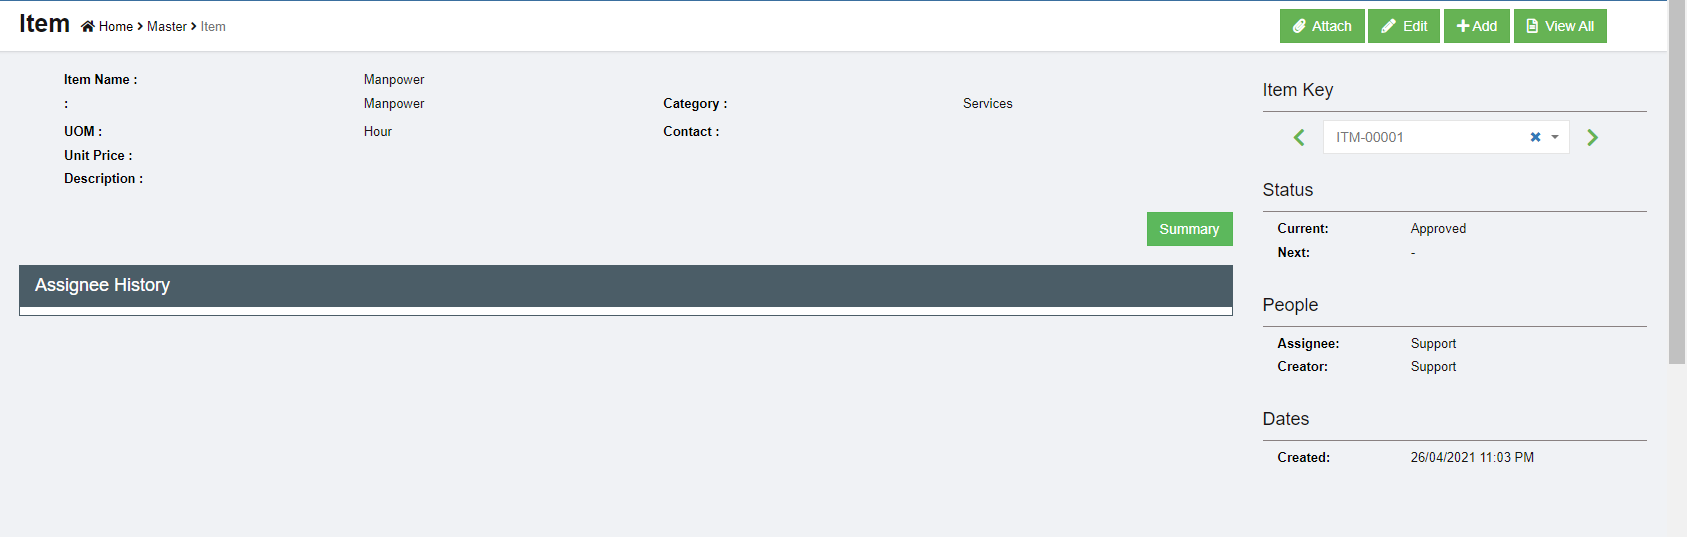
To view items master, click Items submenu in the Masters, the item master list page opens as below,
Add a New Item
To create a new item as item master,
- click
 button in the top right corner in item list view page, the add item page opens as below,
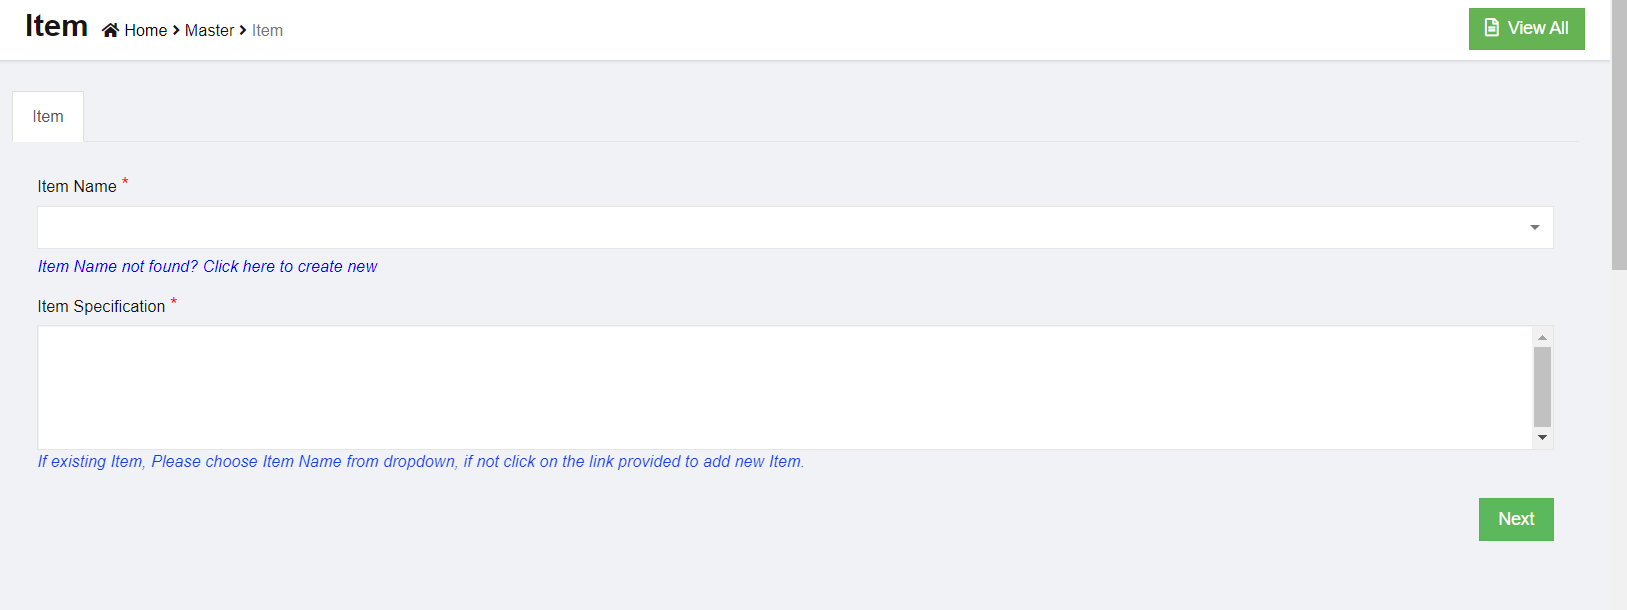
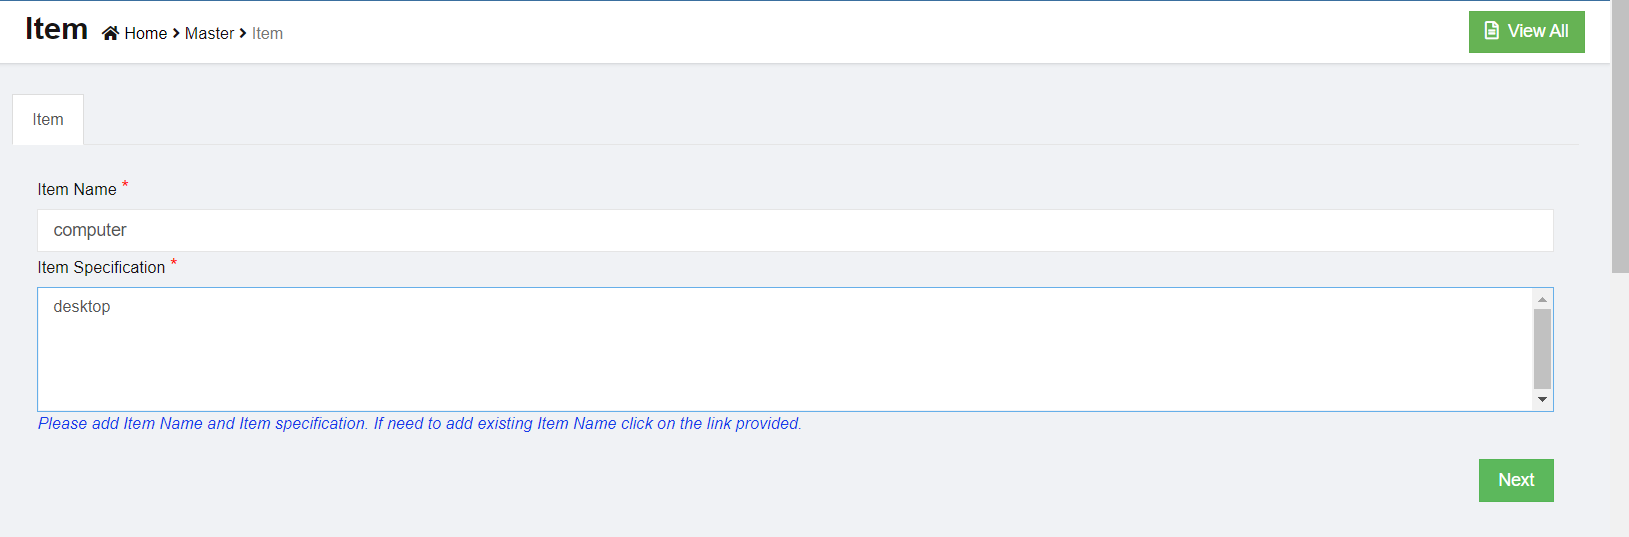
- There are two mandatory information to be filled up. For example, we want to buy a desktop computer. So we have decided classify Computer as item name and Desktop as item specification
- Item Name
- Item Specification
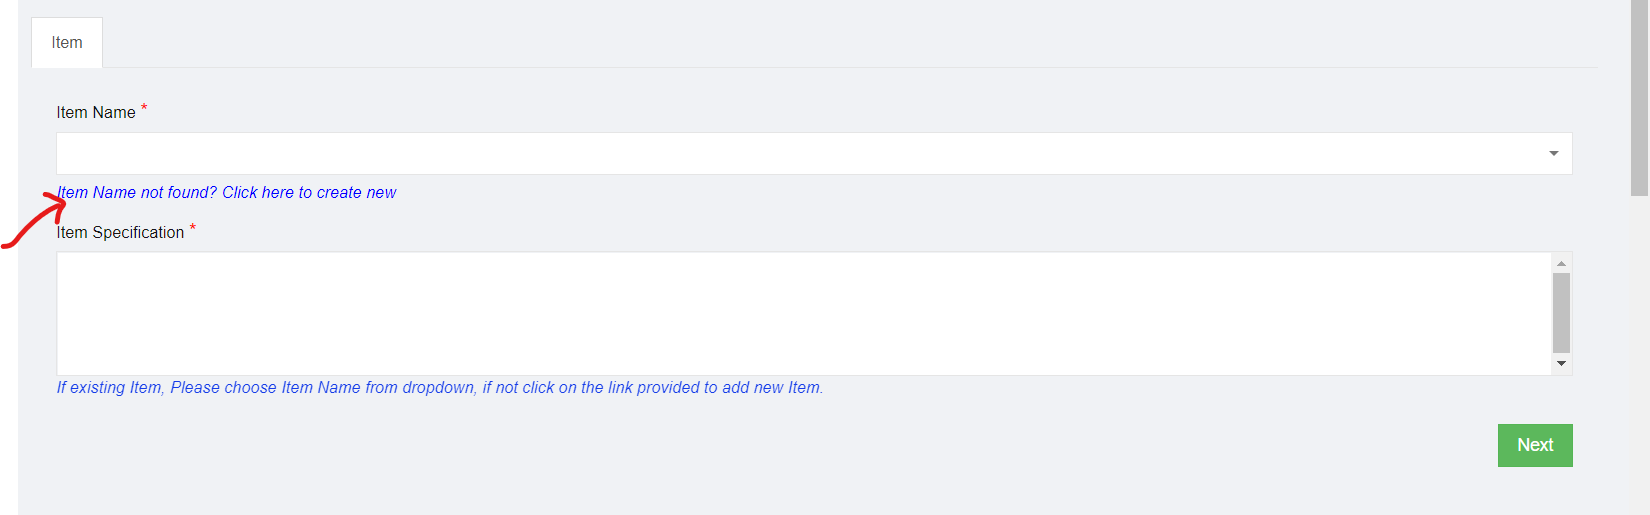
- Select the Item from list. If you can’t find the item, then click “Item Name not found? Click here to create new” link below the text box,
- Enter item name as computer, and the item specification as desktop.

-
Click Next. The below dialog appears,

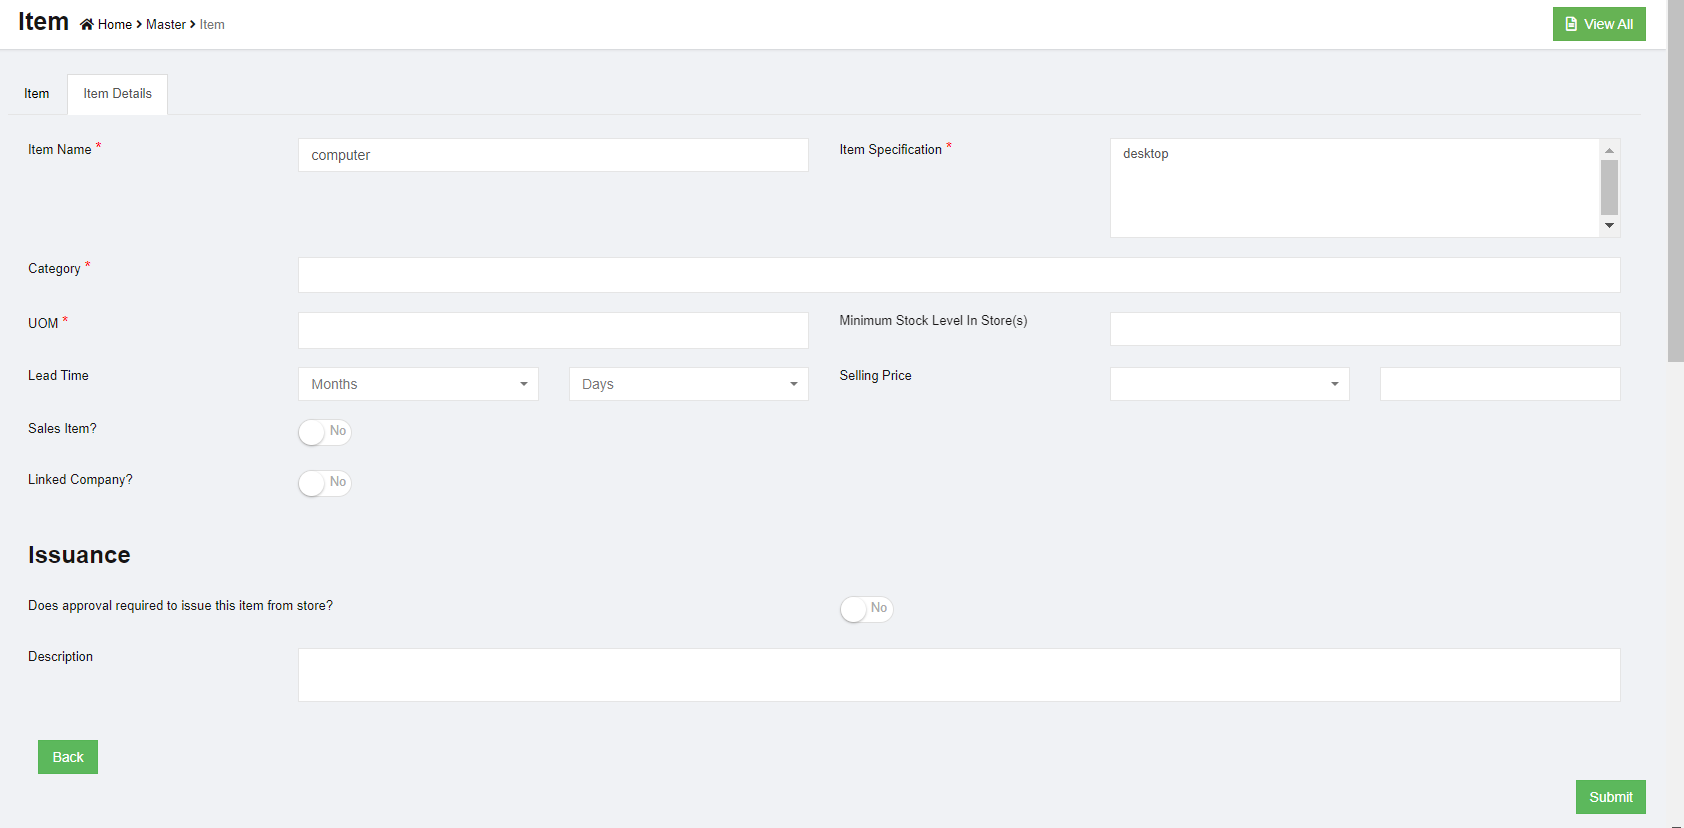
- Choose a category for the item. Select Assets and Equipment (IT). Each item can be classified into more than one category. The category classification is defined by the administrator in Admin Settings.
- Select UOM. (Unit of Measurement). Choose Piece. The UOM is defined by the administrator in Admin Settings.
- Enter minimum stock level alert quantity.
- Enter lead time required to buy this item
- When issue this item, if it requires approval, click to enable flag as Yes, or default as No,
- Enter any additional description for the item.
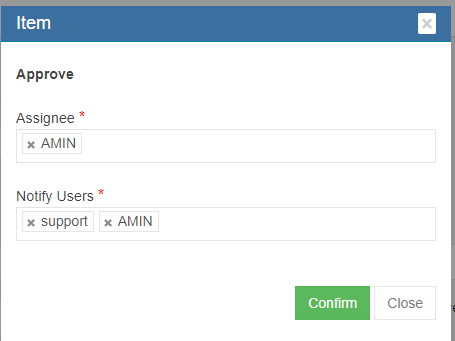
- Click Submit. Each item newly added to item master needs to be approved before it can be used in system. If item master auto approval is configured, the below dialog appears to approve immediately upon submit.

- Click Confirm, item will be approved and appear in item list for system use. Page will be redirected to the below screen.


Edit Item
To edit item master, go to the item list page,
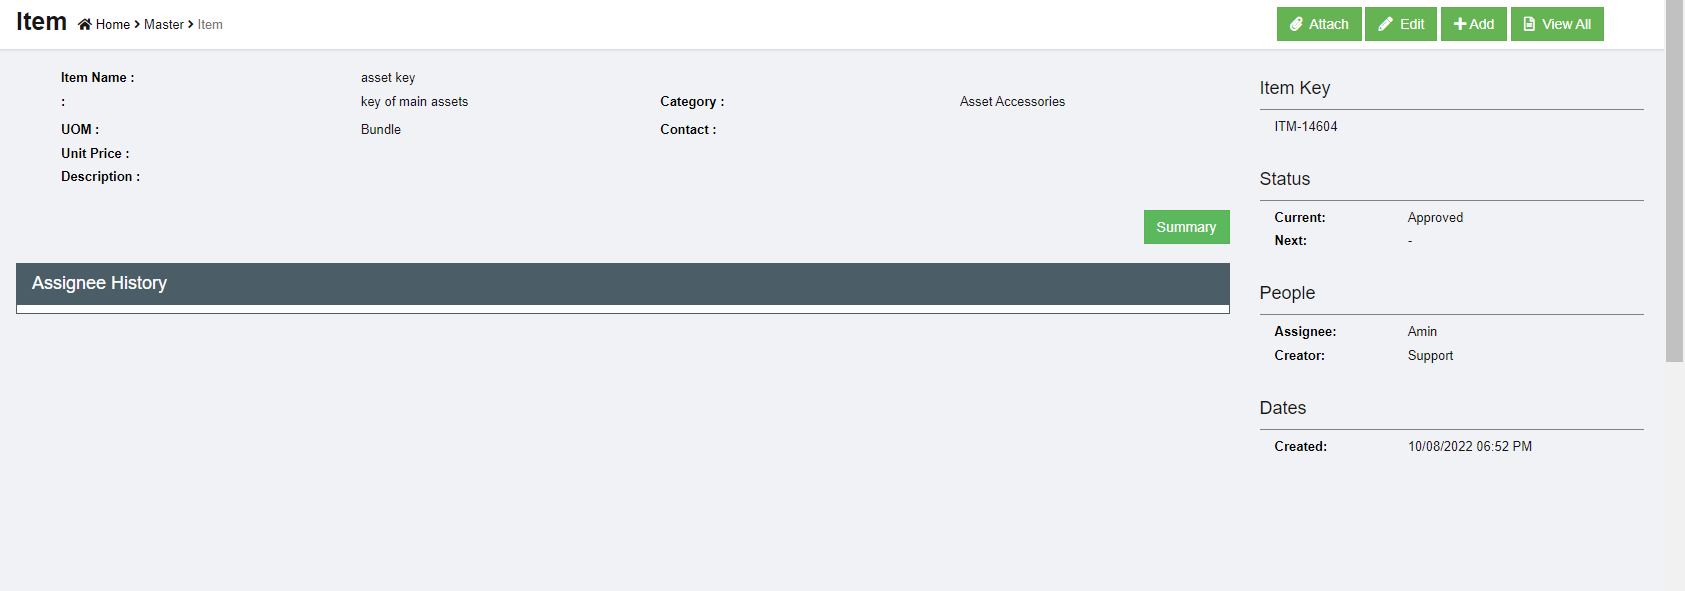
- click the item key and open the item detail page as below,
- Click
 Edit button, the edit window opens up,
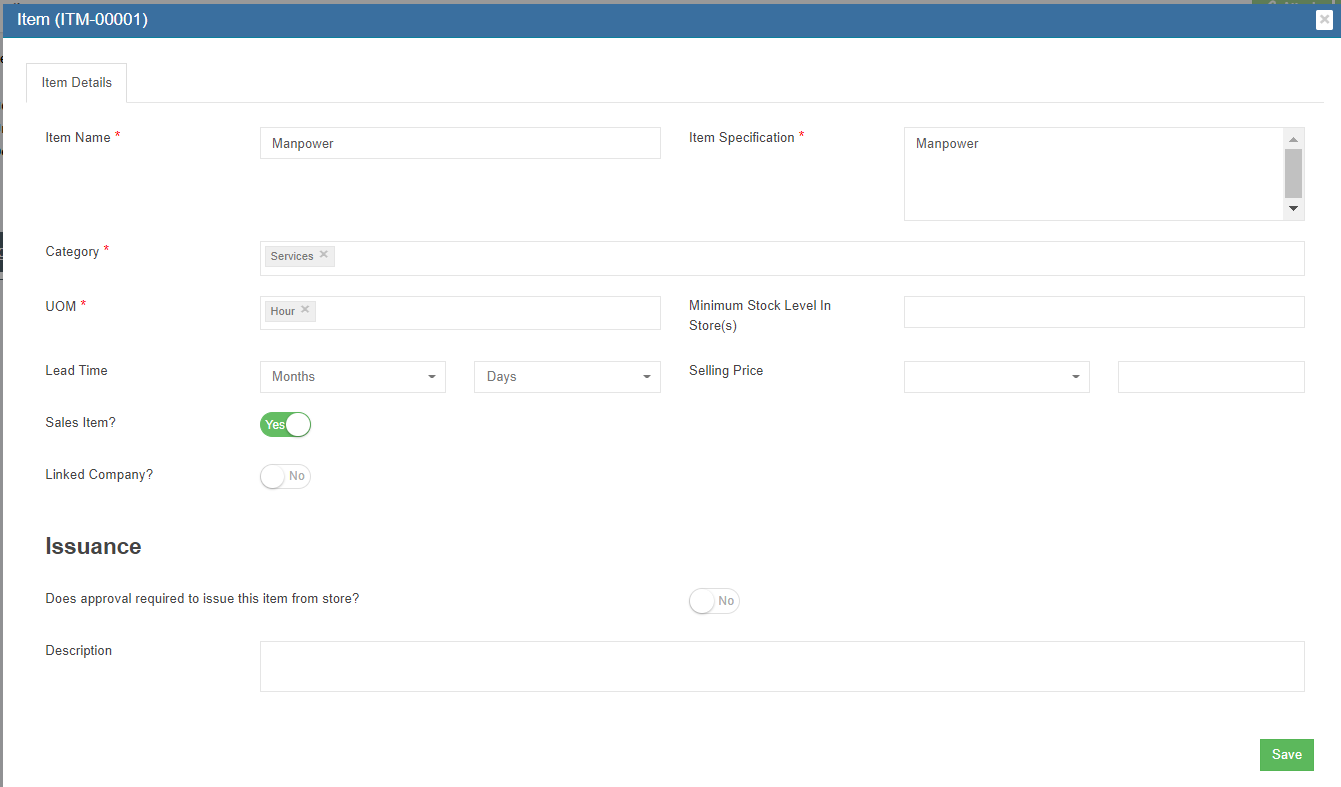
- Update details, and click Save to save edits.


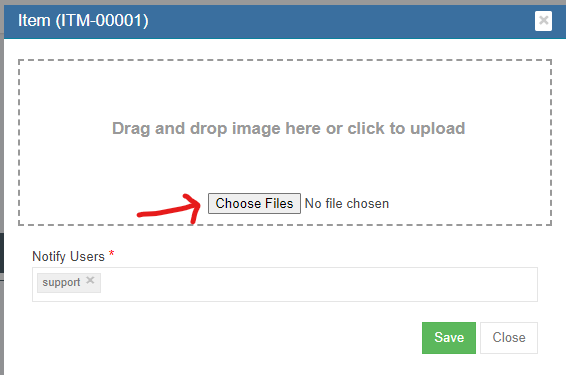
Attach
Any photos and additional documents can be uploaded against the item.
- Click
 Attach button, the attach window opens up,

- Click Choose Files and browse the file to attach.
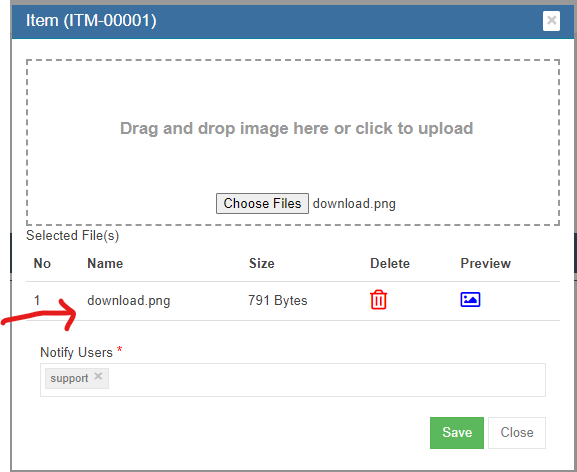
- The added item is shown below,

- Click
 (preview button) to view attached file,
 - Click Save to store the attachment against the item.
 (
(Export Items
User can export all items master data use the export option. Click  the items master data will be export and downloaded.
Suppliers
Suppliers are managed centrally as master data in cuteOffice. All suppliers needs approval to be qualified as supplier, and system provides ranking and evaluation options.
To view all suppliers, click Suppliers submenu in the Masters menu,

Add New Supplier
All supplier companies shall be registered in company master data first, then add as suppliers master.
To add new supplier,
- click Add button
 or
or  , the new supplier page will open as below,

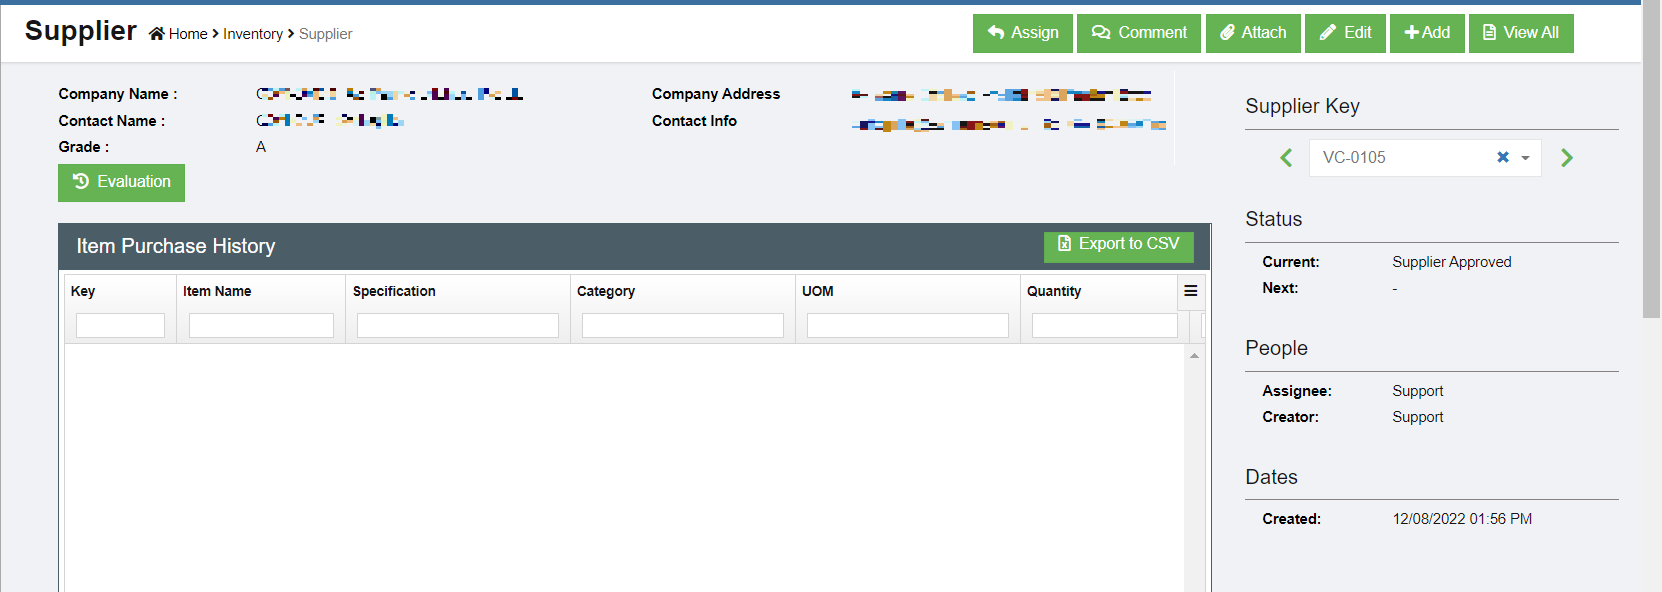
- Select a company from the dropdown list as supplier. If the company is not available, click the link-"Company not found? Click here to create new" below the company dropdown and create a new company. The selected company details are shown in the right side.
- Please check user manual on how to create company master data.
- Select contact from contact master dropdown. The contact details will show. If the contact is not in the dropdown list, click the link "Contact not found? Click here to create new" to create new contact in master data.
- Please check user manual on how to create contact master data.
- Select rating. The ratings value are managed in Admin Options
- Select Payment Terms. The terms are maintained in Admin Options
- Select Currency. The currencies are maintained in Admin Options
- Choose Grade. If A means the supplier needs evaluation. Grade B customers does not require
evaluation. For example, if we buy Amazon, do we need to evaluate them? No. so we choose B.
However, if we need to buy a computer from a supplier they need to be checked and evaluated
before making an order. - Click Submit to create the supplier. The below dialog opens up.
- Click Confirm, a new supplier is created and directed to below new supplier detail page,
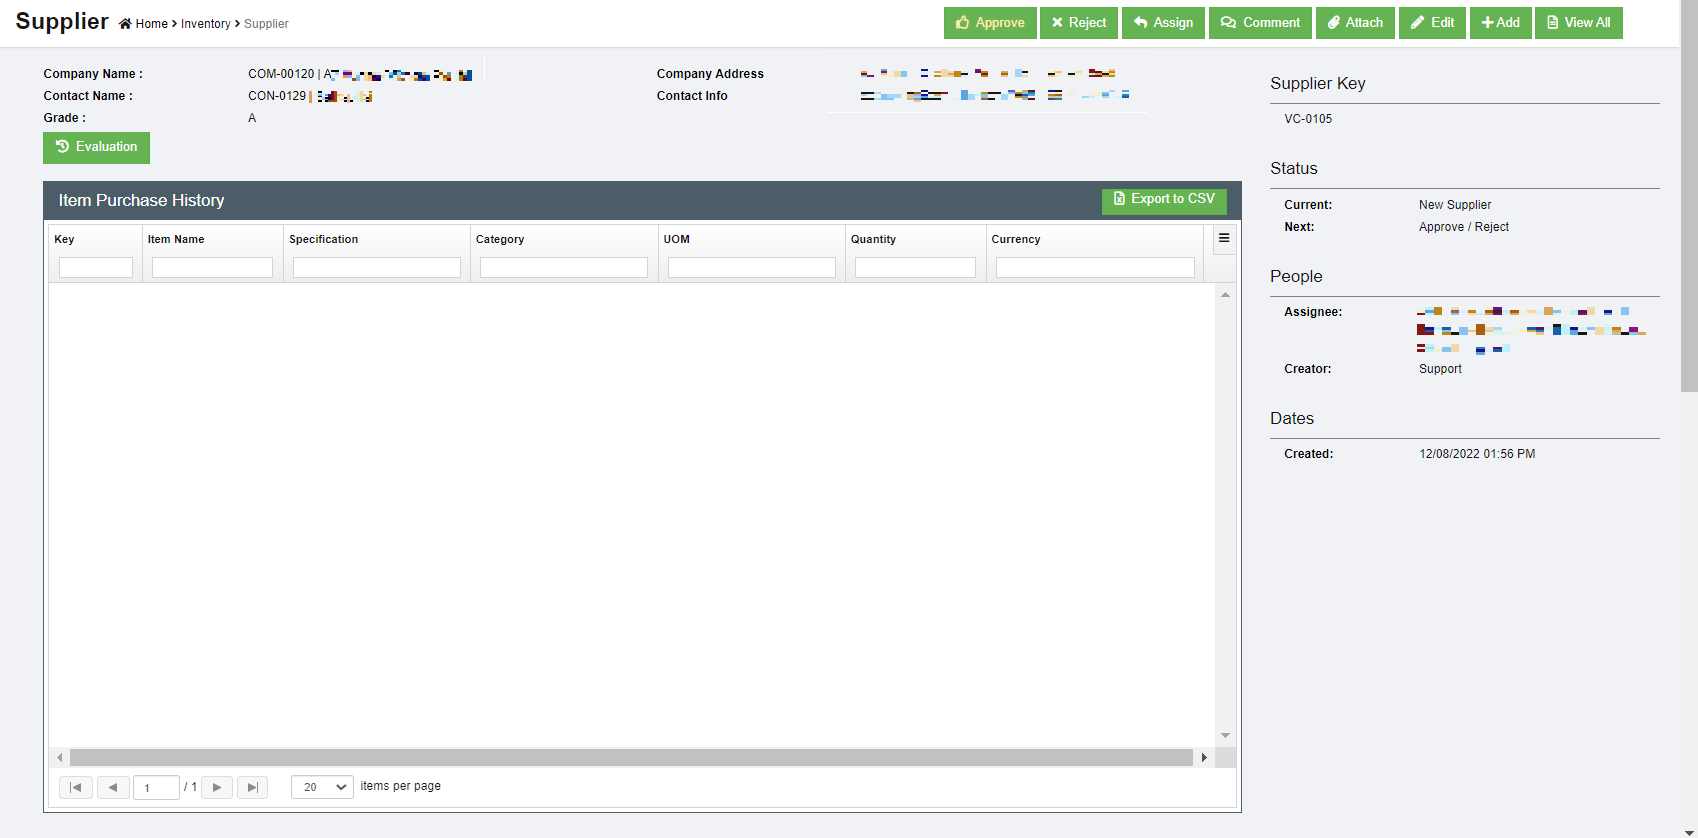
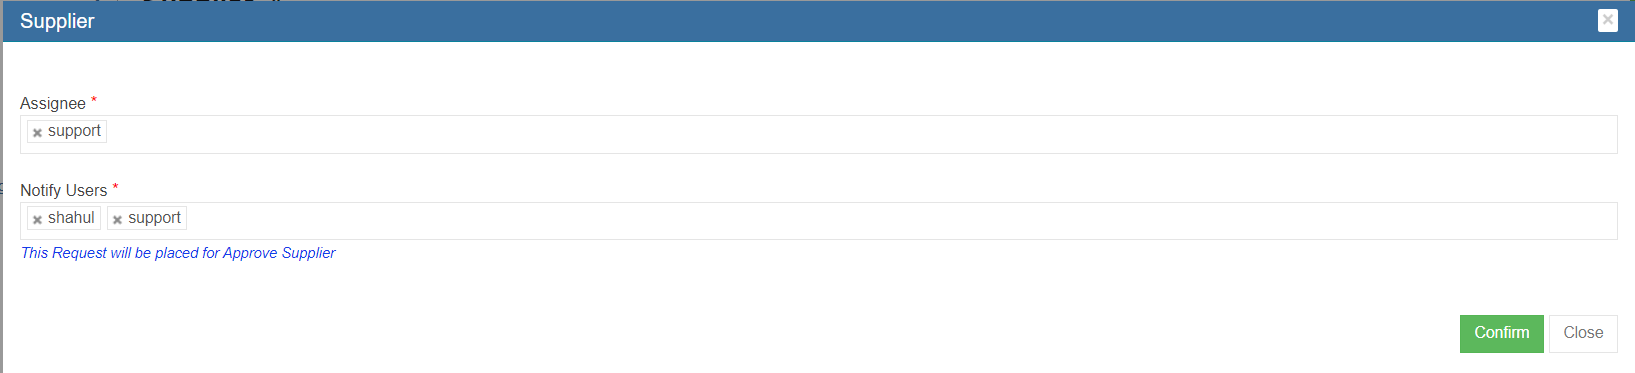
- All new suppliers created in system need to be approved unless auto approval is configured. To approve, click the Approve button in above supplier detail page, below dialog opens,
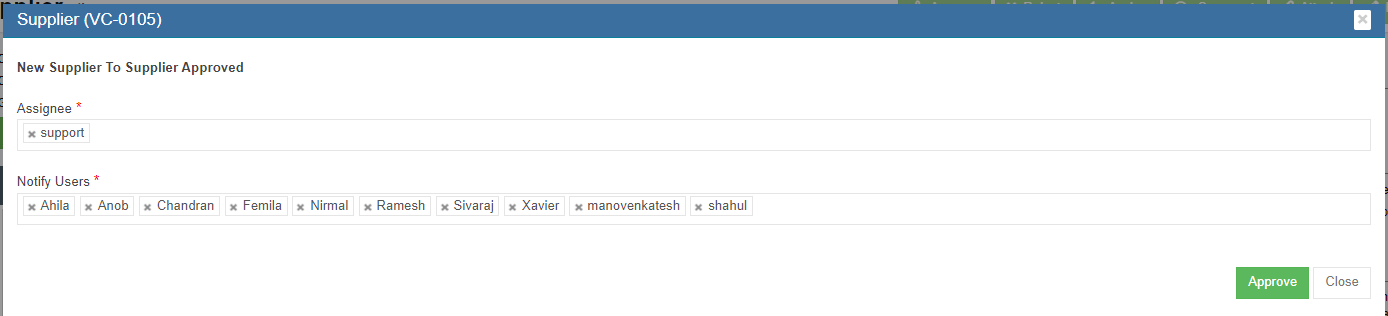
- Click Approve. The supplier status will change to supplier approved.


- To evaluate supplier, click the
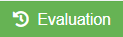 button, below evaluation window opens. Complete the evaluation and click Save.


Other Options in Supplier

There are other options available in supplier master data management.
Export Supplier
User can export all suppliers data use the export option. Click the supplier master data will be export and downloaded.
Company
Company master data manages all clients company, supplier company or any third party companies. To view company master list, click Company in the Master menu.

Add New Company
To add a new company,
- Click
 (Add button) and the new company window opens up,

- Enter the company name and click Next. The below window opens,
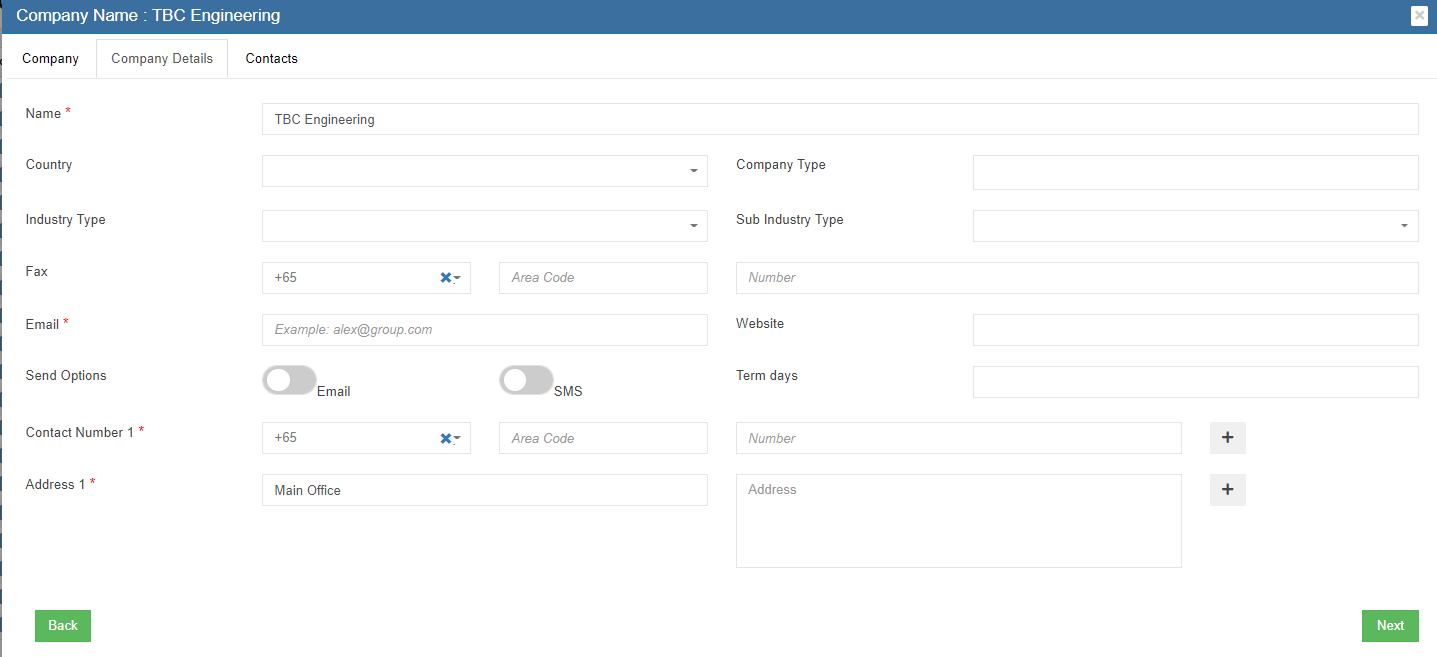
- Select the country
- Enter the email address of the company
- Enter contact number. Click + to add more contact numbers.
- Enter Address. Click + to add more address for the same company.
- Click Next and the below contacts information dialog opens up

- Select person salutation and enter the name of the contact.
- Enter designation.
- Enter email address of the contact.
- Enter phone number, direct phone number etc.
- Click Save to create the company and the contact under the company.


Edit Company
- In the company list page, click
 the edit icon against the company, the company detail page will open,

- Edit the company details and click Save.


Delete Company
- Click
 Delete icon against the company that user wants to delete,

- A confirmation window opens as below, click Yes and the company will be deleted.


Export Company
User can export all company data use the export option. Click the company master data will be export and downloaded.
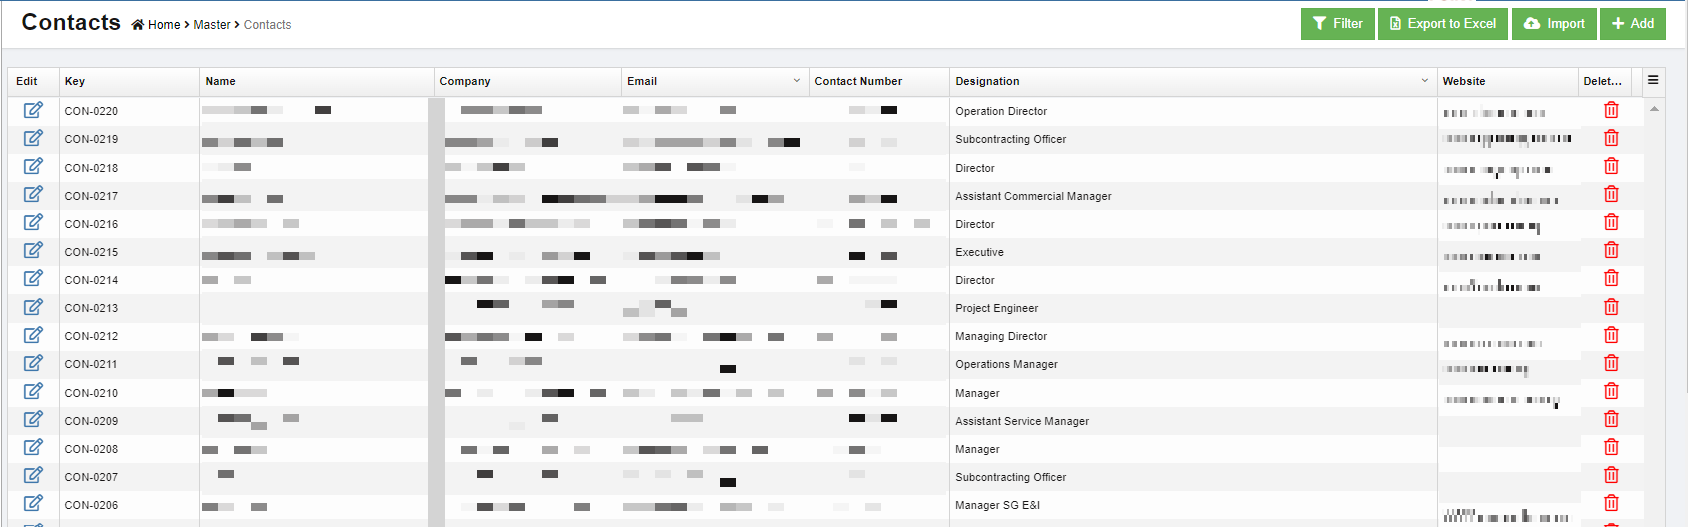
Contacts
Contacts master contains all contacts data from company master. Contacts master can be added in company master contact tab as well as contact master. To view contact master list, click Contacts in the Master menu,
Add New Contact
To add new contact,
- Click (Add button) and the new contact window opens up,
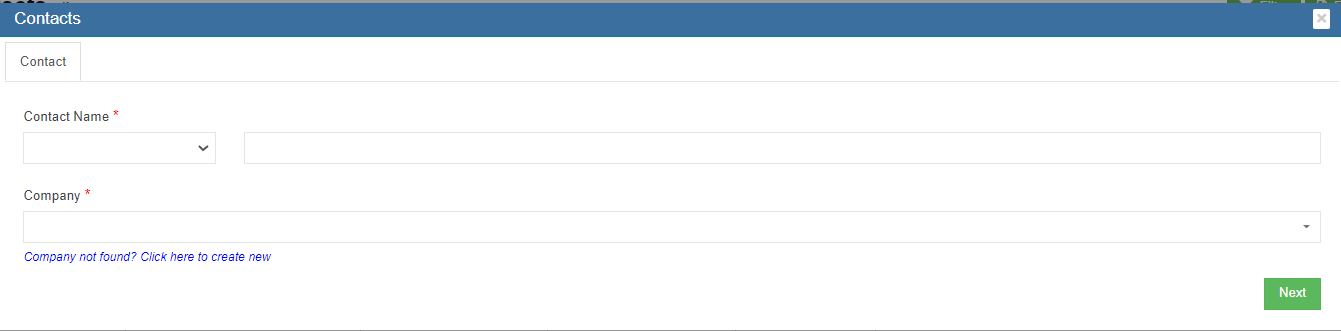
- Select the salutation and enter the contact name.
- Click and select company name, then click Next, the contact detail window opens,

- If the company already exists in company master, it will appear in the company dropdown list
- If the company not exist in company master yet, click the link "Company not found? Click here to create new" to add company in master data.
- Select person salutation and enter the name of the person
- Enter designation
- Enter email address of the person
- Enter phone, direct phone number etc.
- Click Save to create the contact and it is created under the company.


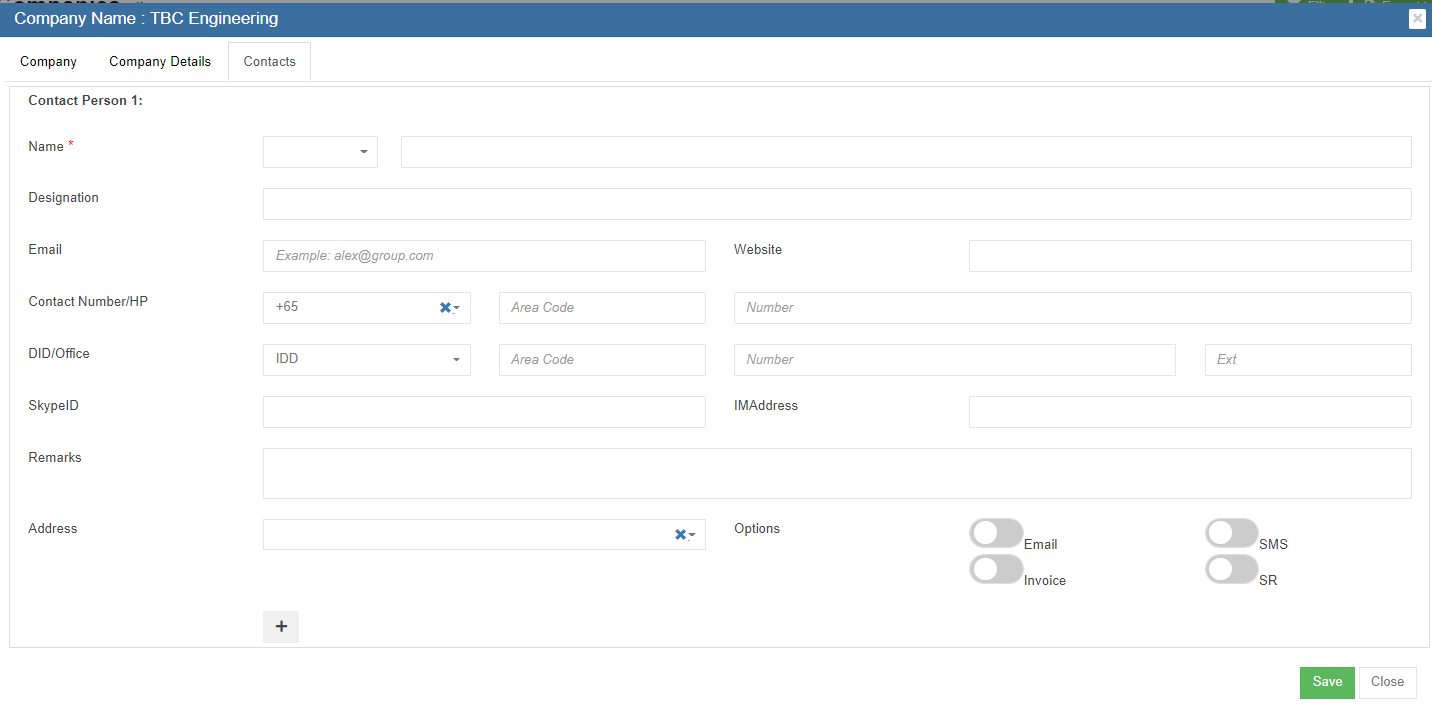
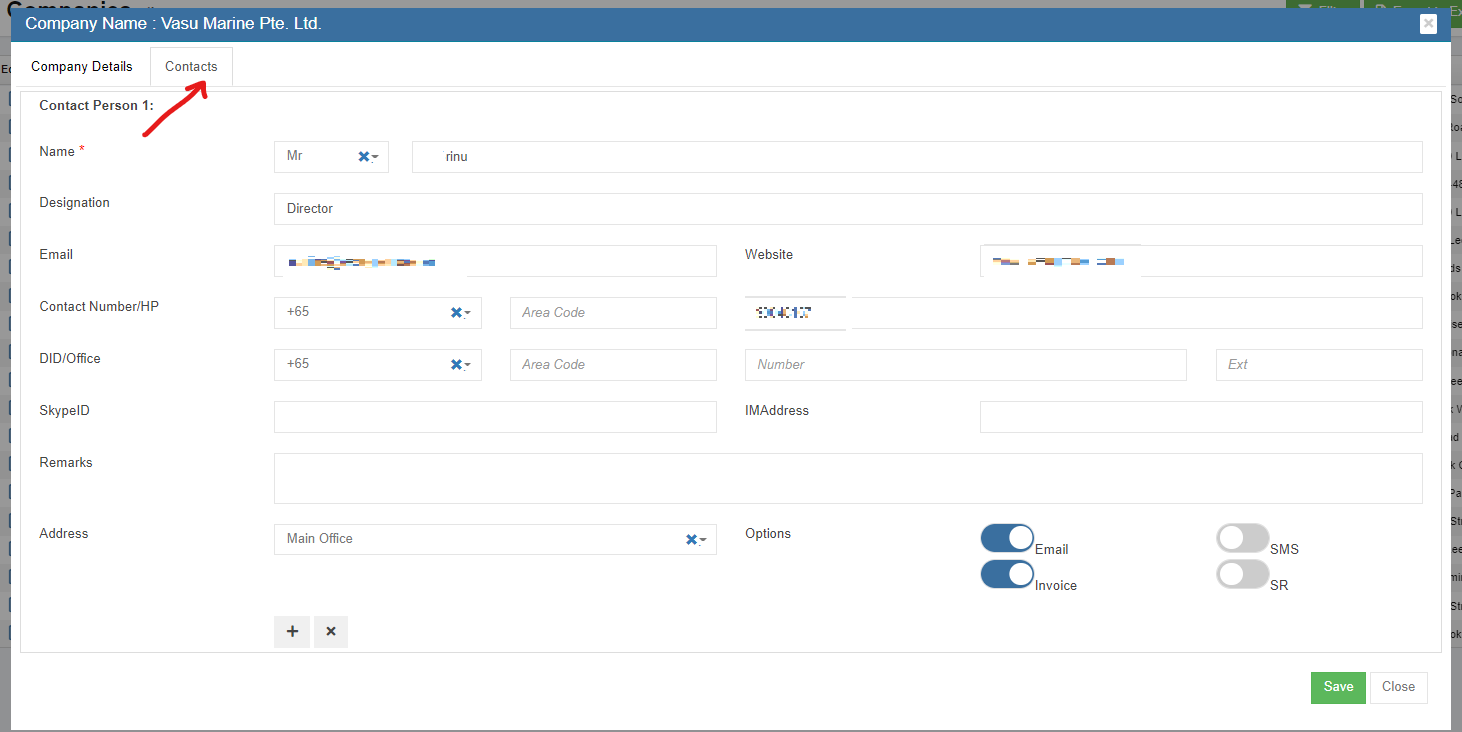
Or alternatively, create contact under company master:
- Click Company in Master menu, select the company from which the new contact come,

- Click the contact tab as in above screenshot, the contact detail page opens.
- Click
 icon at the bottom left side to add new contact. The new contact page will open.
 - Select person salutation and enter the name of the contact.
- Enter designation
- Enter email address
- Enter phone, direct phone number etc.
- Click Save to create the contact under the company. The contact data will be saved in contact master as well.

Edit Contact
- In the contact list page, click the edit icon against the contact, the contact detail page will open.
- Edit the contact details and click Save.
Delete Contact
- ClickDelete icon against the contact that user wants to delete,
- Click Yes to confirm deletion.


Export Contact
User can export all contact data use the export option. Click the contact master data will be export and downloaded.
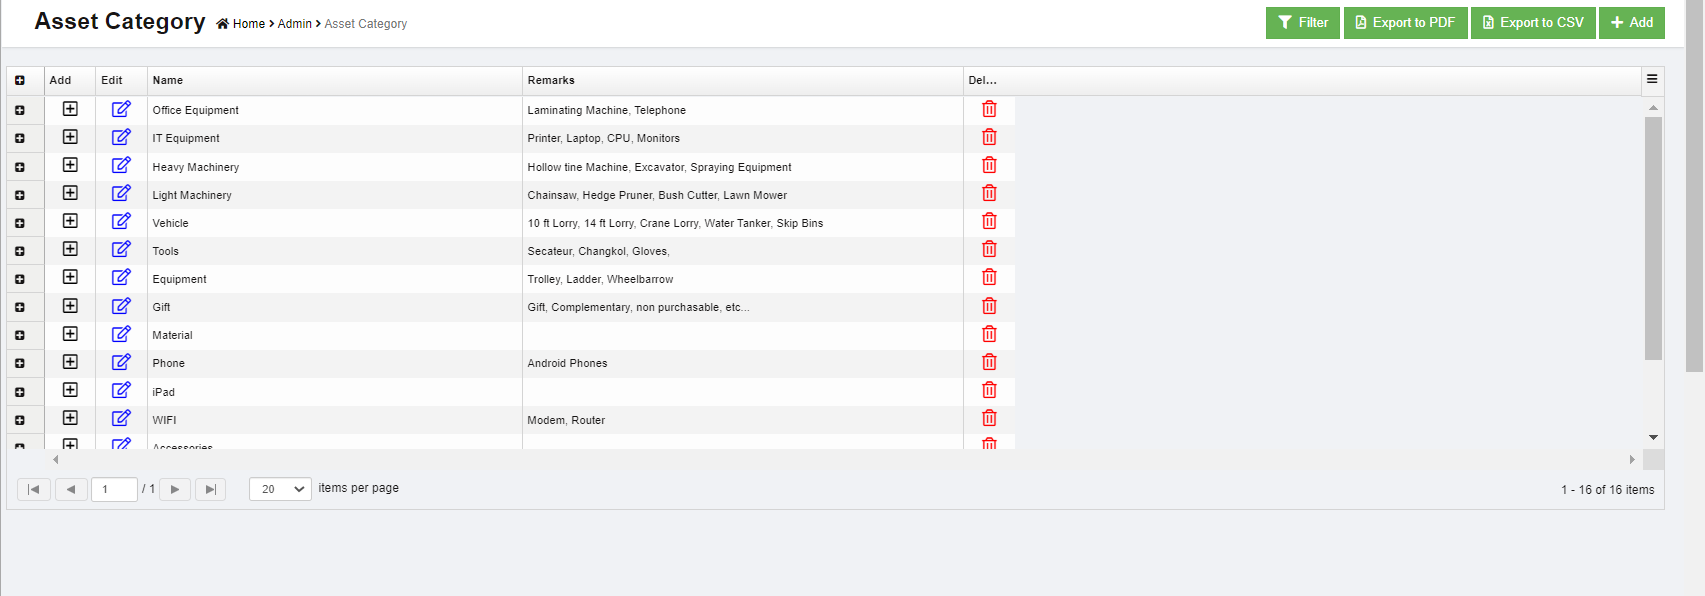
Asset Category
To view all current asset category, click Asset Category in Master menu,
Add New Asset Category
To add new asset category,
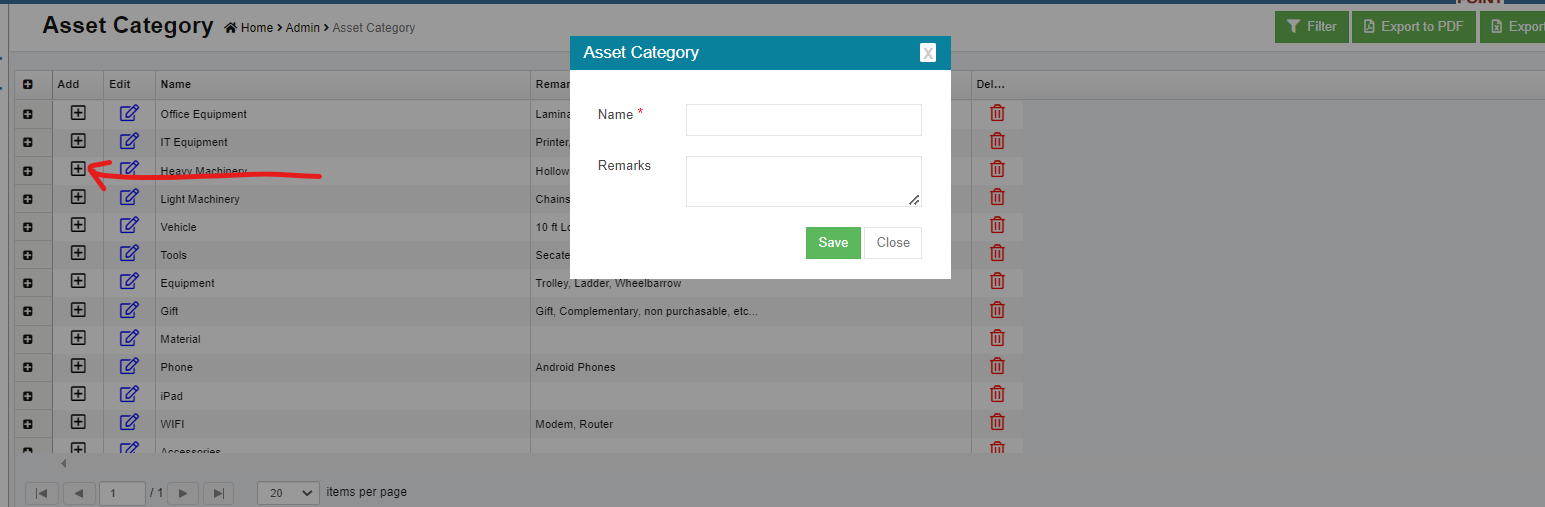
- click in the asset category list view page. The new asset category window opens,

- Enter category name and abbreviation, or any remarks.
- Click Save. A new asset category is added.

Edit Asset Category
- In the asset category list page, click the edit icon against the category, the asset category detail page will open.
- Edit the details and click Save.
Delete Contact
- ClickDelete icon against the asset category that user wants to delete,
- Click Yes to confirm deletion in the confirmation window.
Add Sub-category under Asset Category
To add sub category of an asset category, click the add icon in the Add column against each asset category.
Export Asset Category
User can export all asset category data use the export option. Select and click the asset category master data will be export and downloaded in selected format.
No Comments