
Billing
Billing Systems helps to process successful invoices and charging the customers.
Billing Master Data
1.0 Billing Master Data
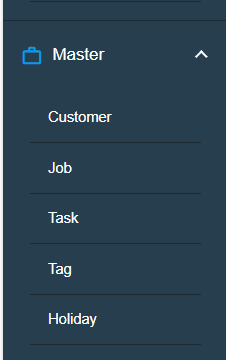
1.1 Customer List
Customer list helps to view customer details so that billing activities can be recorded and entered in the billing system.
To view Customer list, Click Customer submenu in the Master, the customer list page opens as below.
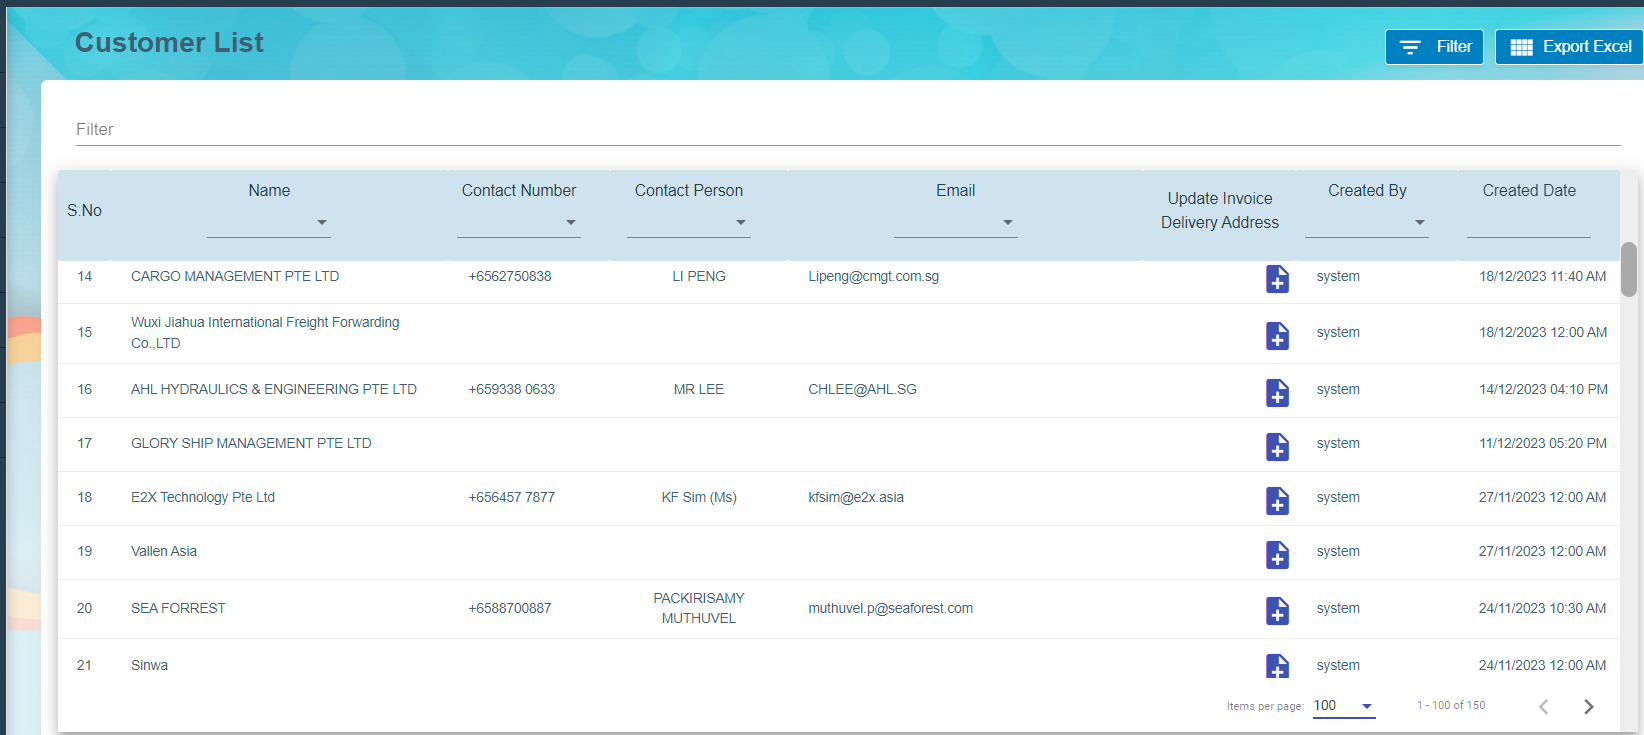
Click add button ![]() to update Invoice Delivery Address and Save it.
to update Invoice Delivery Address and Save it.
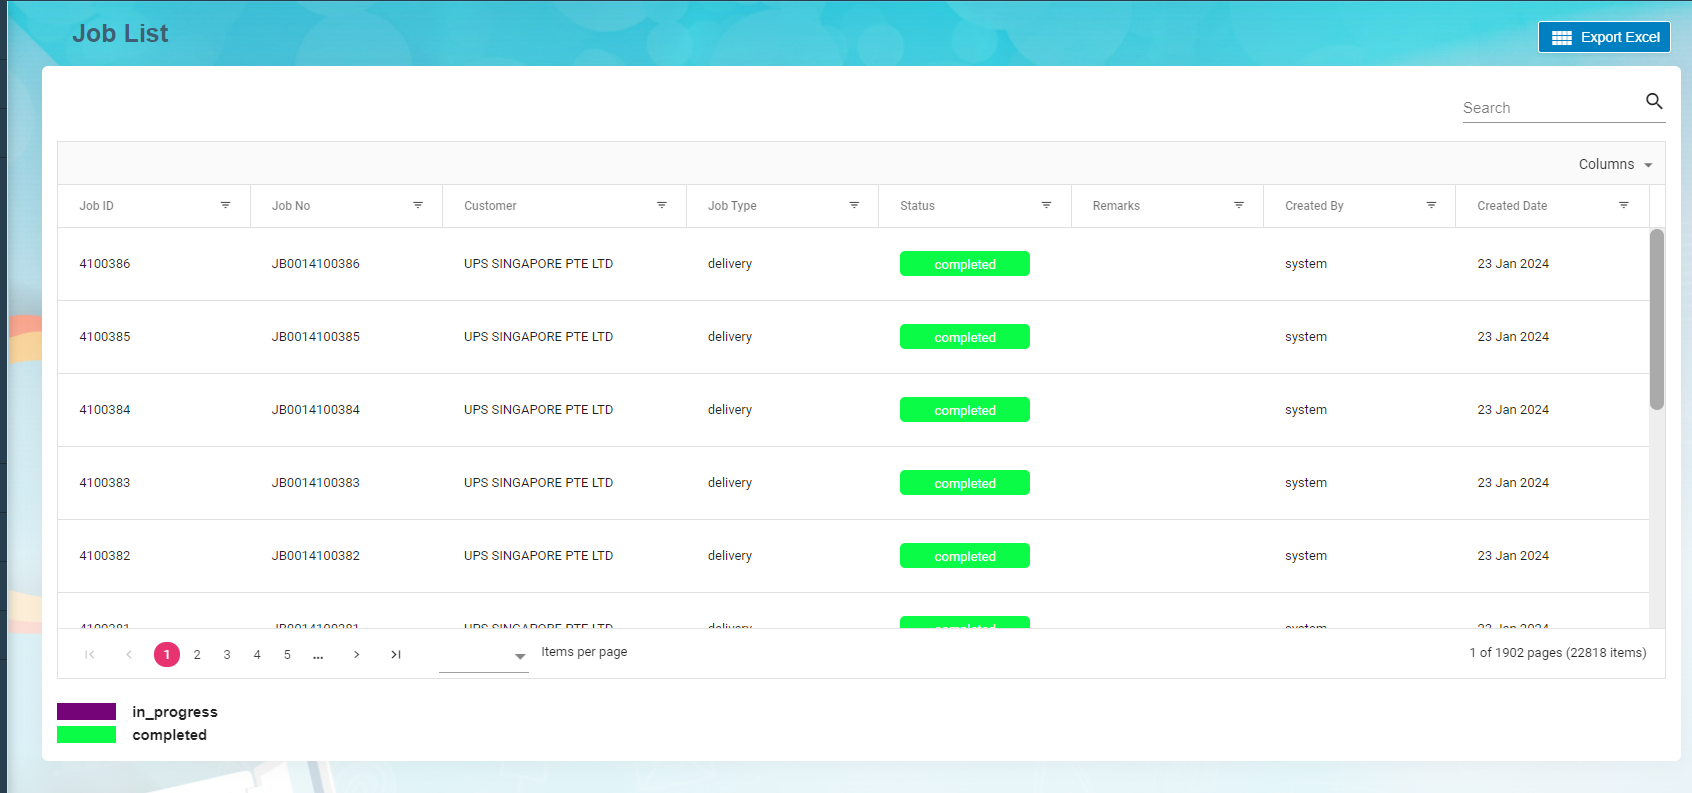
1.2 Job List
Job list viewed to maintain both completed and in progress job details in the system.
1.3 Task List
Task list viewed to contain assigned, waiting for acknowledgment, acknowledged and successful tasks.
Click Details icon ![]() to view Task details, Tags, Job details and Task Assignment. All the details come from the Network linked (Versa Fleet) to cuteOffice. Tags may contain single or multiple tag codes to process against each Task and Job number. The tasks which have successful status are ready to process Invoice.
to view Task details, Tags, Job details and Task Assignment. All the details come from the Network linked (Versa Fleet) to cuteOffice. Tags may contain single or multiple tag codes to process against each Task and Job number. The tasks which have successful status are ready to process Invoice.

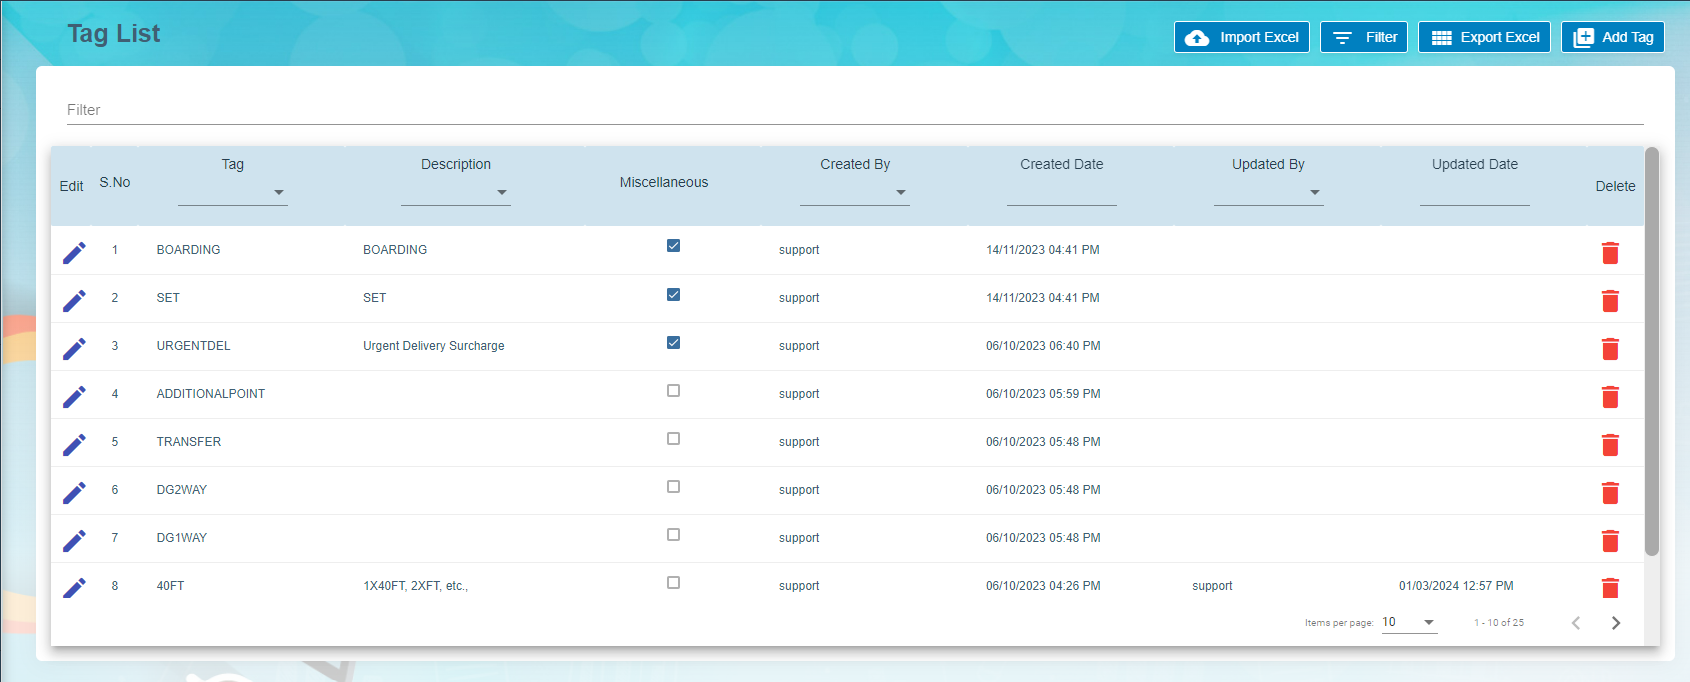
1.4 Tag
1.4.1 Add A New Tag
Click add Tag, Billing Tag window open to add the tag and description. If the tag is miscellaneous tag, enable Miscellaneous in the Billing Tag.
1.4.2 Edit Tag
To edit Task tag
Click  edit button in the edit column of the Tag list that user want to edit any details about Tag name or Miscellaneous Tag Name and their description.
1.4.3 Import Excel
Import Excel functionality![]() is available to import the Tag details. Download the template to add all the Tag details and import into the system.
is available to import the Tag details. Download the template to add all the Tag details and import into the system.
1.4.4 Export Excel
Export Excel ![]() helps to download the tag list in the Master.
helps to download the tag list in the Master.
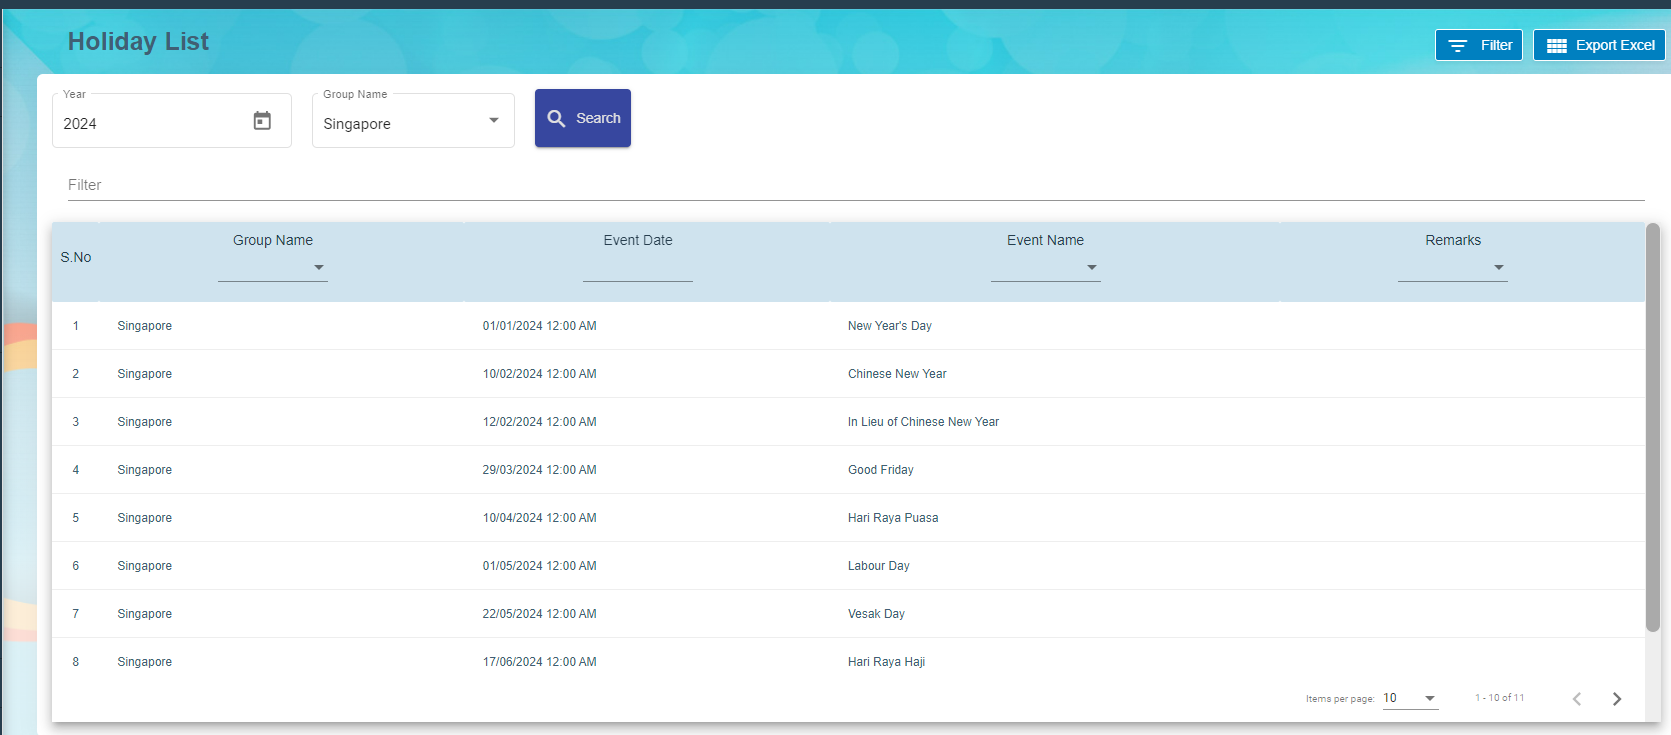
1.5 Holiday List
Holiday list viewed to maintain the holidays based on the Group Name and the Year. Group Name contains the country name such as Singapore, Malaysia etc.,
Main page contains Group Name, Event Name, Event date and Remark.
Excel export available to download the holiday list.
Billing System
2.0 Billing System
Billing System is the processes that help to create invoices against completed tasks for the customers. The system receives tasks from various networks to process invoice. Each task is associated with rates and available in the rate card. Successful task and job are ready to process invoice in the system. New invoices are approved by the approver before sending the invoices to the customer. Once payment received from the customer, it has been updated in the system to close the transaction.
Billing System is a digital platform or solution that facilitates the electronic generation, dispatch, and tracking of invoices, eliminating the need for traditional paper-based billing methods.
2.1 Task Ready to Invoice
Task Ready to invoice submenu available under Billing menu. Successful Task are ready for creating Invoice to the customer.
- Choose Customer in the Task ready to invoice and the date range. Select Type either Day, Month or Ad-Hoc.
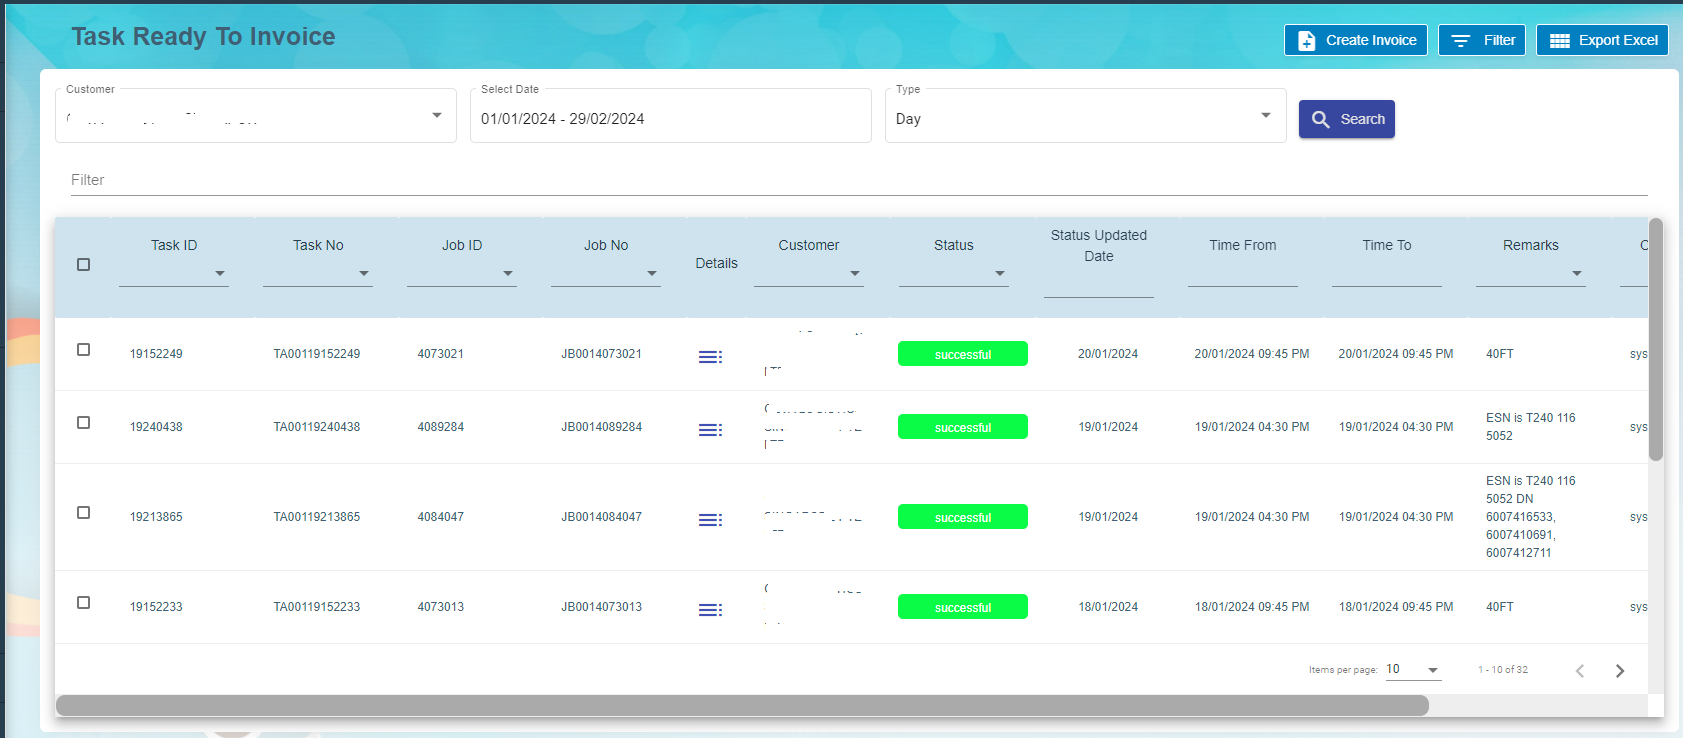
Click detail icon against the task to view the task details , job details, task assignment and Tag details. User can modify the tag code and save it.
- Click single or multiple check box
 against the task id to create invoice.
 - Click create invoice
- Choose the payment terms from the drop-down list and staff name.
- Click create invoice

The new invoice available to process in the Invoice List.
2.2 Invoice
Choose Invoice submenu under Billing menu. Invoice list page contains invoice numbers to process billing for the activities.

- Click Invoice number to view Invoice details.
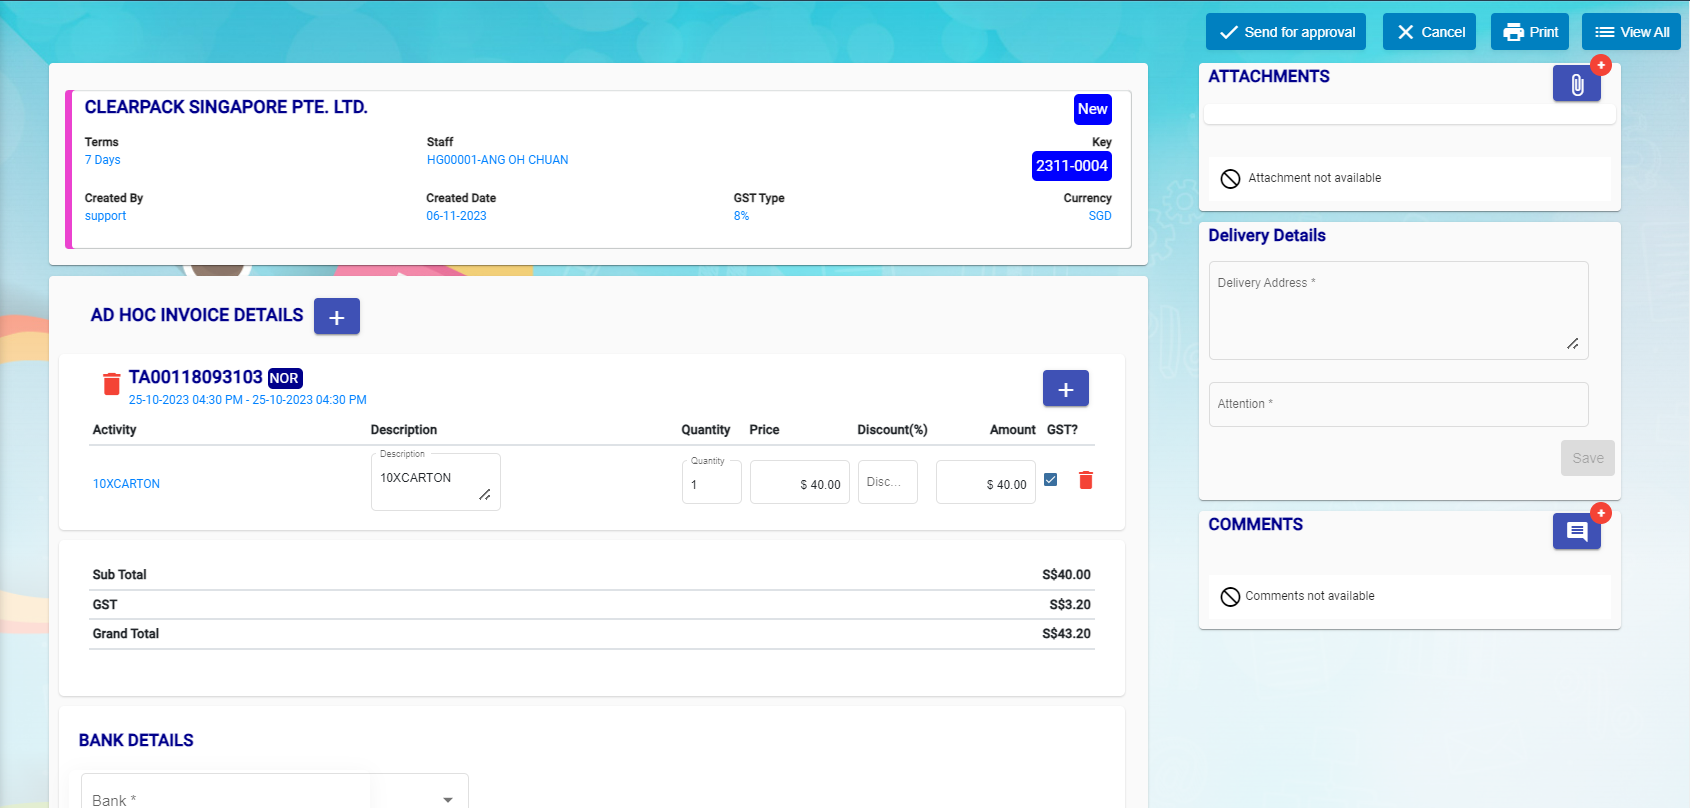
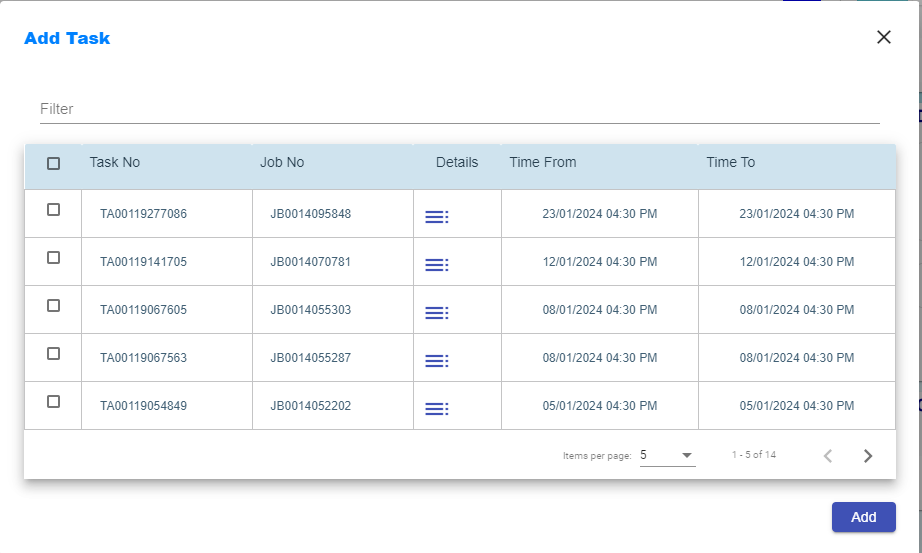
- New task can be added along with the previous task.
- Click add button beside to Ad-Hoc Invoice details.
- New window open to choose the task numbers.
- Click add.
- Choose Bank details and Save it.
- Click send for approval button available on the top right corner.
- Assignee and Notify window open to choose the approver and notify users.
- Click confirm.
- Approver will receive email notification to approve the invoice before sending the invoice to the customer.
- Dashboard contains waiting for approval for the approver to choose it.
- Click Approve button at the top right corner.
- Assignee and Notify window open to intimate the user proceed to send the invoice to the customer.
- Approved Invoice report available to send to the customer. Click Print and email as attachment to customer.
- Click send to customer button.
- New window open to intimate Assignee and Notify Users.
- Click confirm button.
- Invoice status change to waiting for payment.
- Click Paid button after payment received from the customer.
- Eventually Assignee and Notify window open to intimate the users and confirm it.
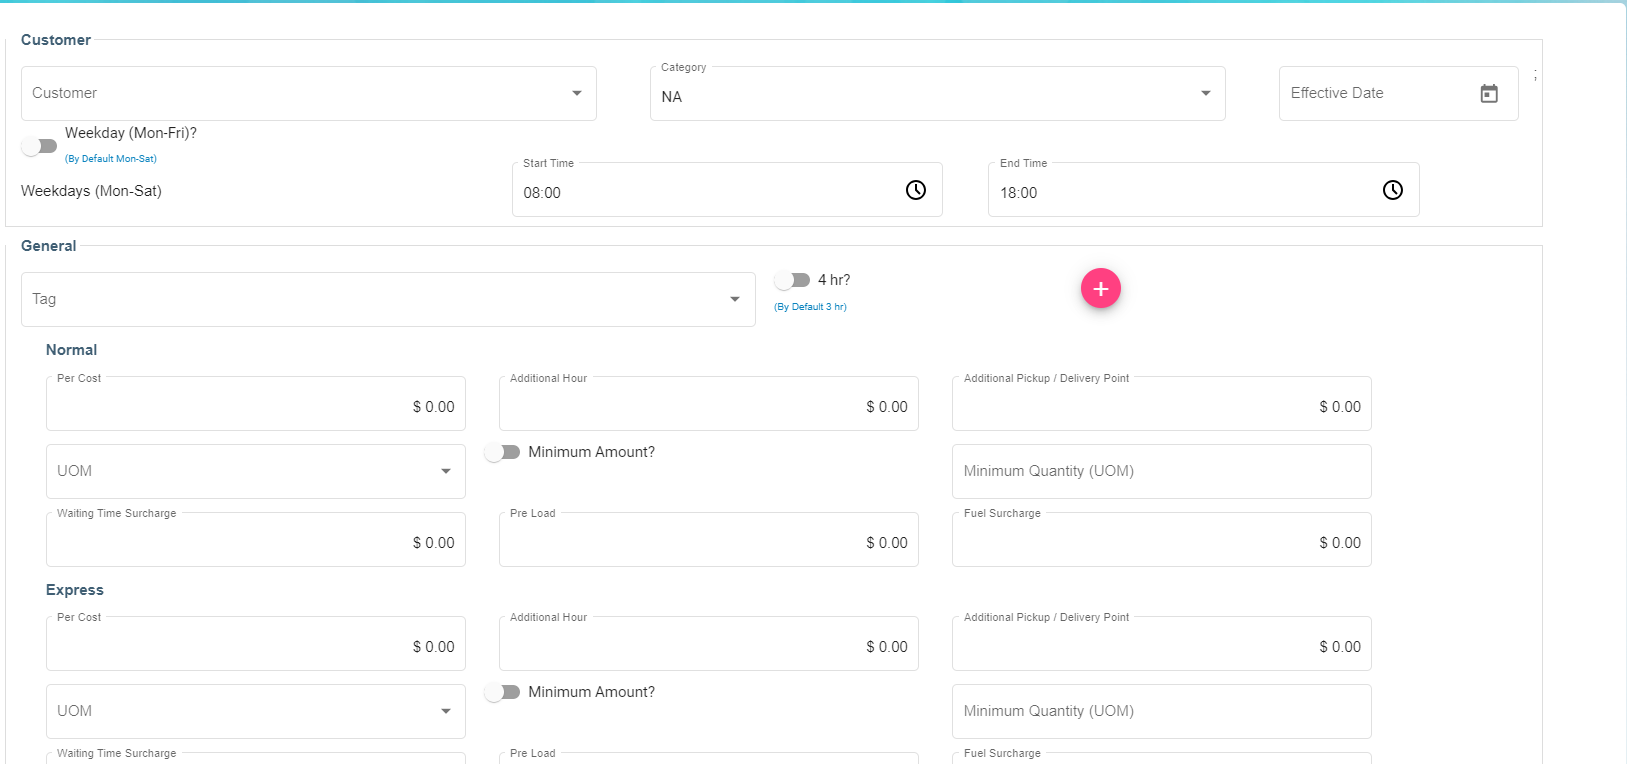
2.3 Rate Card
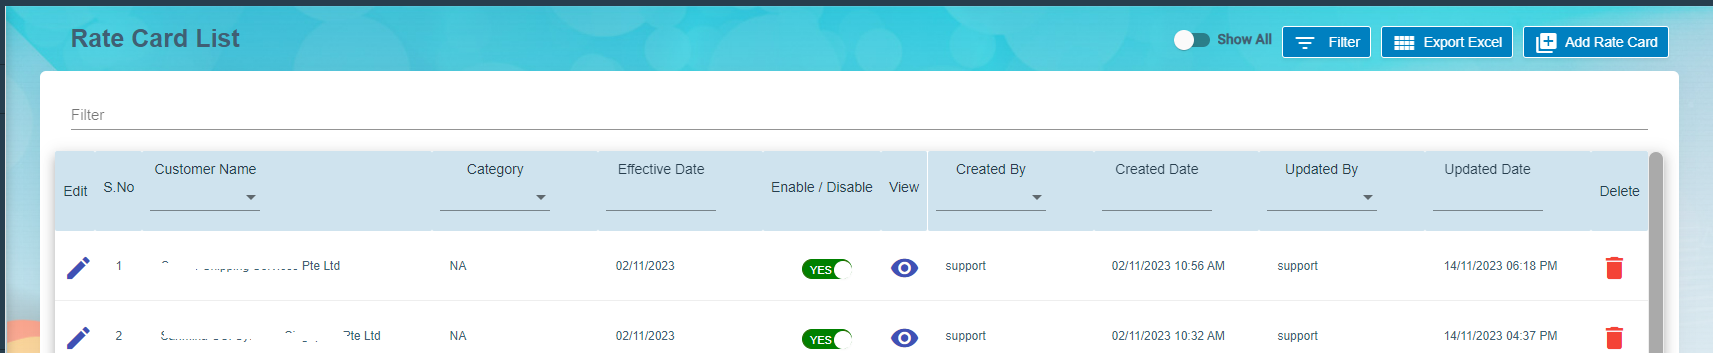
- Click rate card to add all the activities details against the customer.
- Click Save to save the rate card details.
No Comments