
Suppliers Management
Suppliers can register in the client's supplier portal and once approved they get RFQ in the system and quotes can be submitted online. Approved PO are sent through the system and invoices can be submitted online.
Supplier Registration in cuteOffice
Suppliers' representative user shall register as user in cuteOffice system. Contact your Client for URL to register as supplier. New supplier shall follow below steps to create user account and navigate supplier portal in cuteOffice:
Supplier Self Registration
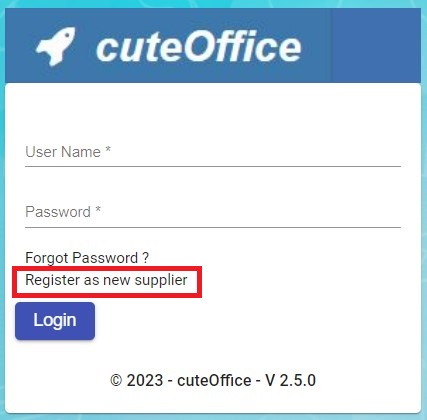
- In cuteOffice user login page of supplier portal, click "Register as new supplier",

- The new supplier registration page opens as below, which includes three parts of information: General Company Information, Authorised Representative Information, Attachment:
- General Company Information
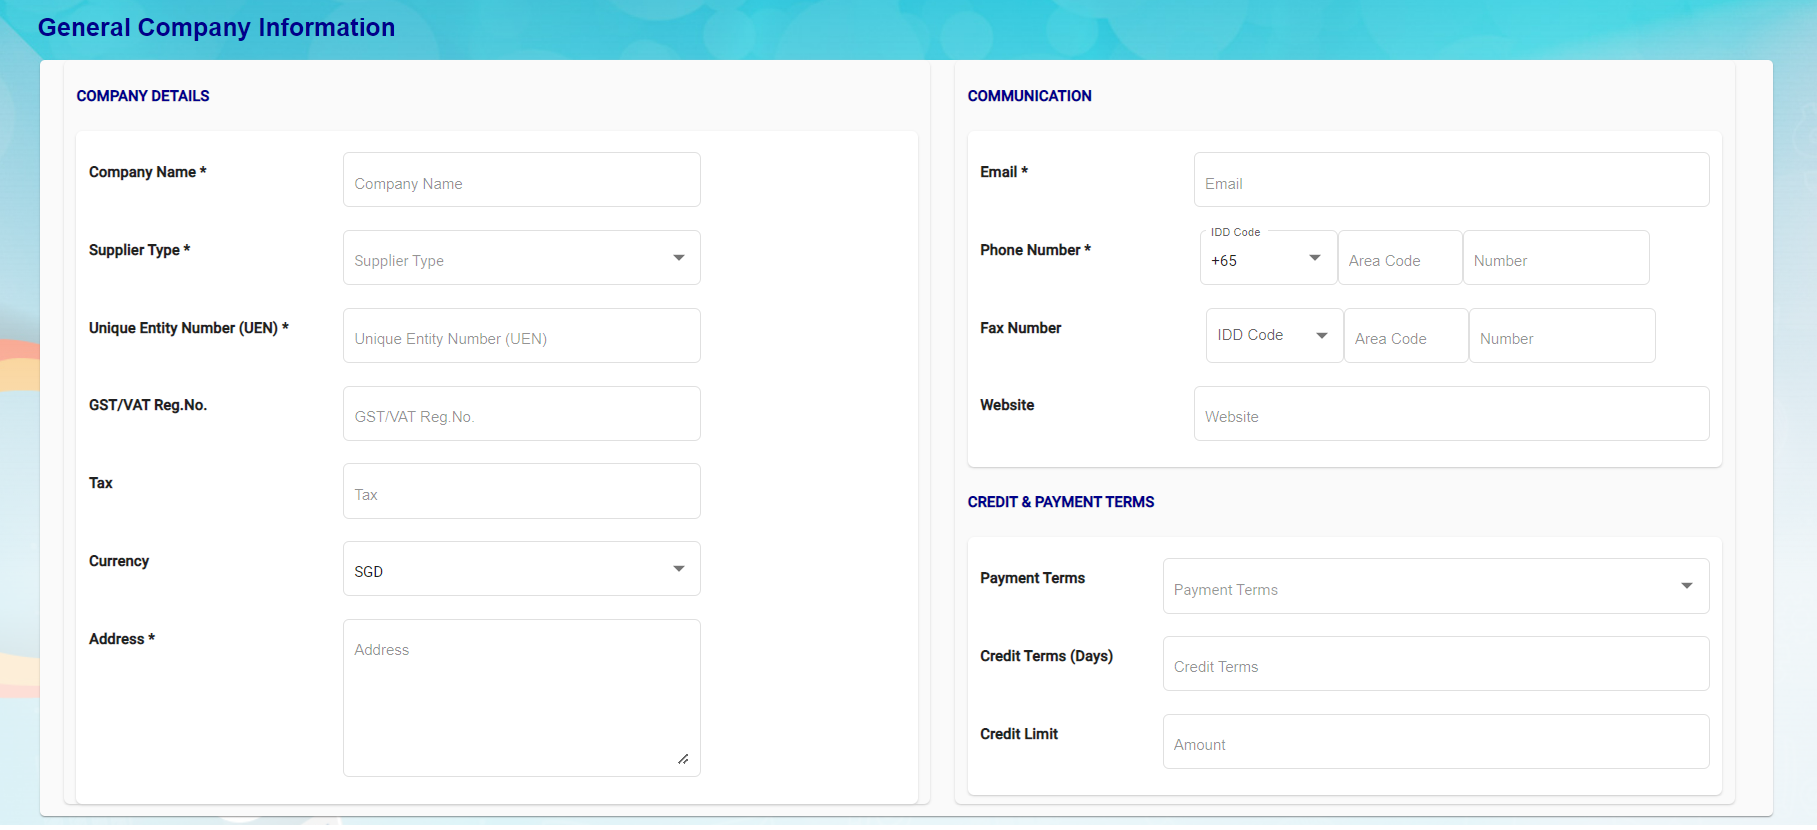
- General Company Information

Company Details
-
-
- In Company Name box, enter supplier company name.
- In Supplier Type box, select supplier type as local or overseas.
- In UEN box, enter company UEN number.
- In GST/VAT Reg No. box, enter GST/VAT registration number.
- In Tax box, enter Yes or No.
- In Currency box, select currency
- In Address box, enter company address.
-
Communication
-
-
- In Email box, enter company email address.
- In Phone Number, select IDD code and enter company phone number.
- In Fax Number, select IDD code and enter company fax number.
- In Website box, enter company website URL.
-
Credit & Payment Terms
-
-
- In Payment Terms box, select payment terms,
- In Credit Term box, select credit terms.
- In Credit Limit box, enter credit limit amount.
-
-
- Authorised Representative Information
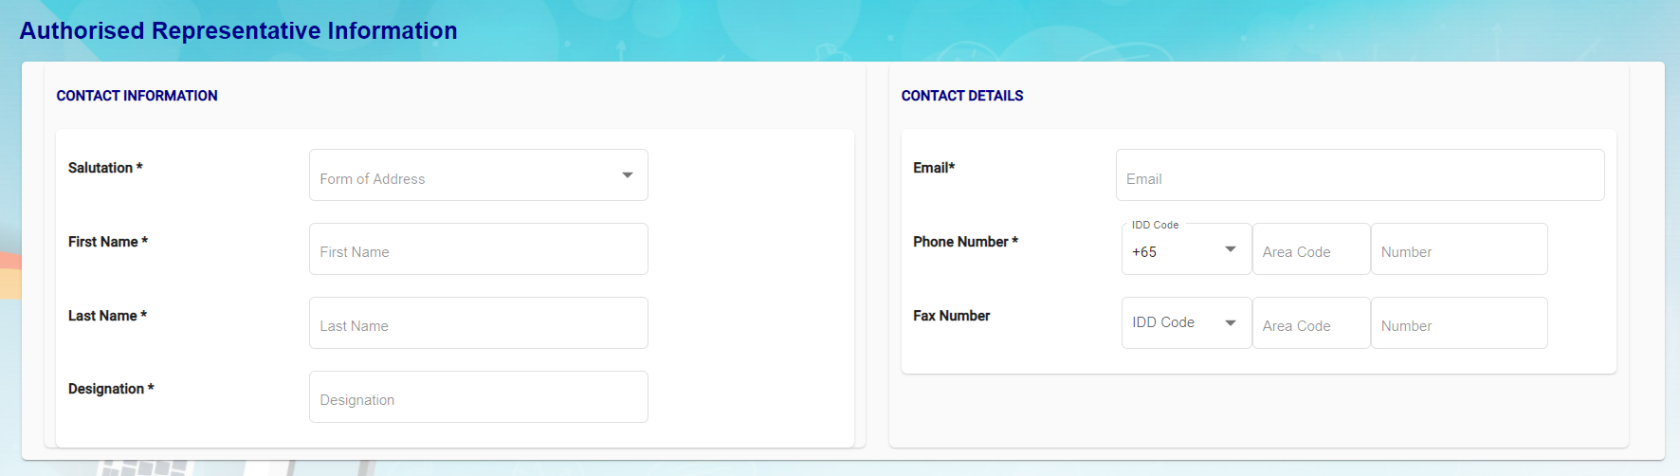
- In Salutation box, select relevant salutation.
- In First Name box, enter user first name.
- In Last Name box, enter user last name,
- In Designation box, enter user designation.
- In Email box, enter user email address,
- In Phone Number, select IDD code and enter user phone number.
- In Fax Number, select IDD code and enter user fax number.
- Authorised Representative Information
-
- Attachment-supplier user can upload required documents in attachment. Click "Select your file" and select files to upload:
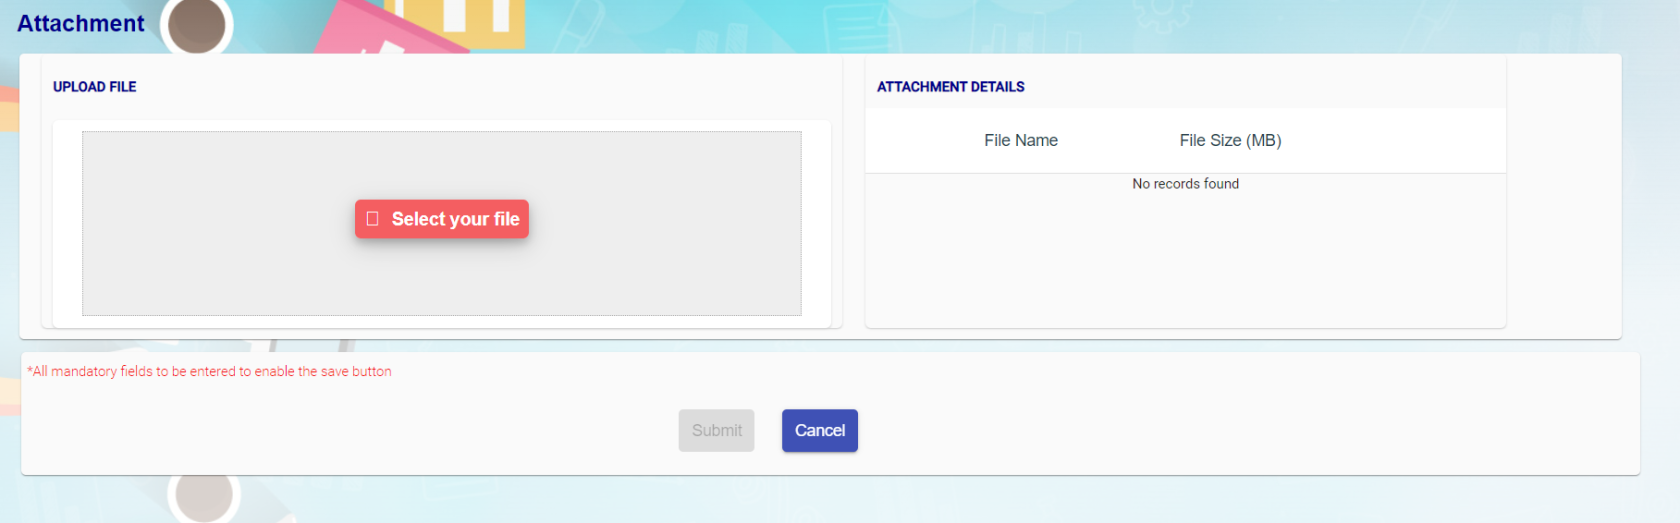
- Attachment-supplier user can upload required documents in attachment. Click "Select your file" and select files to upload:
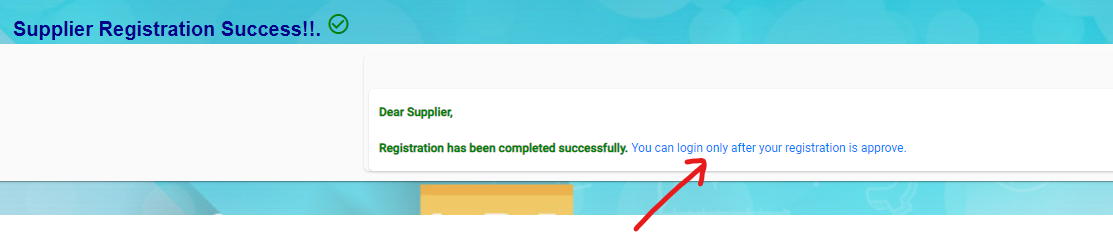
- Once all mandatory information are filled up, the submit button will be enabled. Click Submit, a registration success confirmation message will show as below.


Approving New Suppliers (Client)(Not Suppliers)
Once new suppliers registered in cuteOffice, client company need to approve the new supplier to allow suppliers appearing in procurement module.
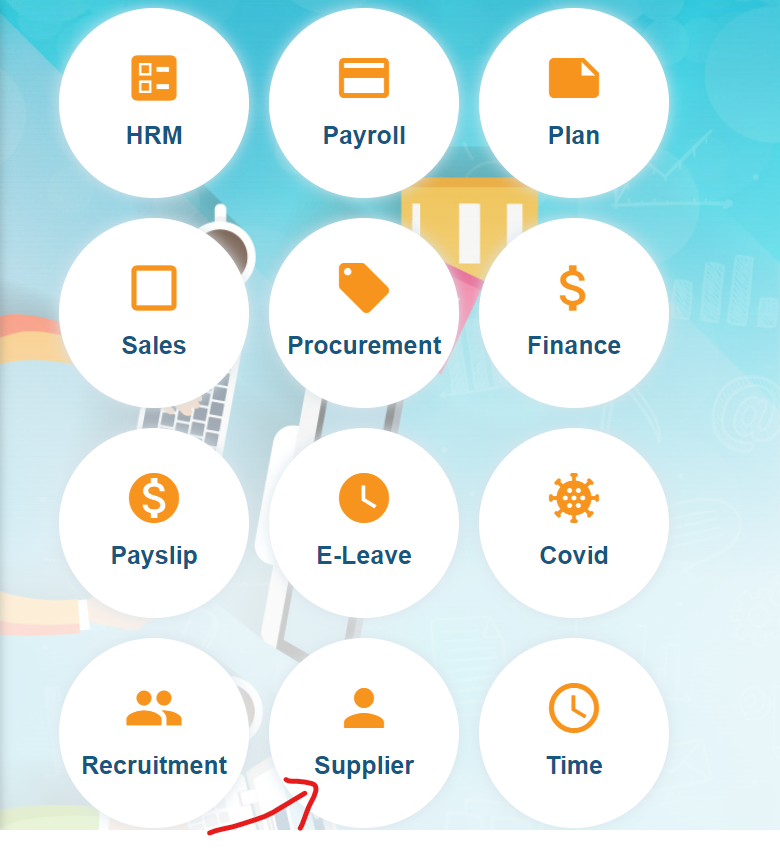
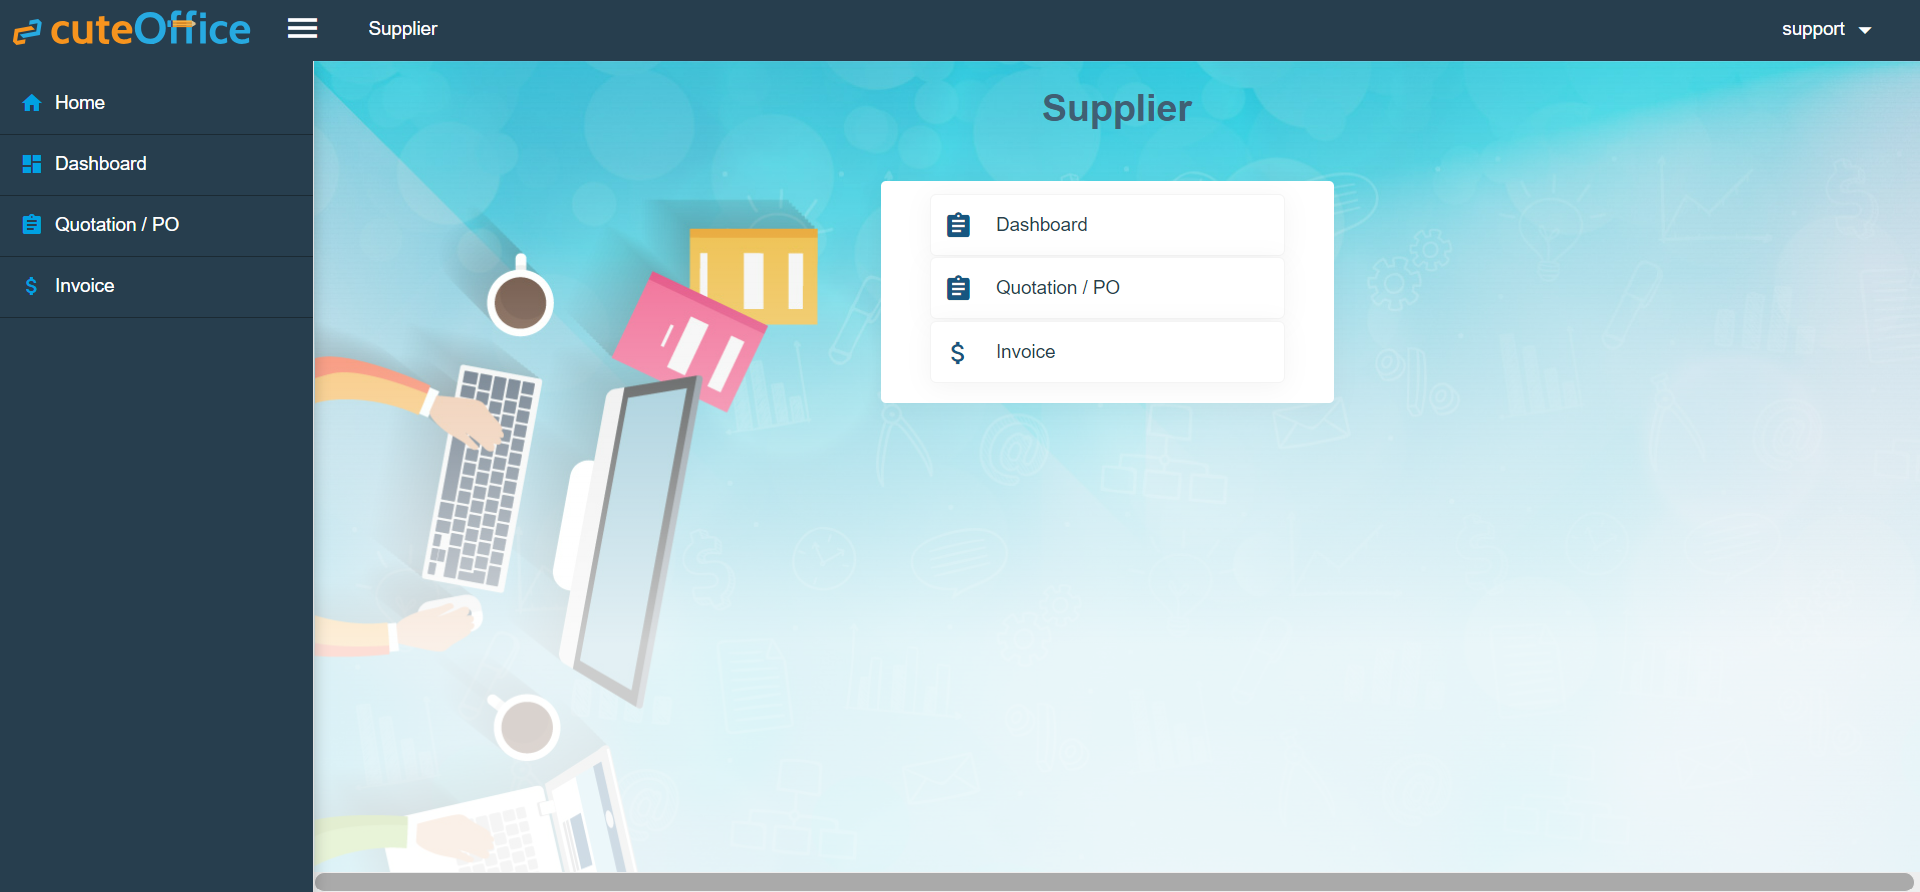
- Navigate to cuteOffice version 2, and click Supplier from the main page.
- Click
 Supplier Request, the new suppliers requests list page opens as below, all new registered suppliers will show status as "New Supplier".

-
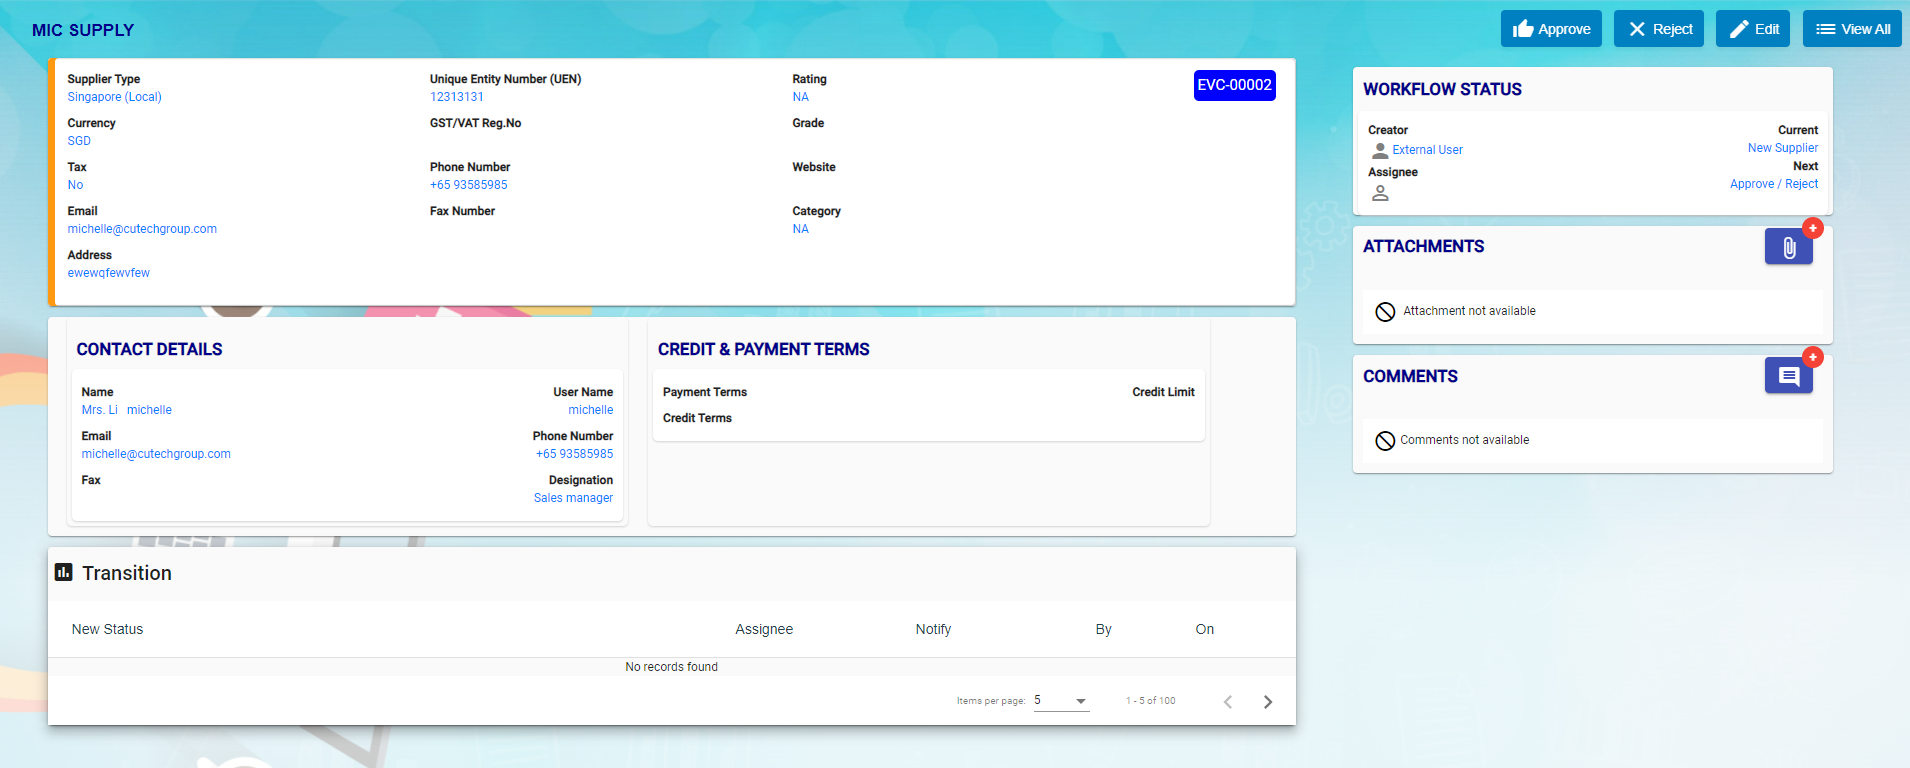
Click the key of the new supplier name to open new supplier review page,

-
To Approve supplier, click
 , the notification window opens,
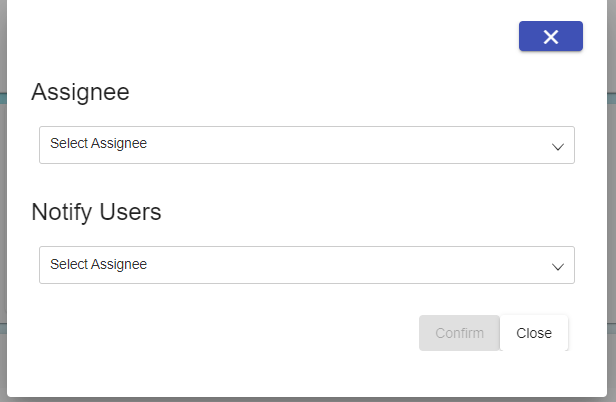
- Select respective users to receive supplier approval notifications, and click Confirm button to approve supplier. Or click Reject to reject new supplier. A notification will be sent to the respective user of the company.
- Once company approved new suppliers, the status of the supplier request will be changed to approved automatically in the supplier portal.


Supplier Login
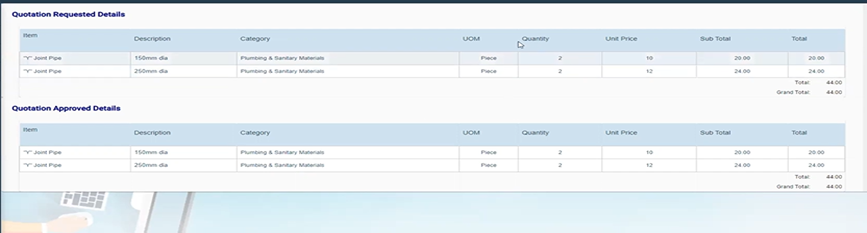
In supplier portal, suppliers can view Dashboard (Quotation Request vs Quotation Approved), Quotation /PO and Invoice menu. New quotations created in procurement module will be available in the supplier portal. Quotation number is the same as in RFQ.
Note: External Supplier will be available in the user list. External supplier will login to the supplier portal.

Supplier Management
Quotation management
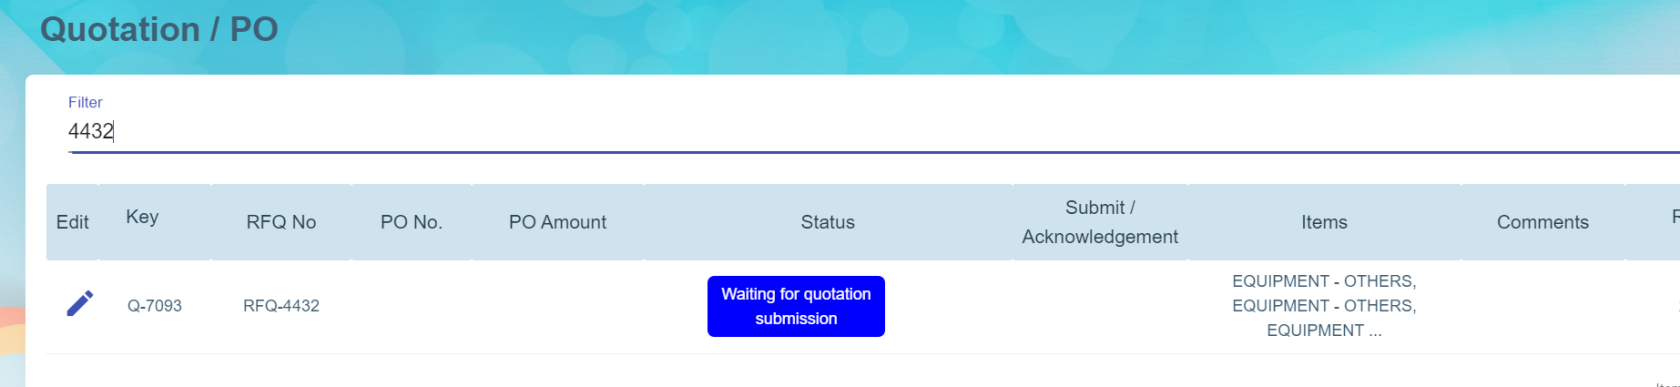
- Click Quotation/PO menu in Supplier portal.

- Click edit icon of the new quotation where status = Waiting for quotation submission, the new quotation opens as below for supplier to fill up details.
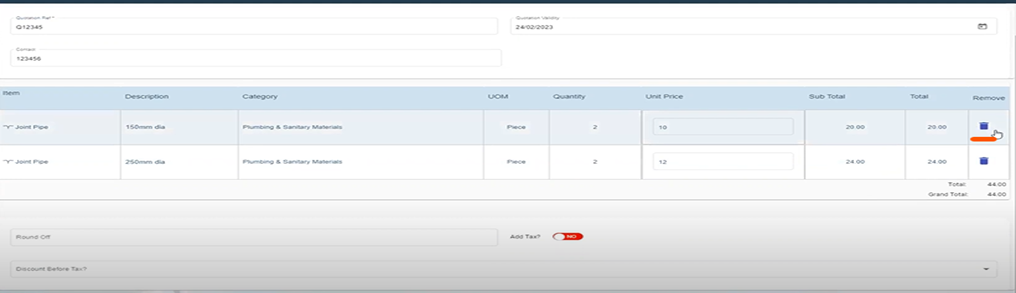
- Enter quotation reference number, validity date, contact number and enter unit price, add TAX and Discount (optional) if required. (Item can be delete from quotation from procurement module , if it is not applicable).
- Click save to save quotation details. Note: Suppliers can edit and modify the quotation until it gets submit.
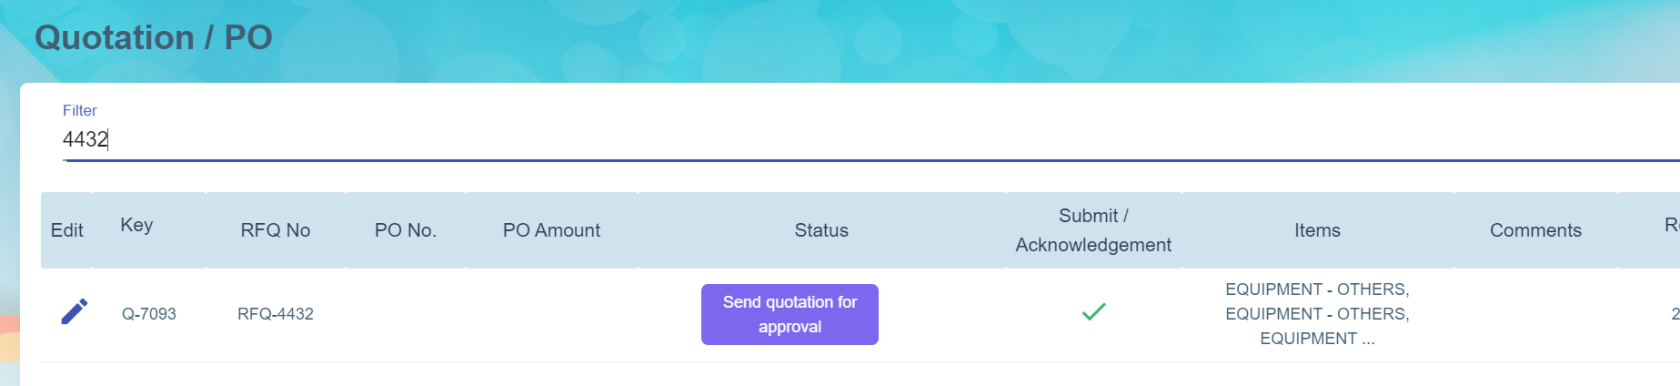
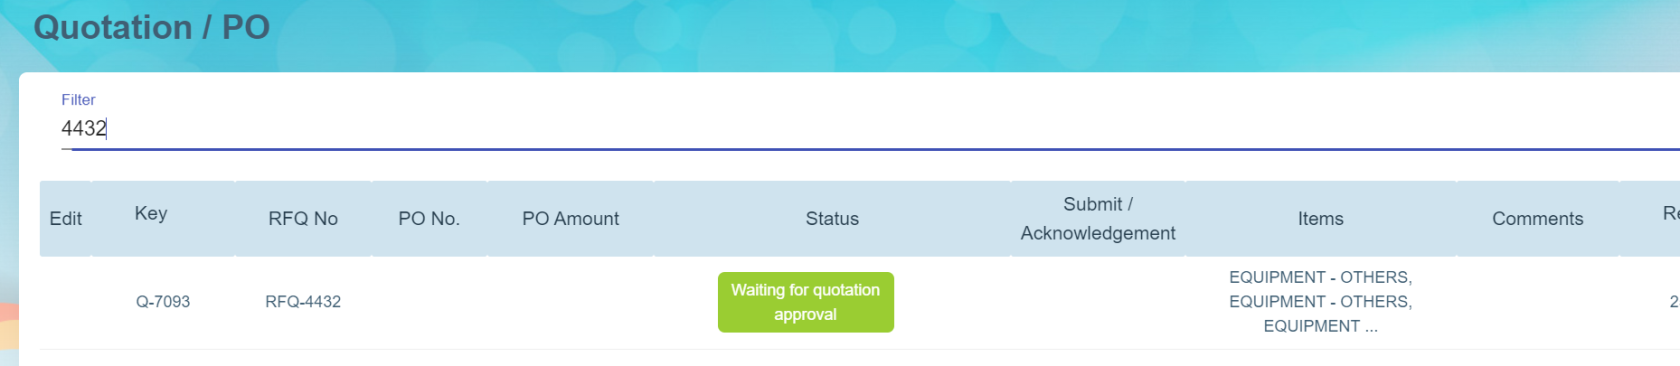
- Once suppliers confirmed the details entered are correct, click submit, the status of new quotation will be changed to Waiting for quotation approval.
- And in procurement module RFQ list, the status of relevant quotation table in the RFQ will automatically updated as quotation created (As Procurement module and supplier module are interlinked).

- Then company will be able to select and confirm quotation and proceed to create PO and send PO to relevant suppliers.


PO management
Once PO is sent to suppliers, supplier users can login to the supplier portal to manage relevant PO.
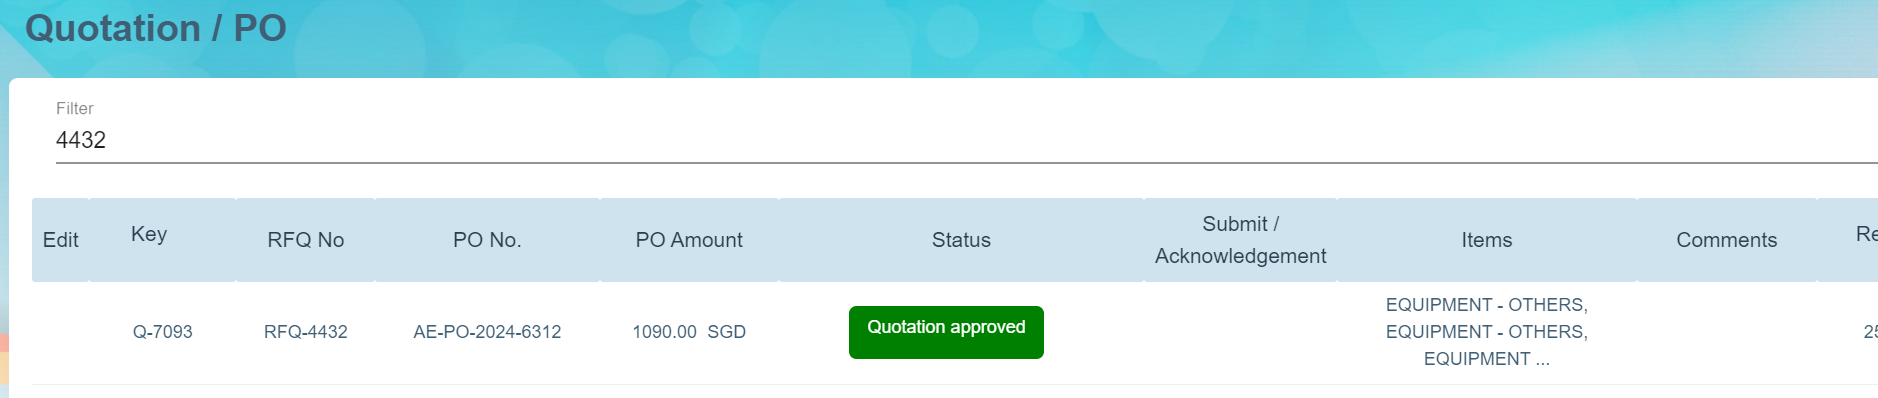
- Click Quotation/PO menu in Supplier portal. The status of PO will be "Quotation approved" in Supplier portal with the PO number.

- Supplier user shall click the Quotation key to open PO detail page,
- Suppliers can acknowledge PO (optional step). Supplier will submit invoice and delivery order.
- After client company received items against the PO, client company will add receiving entry details.
- Supplier will enter invoice details in supplier portal. Supplier can also enter Partial payment in the invoice amount.
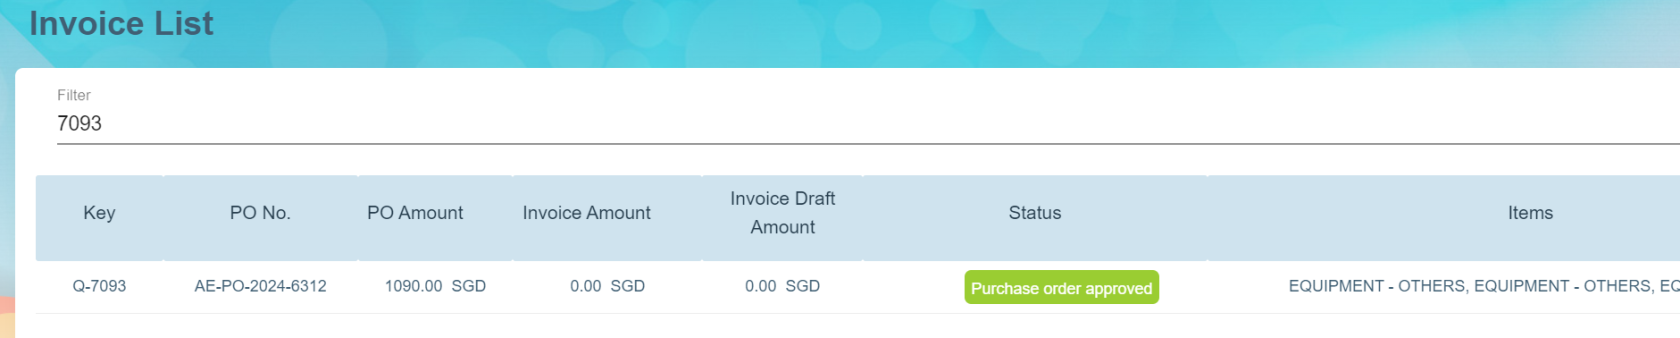
- Click on the quotation key i.e. Q-7093 in the Invoice List page and click Add Invoice button at the Invoice Page to add invoice.

-
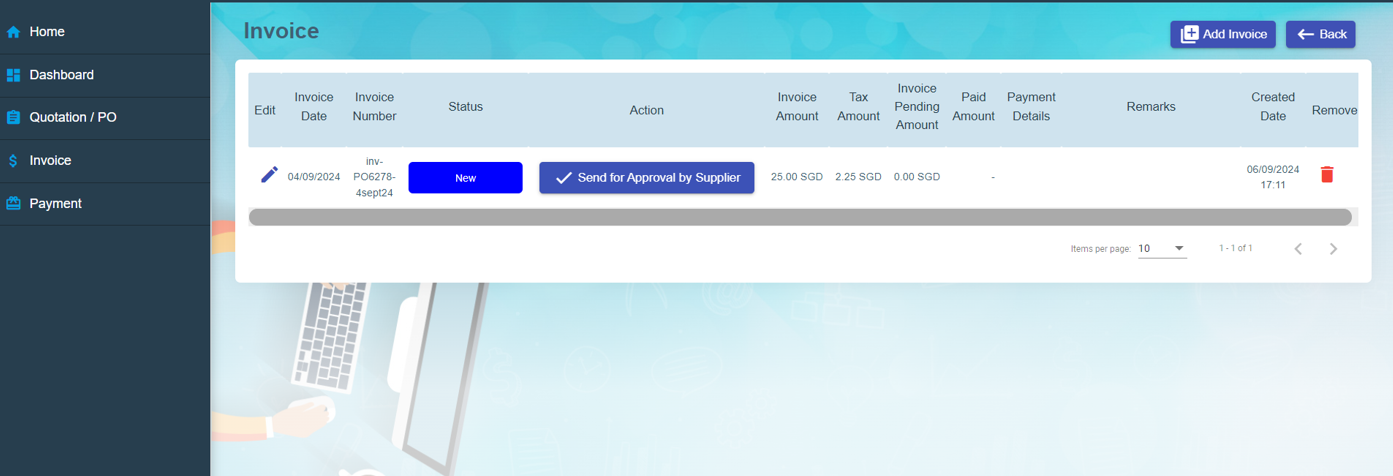
Based on the above selected key, system will show the list of item(s) of the quotation/PO approved record in the invoice details page where user can select which item to invoice. Supplier needs to enter the Invoice Date, Invoice Number and Remarks (optional) and it is compulsory to upload the invoice as attachment to this invoice details record.

-
Below sample shows the status = New when you save the invoice and the icon "Send for Approval by Supplier" in the Action column means that this invoice is still in draft mode.

Once invoice is final then you may click on the icon
 in the Action column to submit for the client’s approval with system prompting Yes or No to submit.
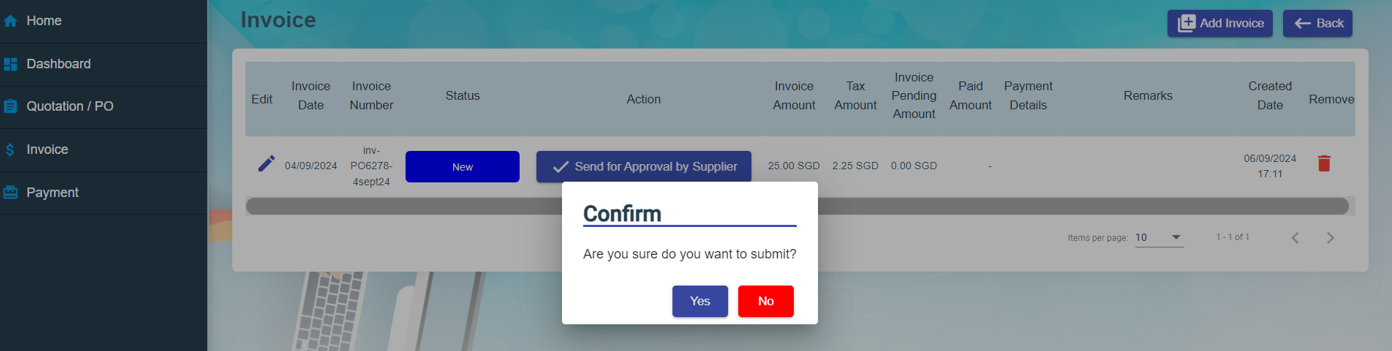
Once clicked Yes to confirm to submit, the status of the invoice will be changed to Submitted and icon is changed to
"Wating for Approval by Client" in the Action column (refer below screenshot) and this will reflect in the client’s procurement module that the invoice is final and can review to proceed to approve for payment if everything is in order.

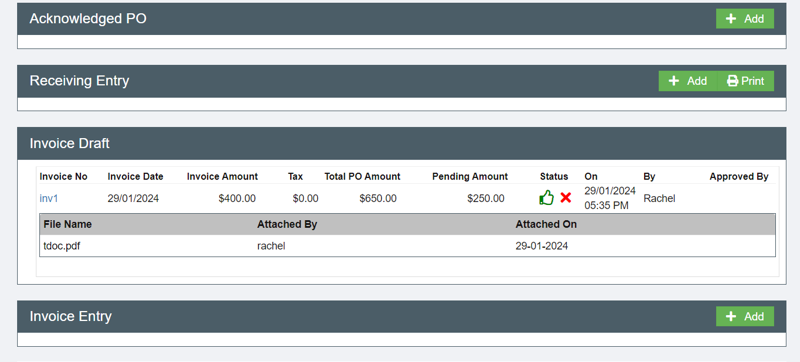
- The invoice data entered by suppliers in supplier portal where invoice status = Submitted, will be automatically synchronized to the invoice draft in client's procurement portal as shown in the below example.

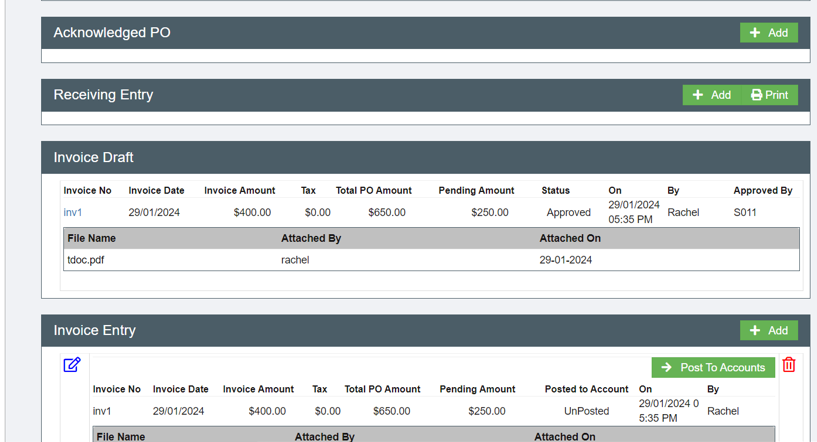
- If invoice details are all correct and approved by the client company, it will automatically load in Invoice Entry when client user clicks on the thumbs up icon at the Invoice Draft section to approve the invoice.

Based on the client company configuration, if there is a link between the Procurement module and the Finance module, the client user can click on Post to Accounts button at the Invoice Entry to integrate this invoice to the Finance module for payment. - Final stage is payment entry. Payment amount and pending invoice amount are entered against either invoice reference number or purchase order key as shown in the below example.

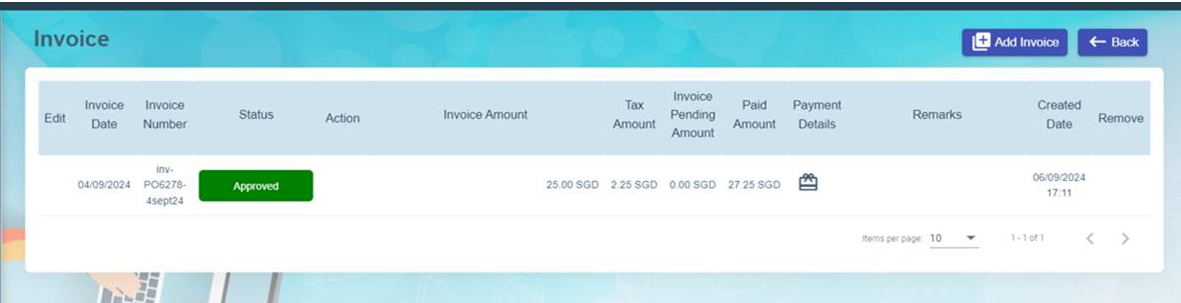
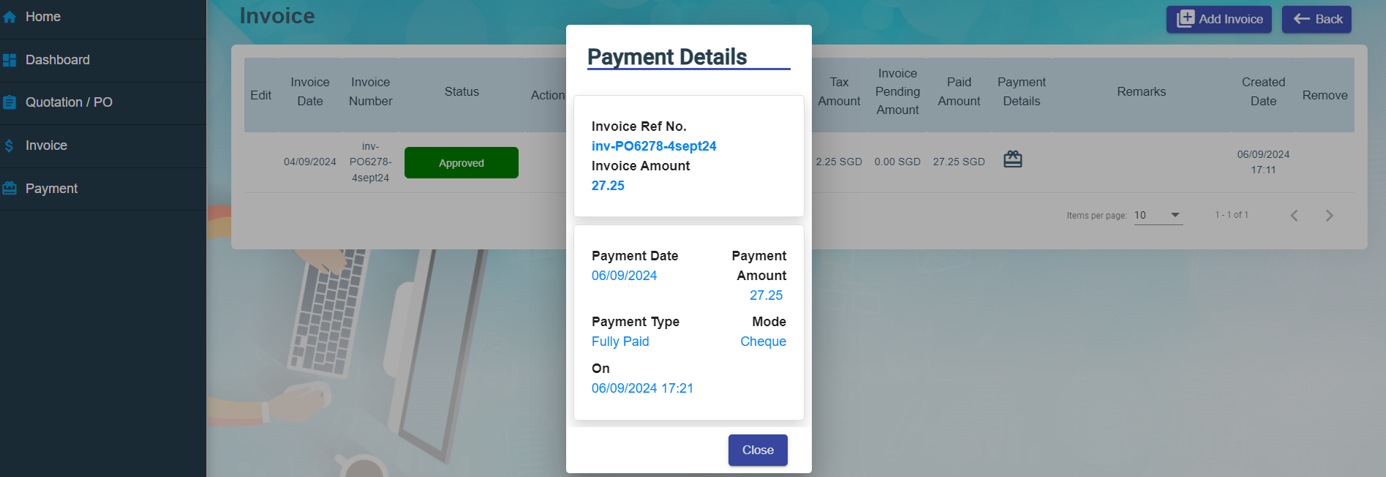
- Once invoice is approved by client and payment is generated for the invoice in the client finance module, the invoice in the supplier portal will be shown as Approved status and there will be an icon in the Payment Details column and system will show the payment details in Payment Details pop up window.

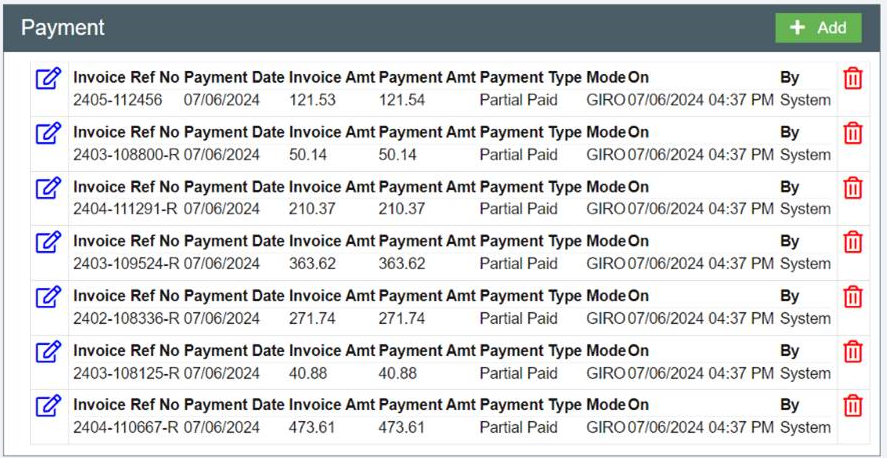
To view all payments in the supplier portal, click on the left hand side menu "Payment" and system will display all payments as shown in the below screenshot.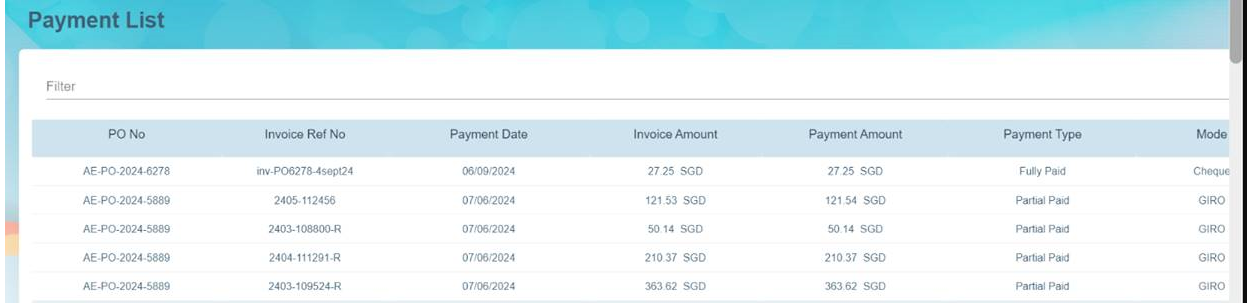


No Comments