
Sales
Sales module in cuteOffice allows sales person to create & modify sale enquiry, and prepare sales quotation to customers against sale enquiry.
Enquiry
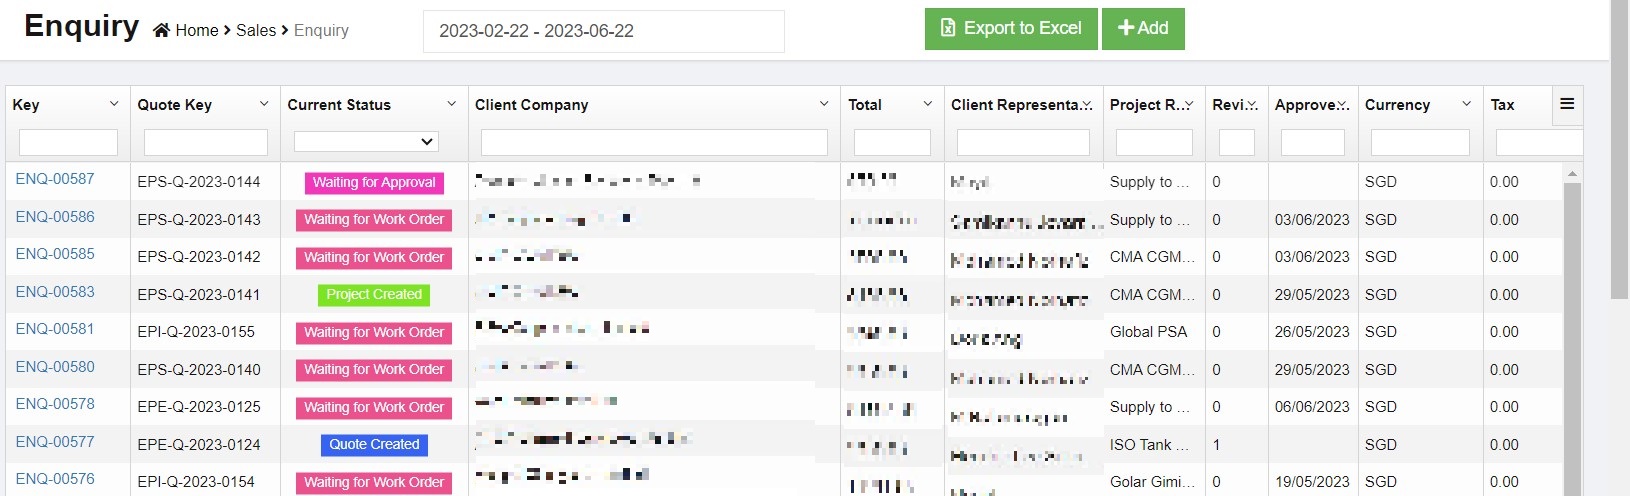
Click Enquiry submenu in Sales menu, the enquiry list page opens as below, the current status column provides color codes for different status type for better visualization.
Status of enquiry legendary:
- Save Draft-when click Create Quote, after enter details in the quotation, use can choose to save as draft by clicking
 icon in the quotation estimation page. The quotation status will change to "Save Draft"
- Quote Created-when click Create Quote, after enter details in the quotation, if user click save, the quotation status will change to "Quote Created".
- Waiting for Approval-after quotation was sent for approval, the enquiry status will change to "Waiting for Approval"
- Approved-after approving authorities approves the quotation, the enquiry status will change to "Approved"
- Waiting for Work Order-after quotation was sent to client, the enquiry status will change to " Waiting for Work Order"
- Project Created-once client replied and approves quotation, user can enter project and the status of enquiry will change to "Project Created"
- Closed Enquiry-when click cancel option in enquiry, the status will change to "Closed Enquiry"
Add New Sales Enquiry
To add a new sales enquiry,
-
Click
 in the up right corner of sales enquiry list page or
  icon in the enquiry menu, the new sales enquiry page opens as below,
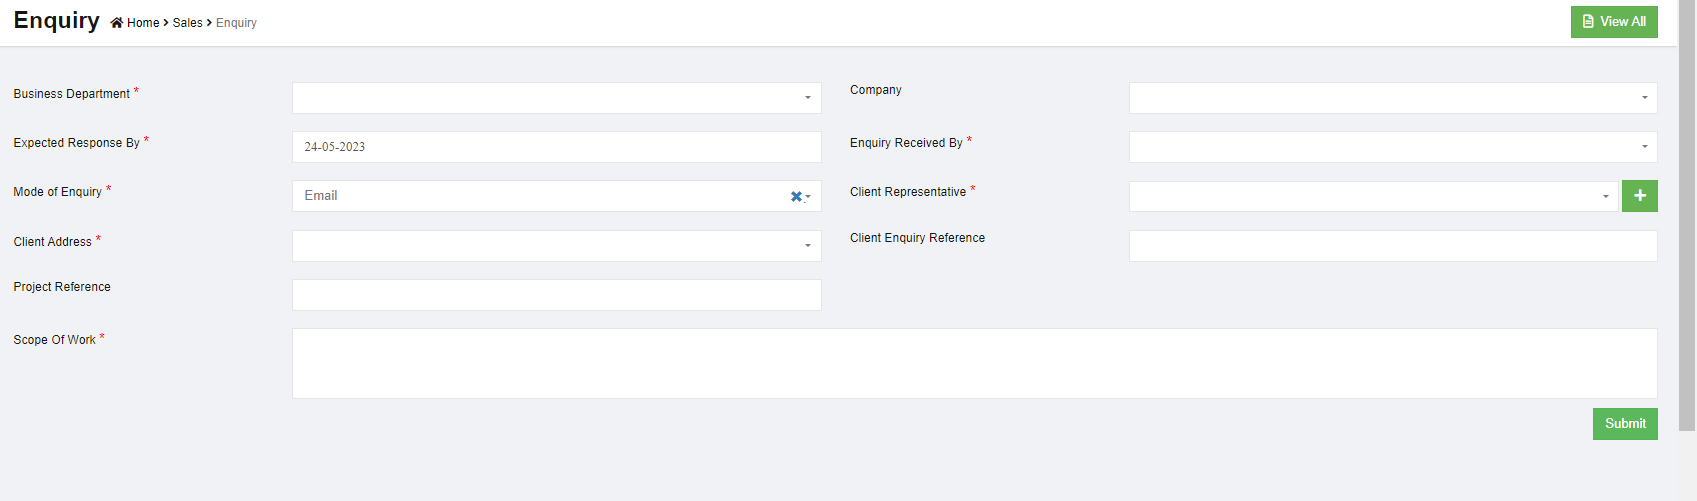
- In Business Department box, click to select relevant department name (Note: only departments marked as cost center will be show in the list of department. This can be configured in Admin-company-department setting page).
- In Company box, click to select relevant company name.
- In Expected Response By box, click to select a response by date from calendar.
- In Enquiry Received By box, click to select employee ID& name.
- In Mode of Enquiry box, click to select mode from list of email/fax, marketing, personal visit, phone. Note: the list of mode of enquiry can be customized in Admin-option.
- In Client Representative box, select contact name if available in the drop down list, or click
 to add a new contact. Note: system will show all existing enquires received from the selected client representative for reference or further action such as create quotation or clone enquiry.
 - In Client Address box, once client contact is selected, the client address will populate address data from the contact details.
- In Client Enquiry Reference box, enter enquiry reference if any.
- In Project Reference box, enter project reference if any.
- In Scope of Work box, enter scope of work from the enquiry.
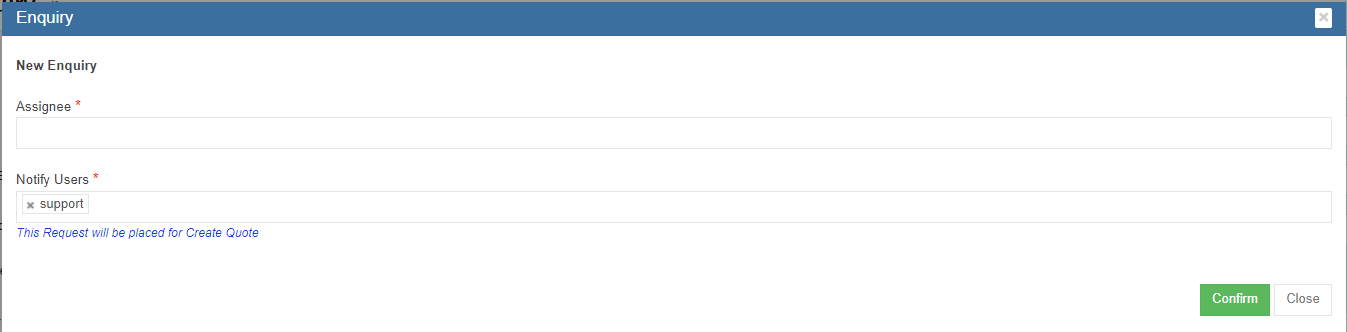
- Click Submit, a notification window will pop up,

- Select Assignee and Notify Users, then click Confirm to create a new sales enquiry.


Create Quotation
After an enquiry is submitted, user can proceed to create quotation. Click enquiry key to open enquiry,
- Click
 in the enquiry detail page,

- The quotation estimation detail page opens as below,
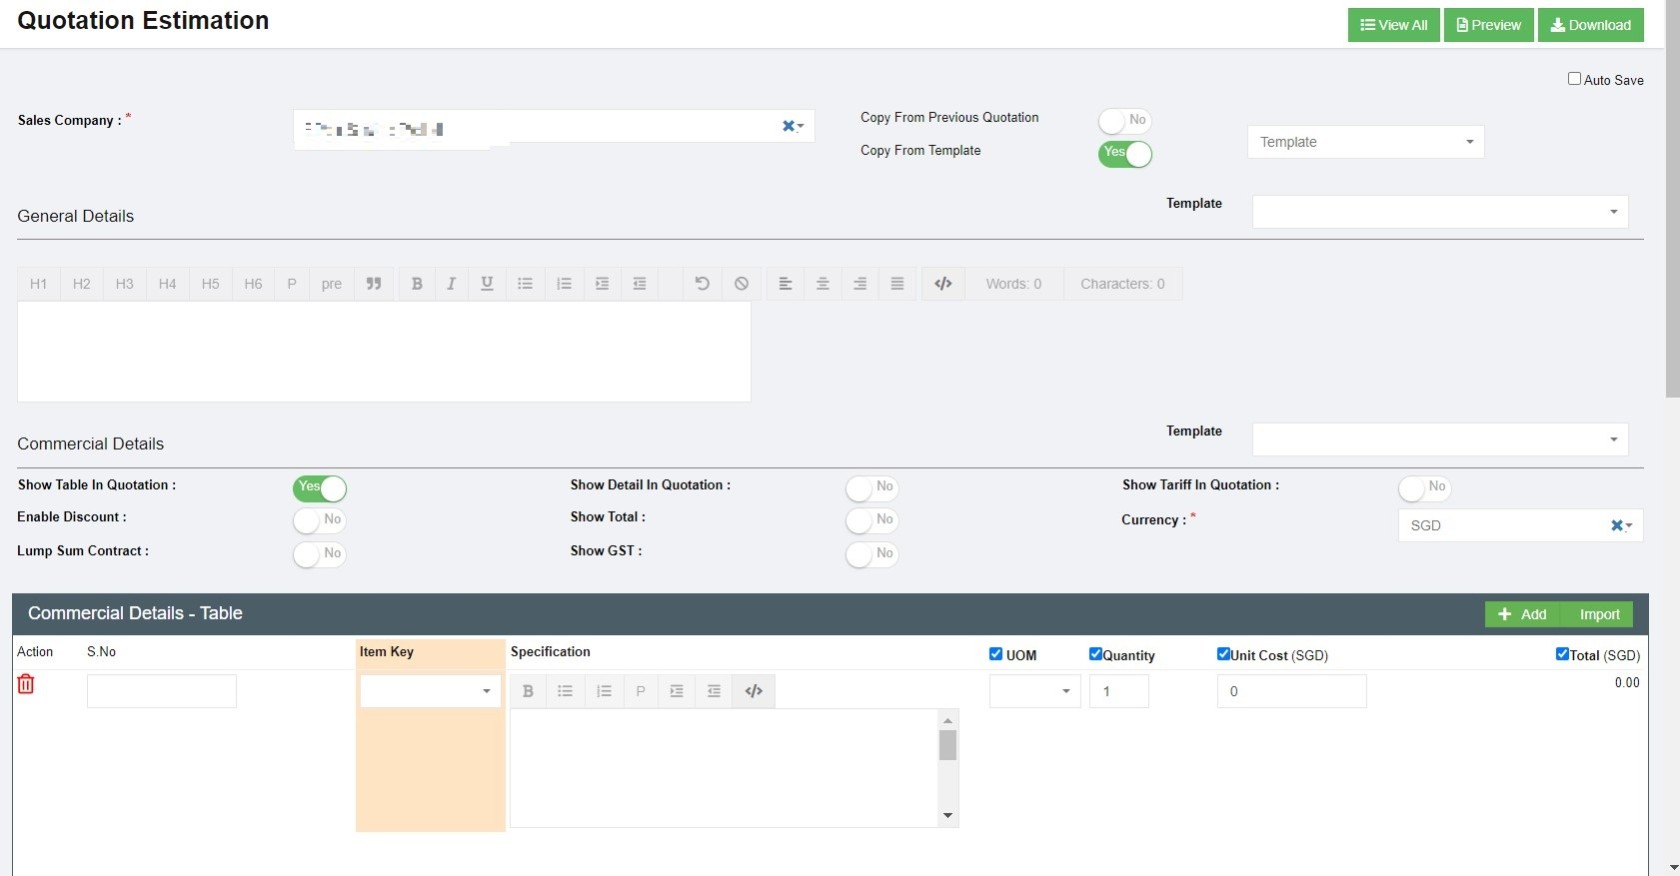
- In sales company section, the details will be the sales company entered in enquiry.
- In terms of quotation templates, user can copy from previous quotation or copy from templates.
- To copy from previous quotation, enable 1 to Yes, and select the relevant previous quotation key/name, the previous quotation details will load, user can edit or update details where needed.

- To copy from template, enable the "Copy From Template" to Yes, and select template name from the template list.
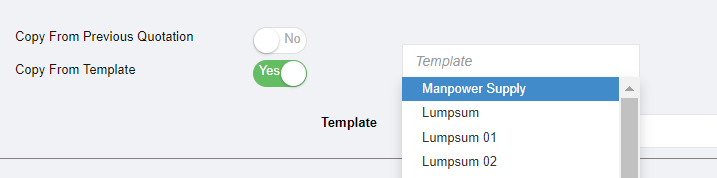
- To copy from previous quotation, enable 1 to Yes, and select the relevant previous quotation key/name, the previous quotation details will load, user can edit or update details where needed.
-
In General Details section, the details will be automatically filled up from template if user choose to use template or copied from previous quotation. Or else, user can key in any details when needed.
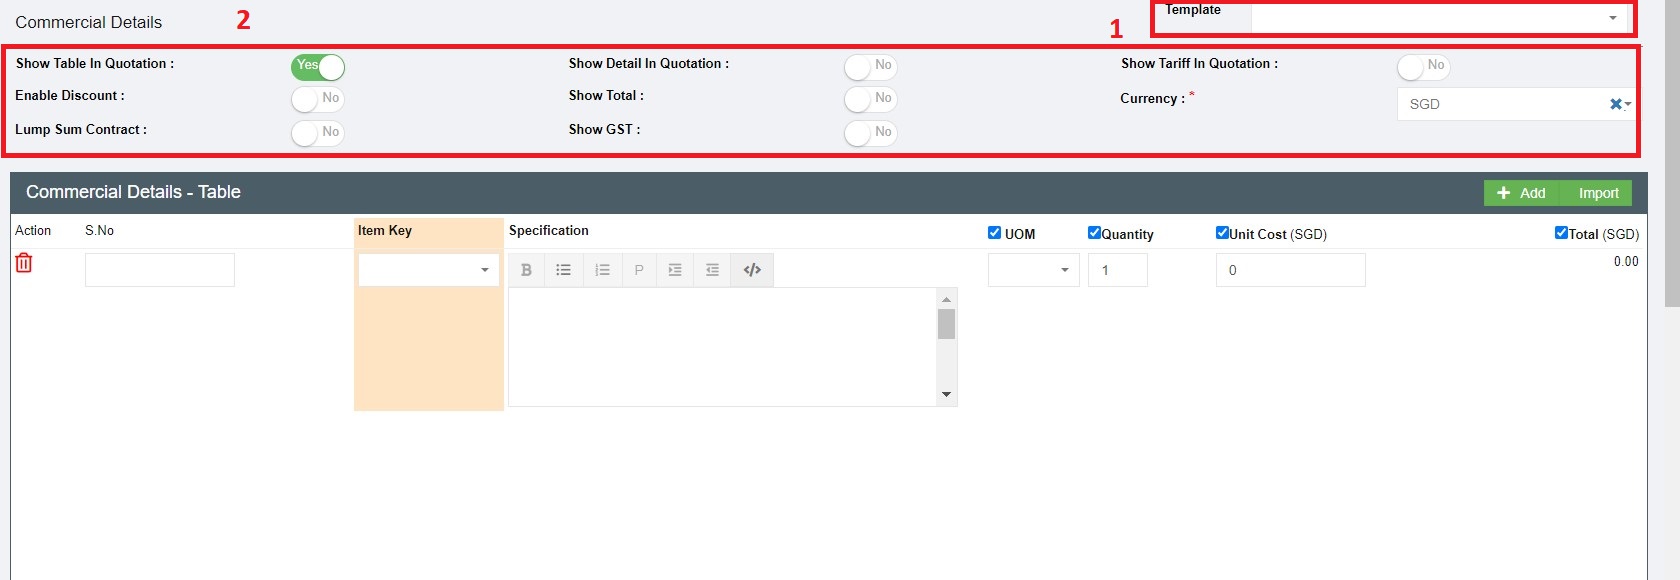
- In Commercial Details section,,
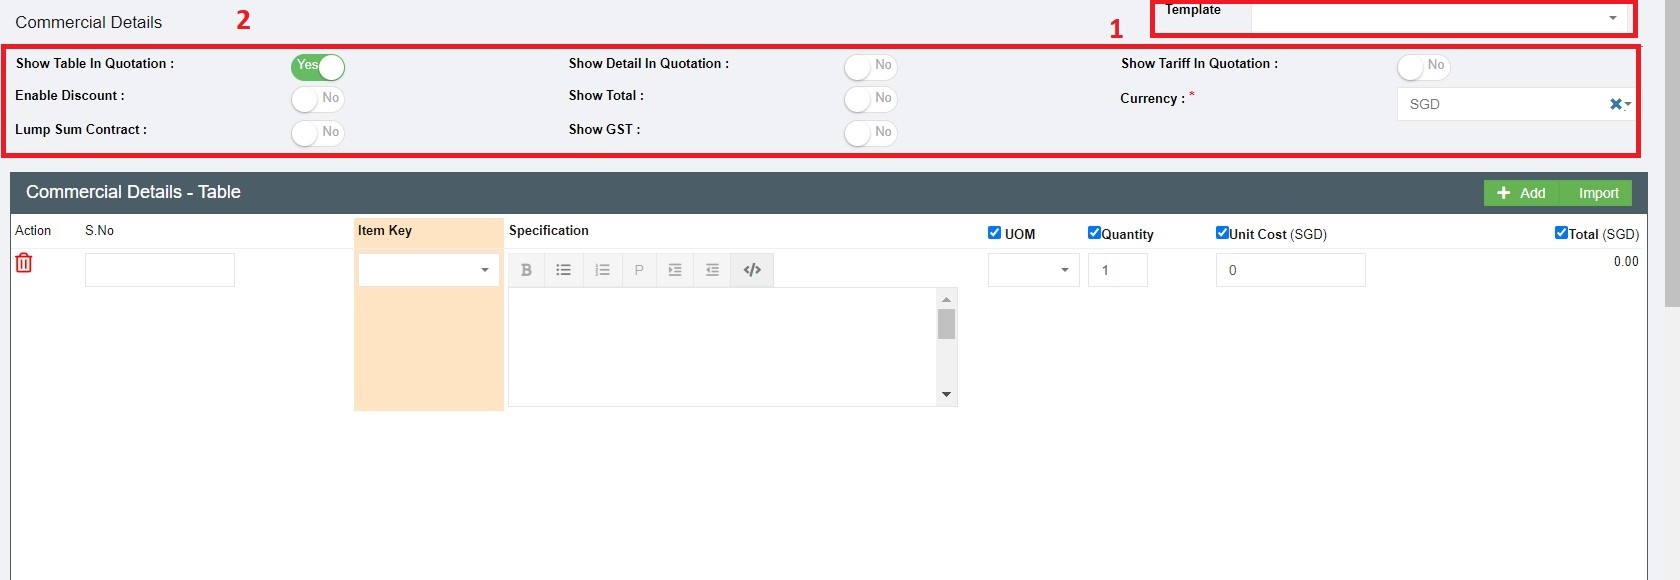
- User can choose from commercial detail templates in area 1 that are predefined by user.
- Or customize commercial details table using the flag options in area 2 in above screenshot.
- Select items and enter other details such as quantity etc. (Once selected Item key, the specifications and UOM will load from item master list); click
 Add item icon in the upper right corner of Commercial Details table to add more items.
- In Terms and Condition section, user can enter details or select template from the template field.
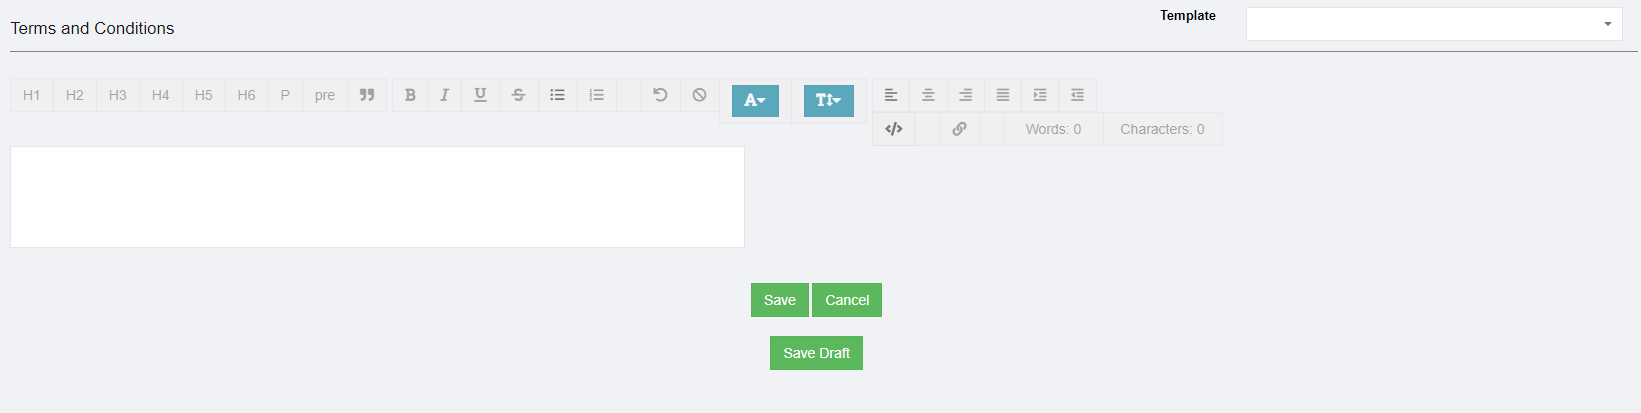
- Once quotation details are filled up, user can click Save/Cancel or Save draft as needed.


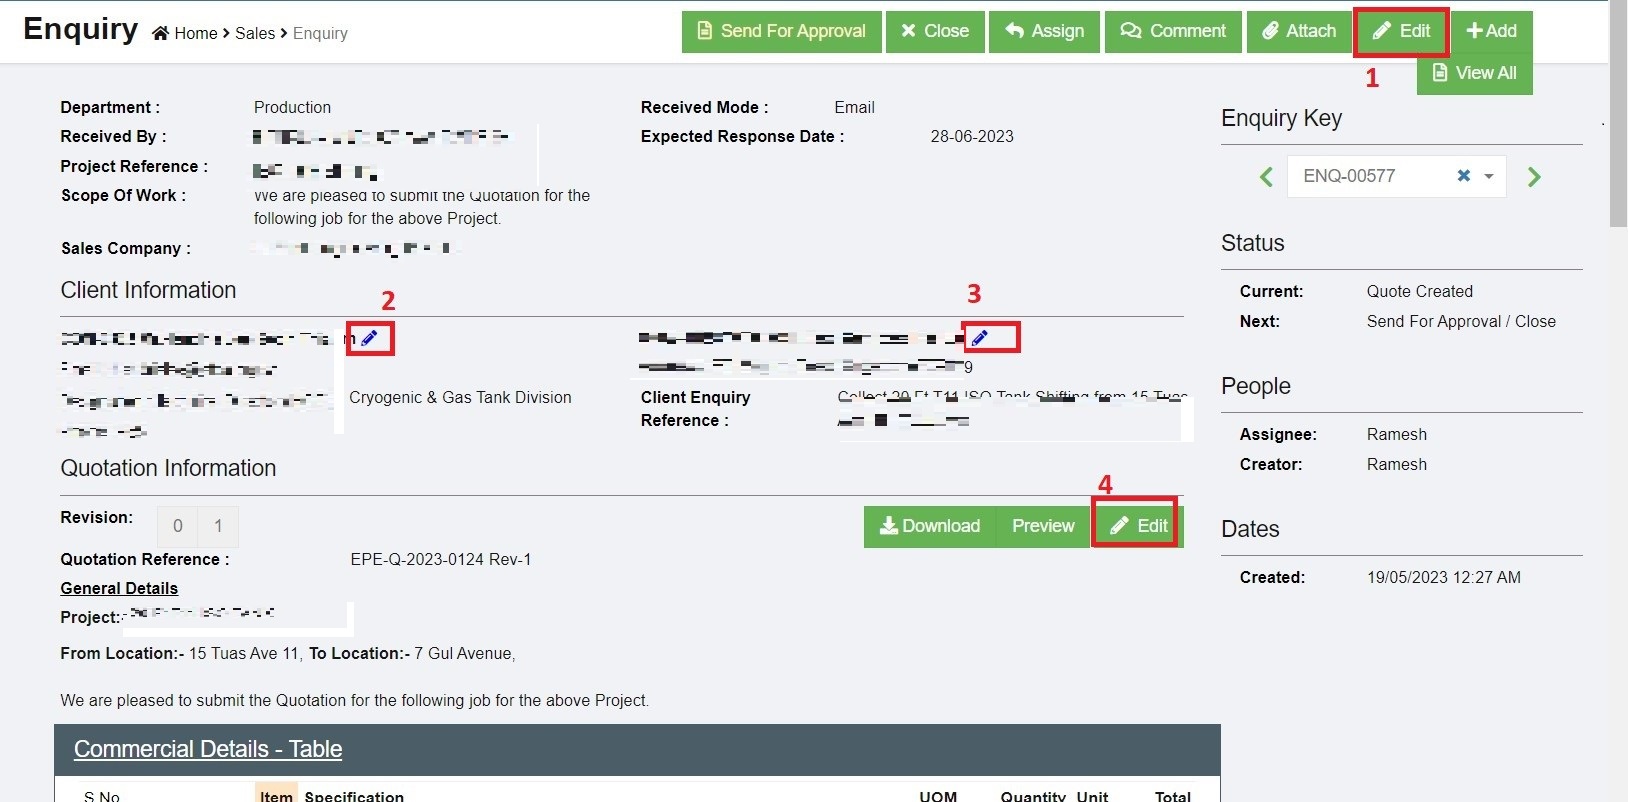
Edit Sales Enquiry When Needed
Edit of quotation information is allowed before the enquiry is approved. Once enquiry is approved, user can not edit quotation information and can only edit client information (contact /address).
To edit enquiry,
- Click the key of the enquiry to open detail page,

- Click the edit icon in respective area to edit details. (Note: once quotation is sent for approval, the general enquiry information and quotation information is not allow to edit and edit option will be removed.),
- Click edit icon in area 1 to edit enquiry general details
- Click edit icon in area 2 & 3 to edit client information
- Click edit icon in area 4 to edit quotation information.
- User can preview or download quotations using below options in quotation information section.


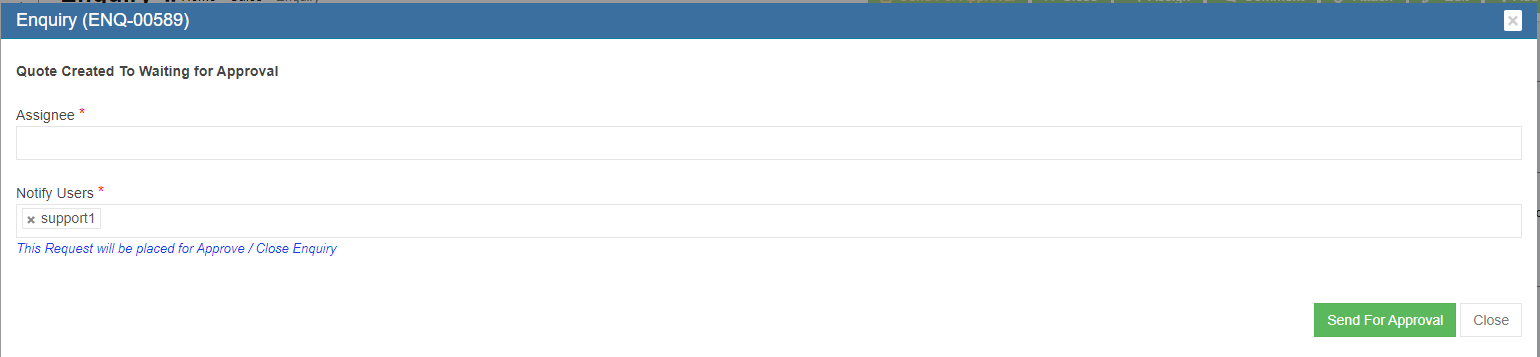
Approve Quotation
- once quotation details are reviewed and ready for approval, user can click the
 icon (the action needed icons will blink in yellow) and a notification window will open as below,
- Select Assignee and Notify users, then click Send for Approval. System will send out waiting for approval notifications to relevant users.
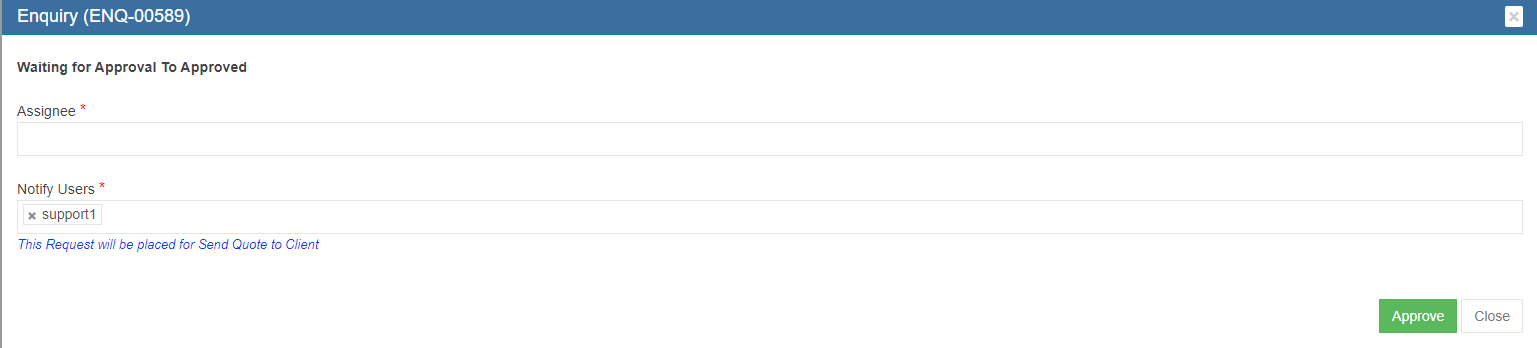
- Approve option will be provided at the top right page for users who have the access right to approve quotations.

- Other useful options :
-
 -if user click this icon, a notification of closing enquiry will be prompt and the enquiry will be closed upon confirmation, and the status will change to "Closed Enquiry".
 -
 -user can click this icon to update assignee.
 -
 -user can click this icon to add comment about the enquiry to specific users
 -
 -user can click this icon to attach relevant documents
 -
 -click this icon, system will open a new enquiry page.
 -
 -click this icon, page will be redirected to sales enquiry list page.
-
- Other useful options :
- To approve a quotation, click the approve icon, and a notification window will open as below

- Select Assignee and Notify users, then click Approve. System will send out approved notifications to relevant users.


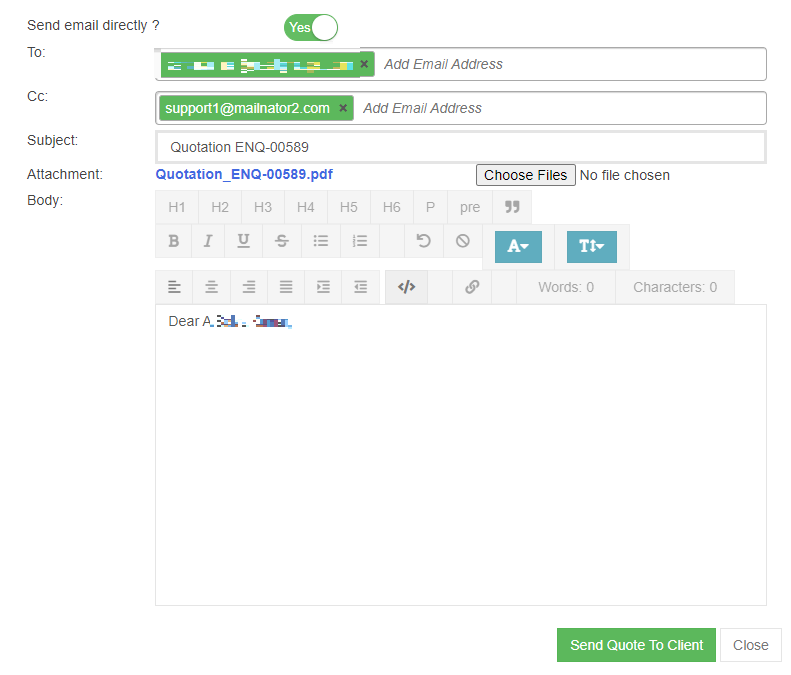
Send Quotation to Client
After quotation is approved. Sales users can send approved quotation to client. And the Send Quote To Client icon will blink for action. Click , below window opens, and there are two ways to send quotation.
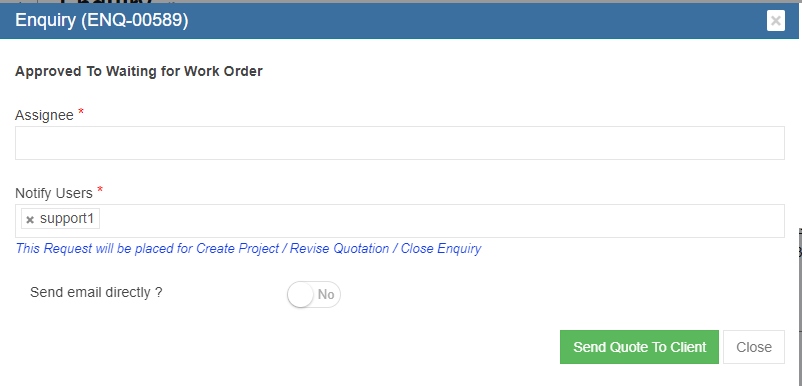
- Send email directly from cuteOffice system: click to enable "Send email directly?" to Yes, and below emailing window opens. User shall fill up all required information and click Send Quote to Client at the end.

- Print Quotation and email as attachment to suppliers: enable the "Send email directly?" to NO, then click Send Quote to Client so system will update quotation status. The page will be redirected to enquiry detail page, user can click download icon in quotation information section to download as pdf, and then use sales email to send to suppliers.
Settings to upload letter head for Quotation
- Click Admin
- Click company menu
- Edit company
- Click Logo Upload
- Choose Letter Pad in the image type
- Click choose file and upload the letter pad
- Click save to save the file
- Click Settings tab
- Click add
- Enter "enquiryQuoteFormat" in the name
- Enter value as "format12", "format13" etc., based on the client request.

- Click save to save the data
- Click add to enter header size "salesHeaderSize" for adjusting the header size
- Enter value based on adjustment in the report
- Click add to enter footer size "salesFooterSize" for adjusting the footer size
- Enter value based on adjustment in the report
Note : If client gave letter head in word doc, use the below converter tool to convert into png or jpeg image type file. https://online2pdf.com/convert-word-to-png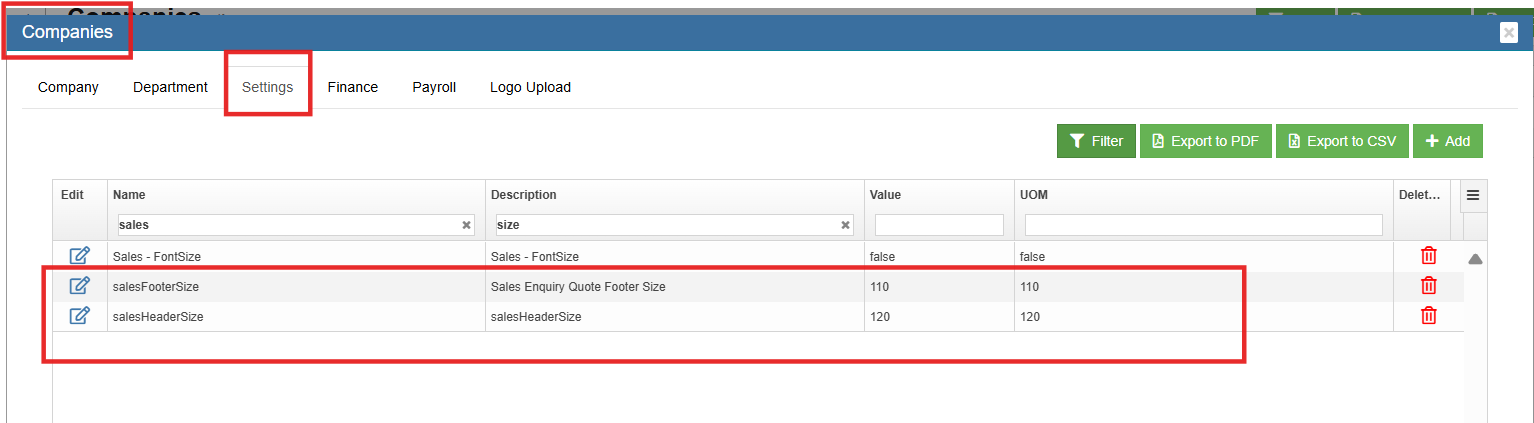


Create Project
Once client agreed and confirmed quotation, user can create project against the enquiry. And the "Project Created" status will mark the completion of sales enquiry.
To create project, click![]() , the project creation window opens,
, the project creation window opens,
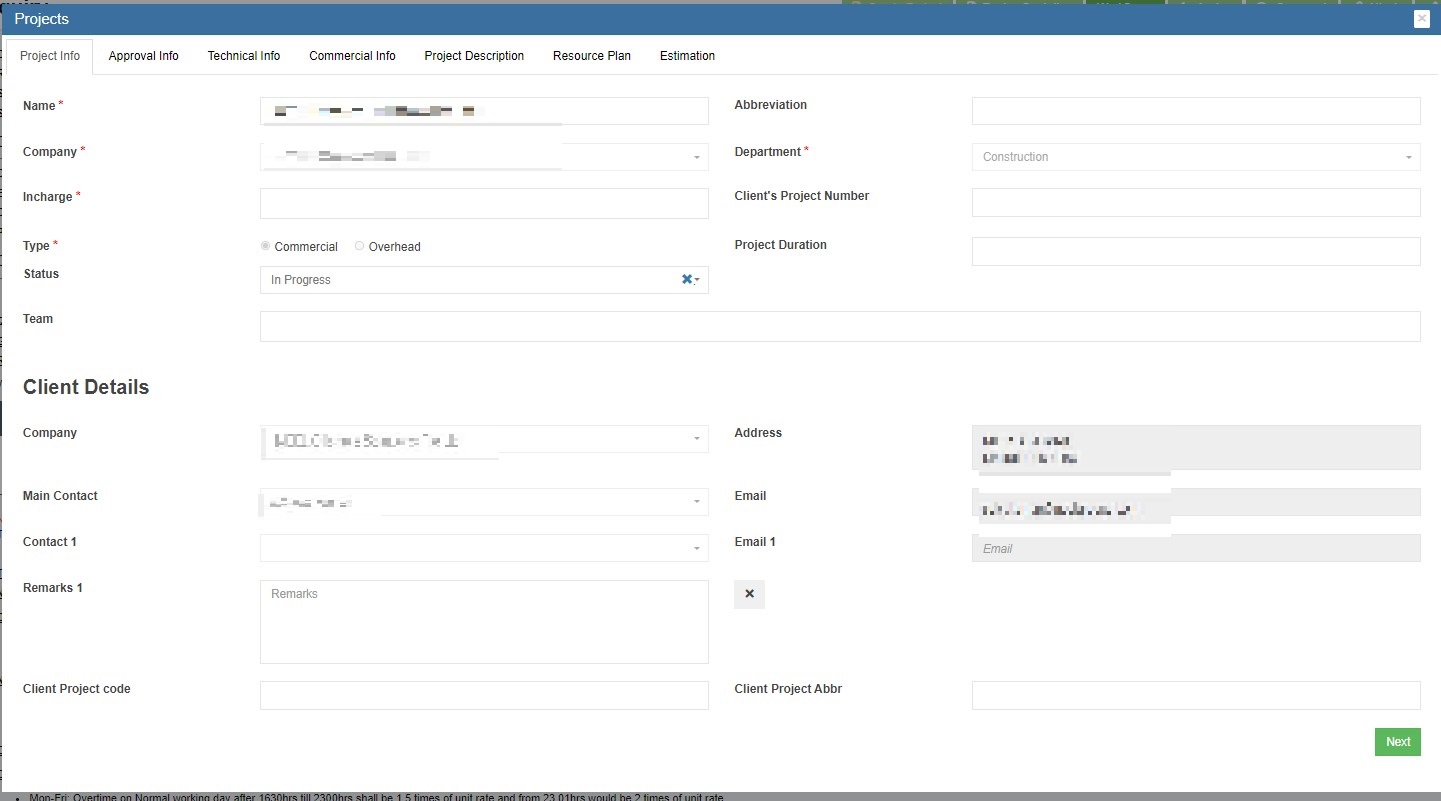
Project Info Tab
- In Name box, enter project name.
- In Abbreviation box, enter project name abbreviation.
- In Company box, select company name.
- In Department box, select department name.
- In Incharge box, select person in charge.
- In Client's Project Number box, enter client side project number if available.
- In Type box, click commercial or overhead to indicate project type.
- In Project Duration box, click to select project start and end date from calendar.
- In Status box, click to select status as In Progress/Closed/Terminated.
- In Team box, enter team information.
- Click Next to save project info and open Approval Info tab.
Approval Info Tab
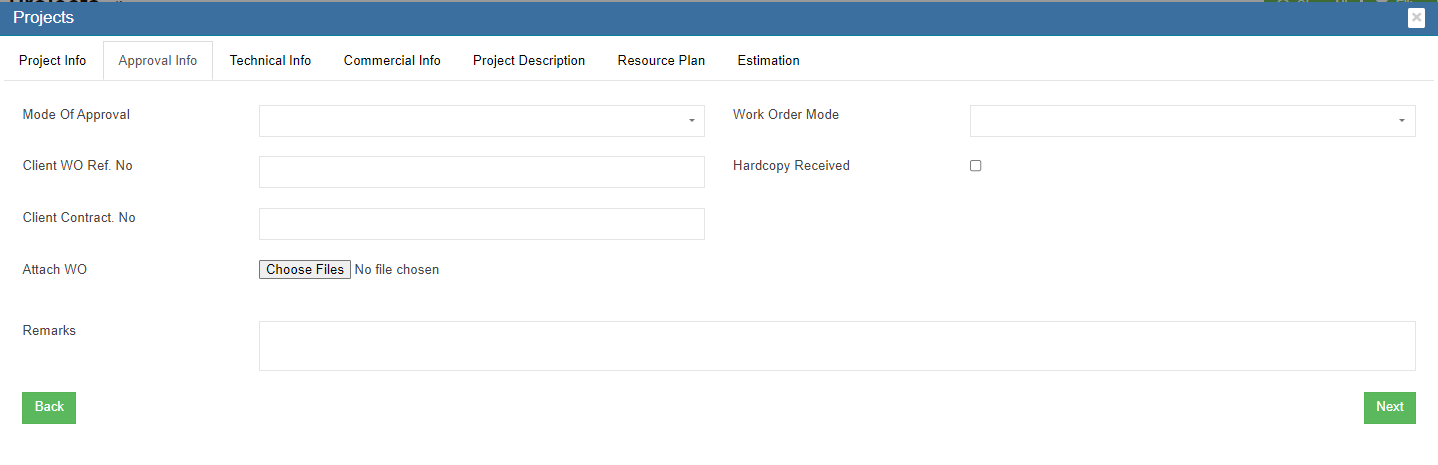
- In Mode of Approval box, click to select approval mode as Email/Hardcopy/Phone.
- In Work Order Mode box, click to select work order mode as single or multiple.
- In Client WO Ref No box, enter client work order reference number.
- In Hardcopy Received box, tick to indicate received approval hardcopy document.
- Client Contract No box, enter client contract number.
- In Attach WO area, click
 to choose file to upload.
 - In Remarks box, enter remarks if any.
- Click Next to save approval info and open Technical Info tab.
Technical Info Tab
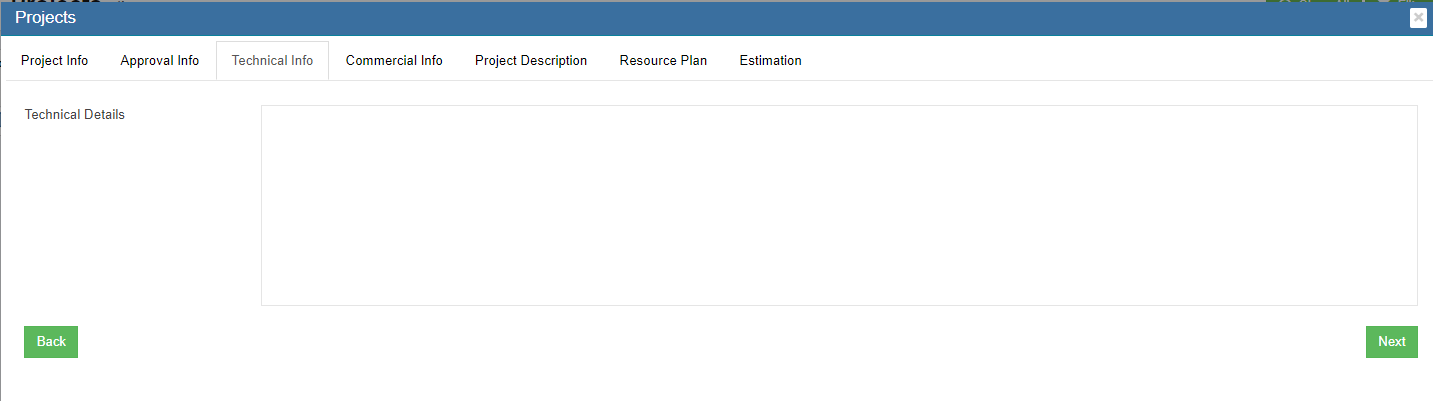
- In Technical Details box, enter project technical detail.
- Click Next to save technical info and open Commercial Info tab.
Commercial Info Tab
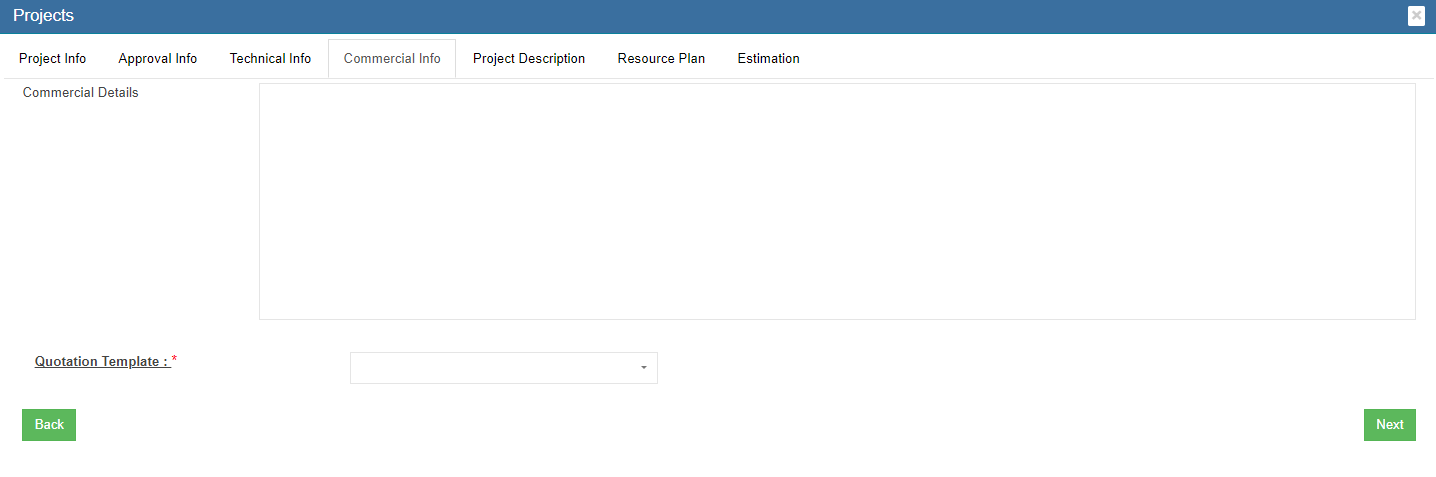
- In Commercial Details box, enter project commercial detail.
- Click Next to save commercial info and open Project Description tab.
Project Description Tab
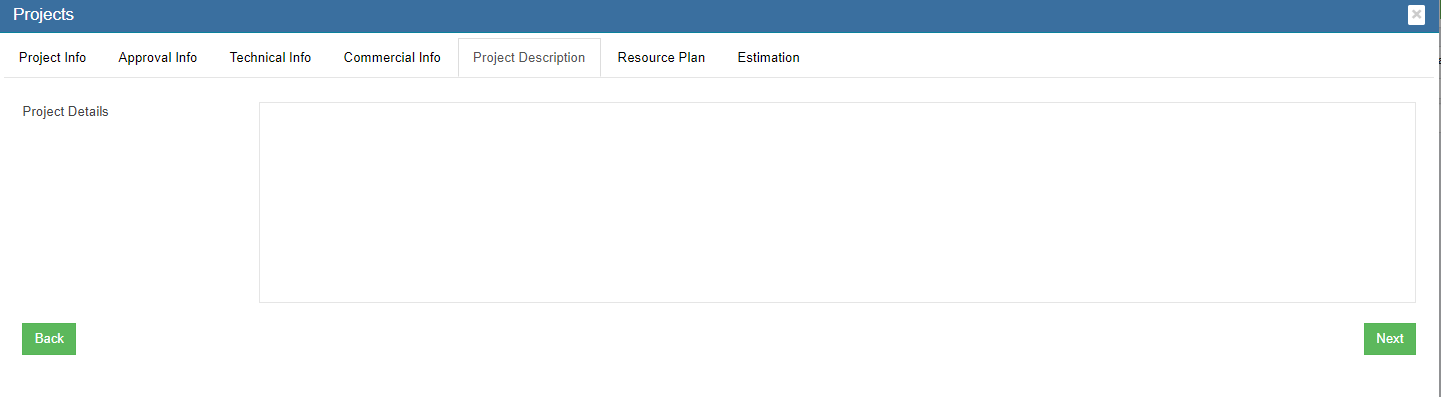
- In Project Description box, enter project description.
- Click Next to save project description and open Resource Plan tab.
Resource Plan Tab

- In Minimum Manday box, enter minimum man days.
- Click Next to save resource plan and open Estimation tab.
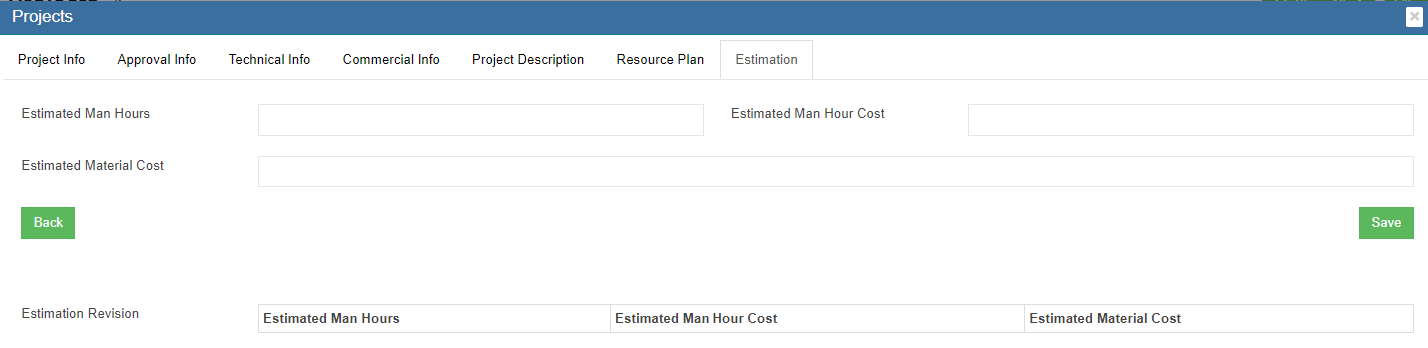
Estimation Tab
-
- In Estimated Man Hours box, enter estimated man hours.
- In Estimated Man Hour Cost box, enter estimated cost.
- In Estimated Material Cost box, enter estimated material cost.
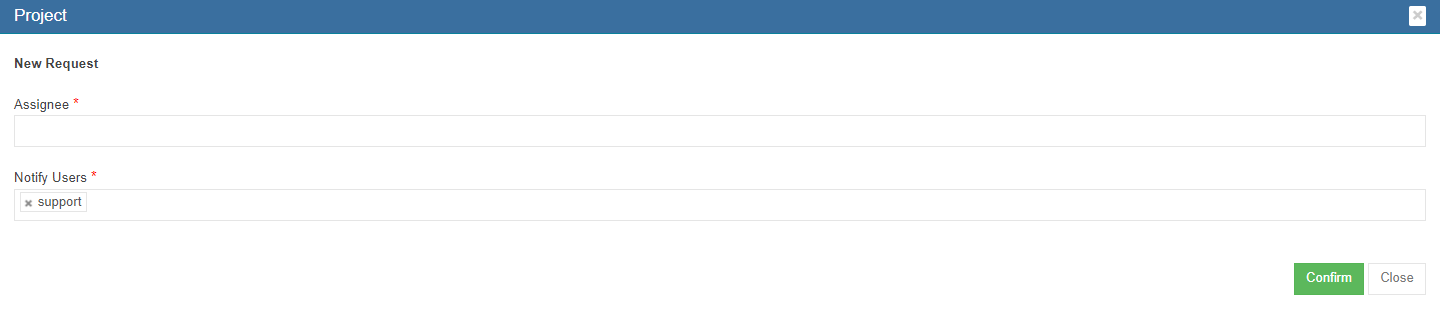
- Click Save to save all data entered in project tabs, a project creation notification window opens as below,

- Click Confirm to create project. And project data will be managed in project master page.
No Comments