# HRM Others
The **Others** submenu in the **HUMAN RESOURCES** page helps you to manage the details of vehicles belongs to the company, insurance details of company and employees, salary addition/deduction details of employees for each month and various documents that company needs to keep track of along with MOM OED submissions too.
[](https://wiki.cuteinfocomm.com/uploads/images/gallery/2025-03/image-1741838058117.png)
The **Others** submenu contains the following tabs,
- Vehicle
- Insurance
- Addition/Deduction
- Document List
- Letter Generation
- Broadcast
- MOM OED Submissions
- User Manual
- Scheduler Subscription
### Vehicle
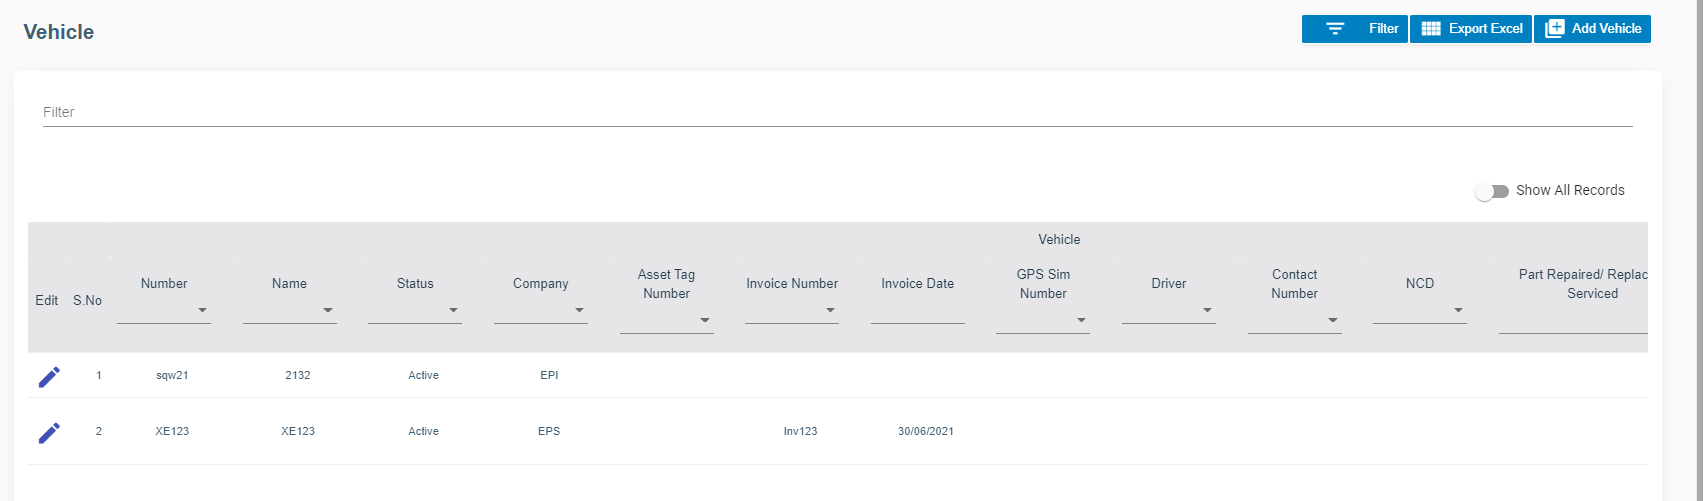
The **Vehicle** tab in the **Others** submenu helps you to add the details of vehicles belongs to the company including vehicle type, vehicle insurance, maintenance, and season parking pass details. Click the **Vehicle** tab in the **Others.** The **Vehicle** page opens.
[](http://wiki.cuteinfocomm.com/uploads/images/gallery/2022-09/image-1662095291430.png)
#### Add Vehicle
If you want to add vehicle, do the following steps,
1. Click (**Add Vehicle** button) in the **Vehicle.** The **Vehicle Information** window opens.
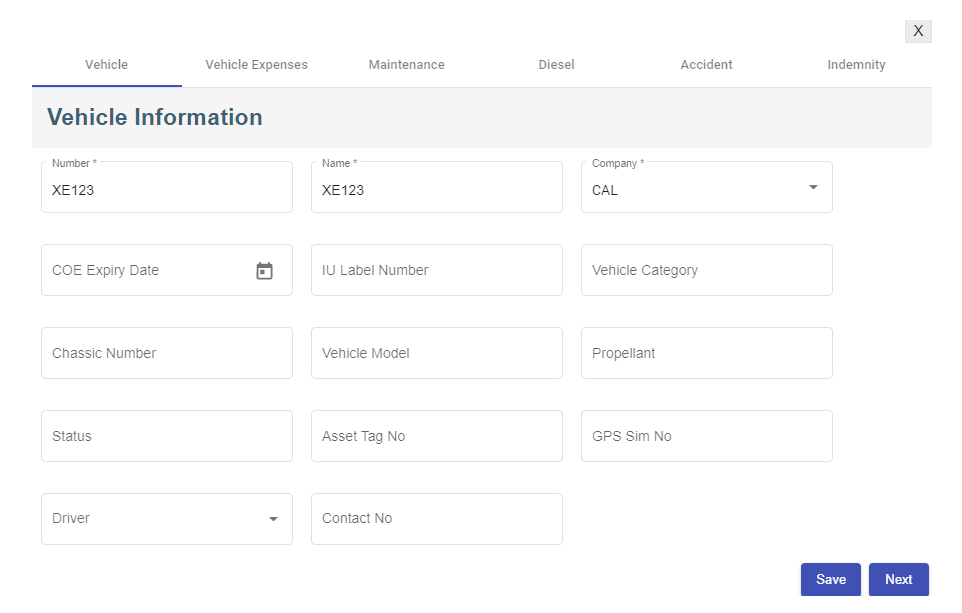
2. In the **Vehicle** tab, fill up the following details, [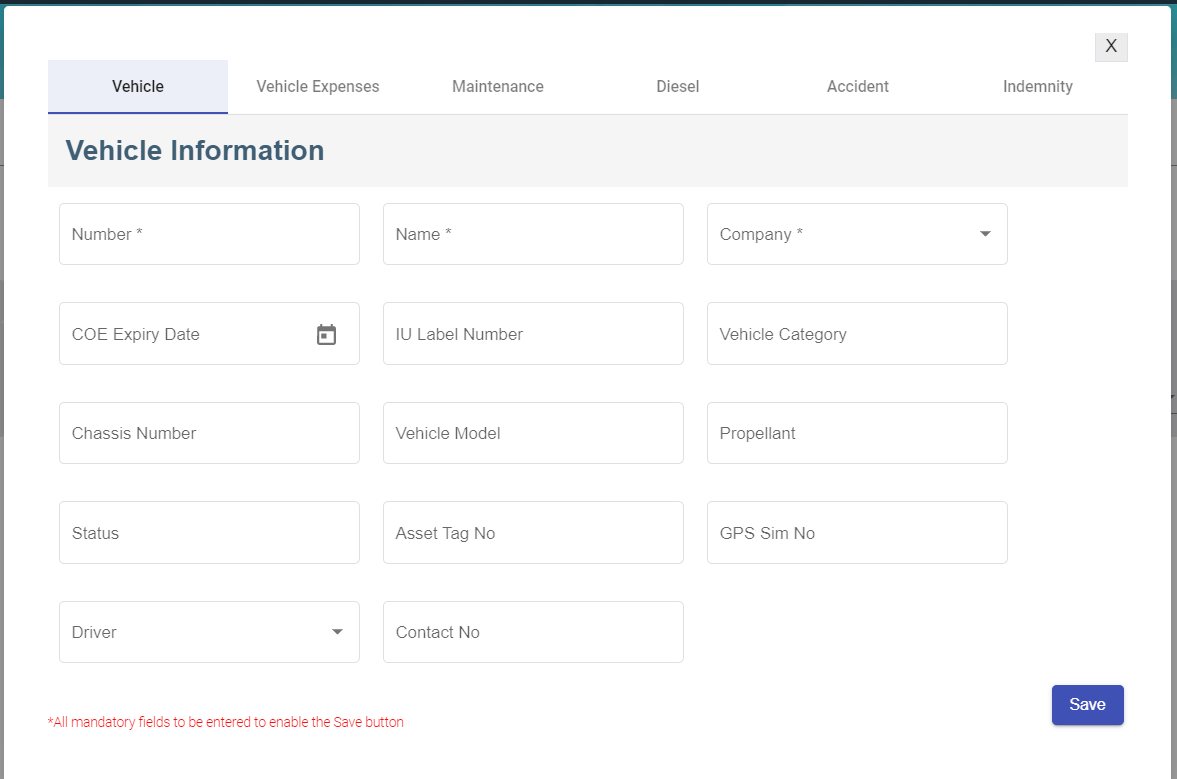](http://wiki.cuteinfocomm.com/uploads/images/gallery/2022-09/image-1663644517500.png)
- - In the **Number** box, enter the vehicle number.
- In the **Name** box, enter the name of the vehicle.
- In the **Company** box, select company name from dropdown list.
- In the **COE Expiry Date** box, enter COE expiry date.
- In the **IU label Number** box, enter the IU number.
- In the **Vehicle Category** box, enter the vehicle category.
- In the **Chassis Number** box, enter the car identification number
- In the **Vehicle Model** box, enter the vehicle model.
- In the **Propellant** box, enter the propellant information.
- In the **Status** box, enter the status of the vehicle
- In **Asset Tag No** box, enter the company asset tag number.
- In **GPS Sim No** box, enter the GPS Sim attached to the vehicle if any
- In **Driver** box, select the driver name from company employee list.
- In **Contact No** box, enter the contact number.
- Click **Save** then click **Next**, the vehicle expenses tab will open.
3. In the **Vehicle Expenses** tab, fill up the following details, [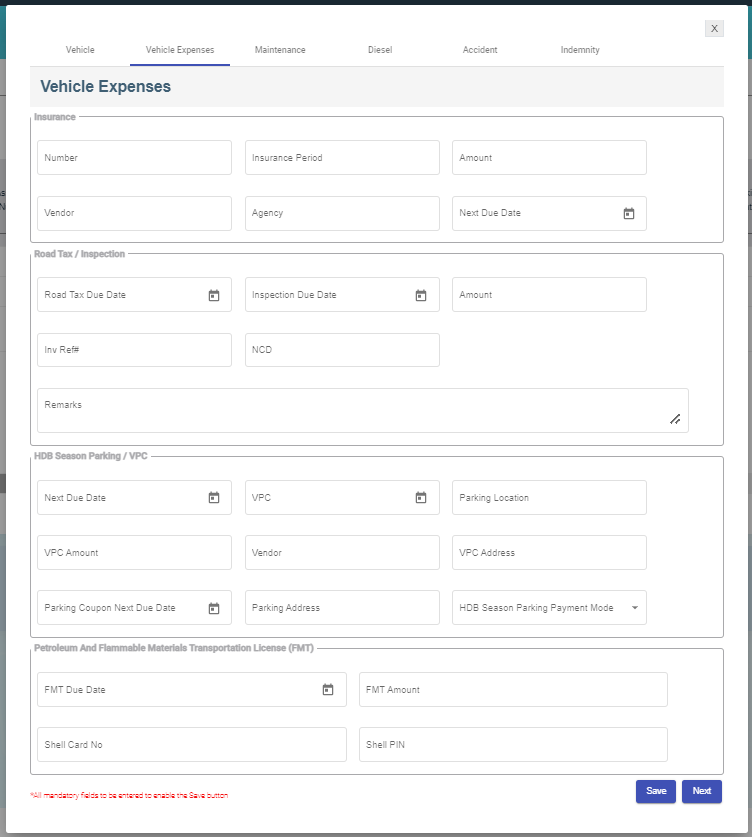](http://wiki.cuteinfocomm.com/uploads/images/gallery/2022-09/image-1663261822494.png)
- Insurance section
- In the **Number** box, enter the vehicle insurance number.
- In the **Insurance Period** box, enter the current insurance period,
- In the **Vendor** box, enter the name of the vendor.
- In the **Agency** box, enter the name of the agency.
- In the **Next Due Date** box, select the due date of the vehicle insurance.
- Road Tax/Inspection section
- In the **Road Tax Due Date** box, select the due date of the road tax.
- In the **Inspection Due Date** box, select the due date of the inspection.
- In the **Amount** box, enter the inspection amount.
- In the **Inv Ref#** box, enter invoice reference number.
- In the **NCD** box, enter no claims discount.
- HDB Season Parking/VPC section
- In the **Next Due Date** box, select the due date for HDB season parking.
- In the **Vehicle Parking Certificate (VPC)** box, select the VPC due date.
- In the **Parking Location** box, enter the parking address.
- In the **VPC Amount** box, enter the VPC amount.
- In the **Vendor** box, enter the vendor name.
- In the **VPC Address** box, enter the VPC address.
- In the **Parking Coupon Next Due Date** box, select the next due date of the parking coupon.
- In the **Parking Address** box, enter parking address.
- In the **HDB Season Parking Payment Mode** box, select the payment mode.
- Petroleum And Flammable Materials Transportation License (FMT) section
- In the **FMT Due Date** box, enter the due date of the FMT.
- In the **FMT Amount** box, enter the FMT amount.
- In the **Shell Card No** box, enter the shell card number.
- In the **Shell Pin** box, enter the shell pin number.
- Click **Save**, then click **Next**, the Vehicle Maintenance tab will open.
4. In the **Vehicle Maintenance** tab, fill up the following details, [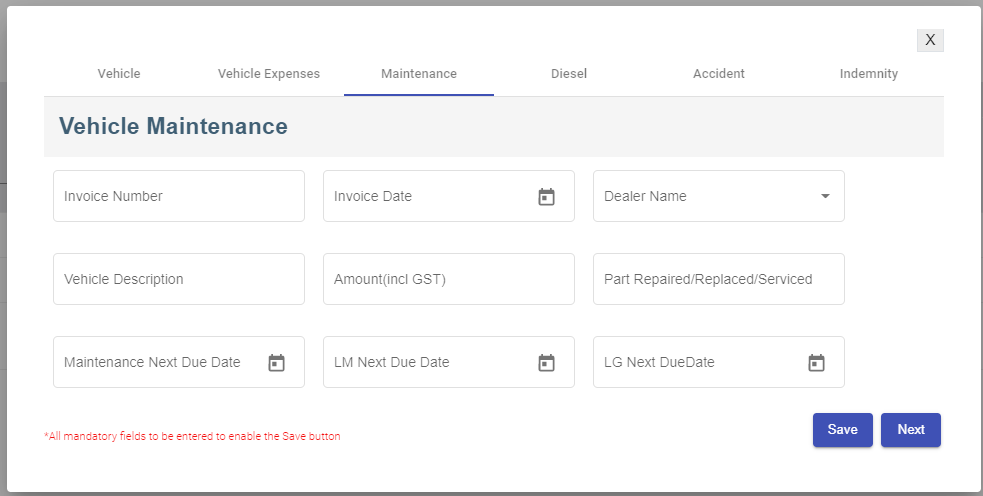](http://wiki.cuteinfocomm.com/uploads/images/gallery/2022-09/image-1663263840925.png)
- - In the **Invoice Number** box, enter the invoice number.
- In the **Invoice Date** box, select the date of the invoice.
- In the **Dealer Name** box, select the dealer name.
- In the **Vehicle Description** box, enter the maintenance description.
- In the **Amount (incl GST)** box, enter the maintenance amount.
- In the **Part Repaired/Replaced/Serviced** box, enter the part name.
- In the **Maintenance Next Due Date** box, select the next due date of maintenance.
- In the **LM Next Due Date** box, select the next due date of LM.
- In the **LG Next Due** box, select the next due date of LG.
- Click **Save**, then click **Next**, the Vehicle Diesel tab will open.
5. In the **Vehicle Diesel** tab, fill up details of each record. [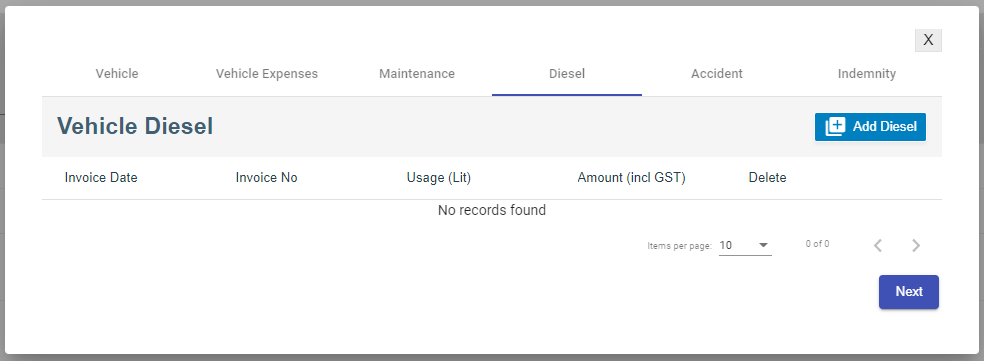](http://wiki.cuteinfocomm.com/uploads/images/gallery/2022-09/image-1663264329106.png)
- Click [](http://wiki.cuteinfocomm.com/uploads/images/gallery/2022-09/image-1663352493239.png)add diesel icon, below window opens, enter the diesel details, [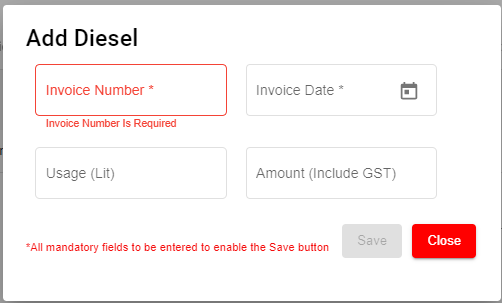](http://wiki.cuteinfocomm.com/uploads/images/gallery/2022-09/image-1663264465471.png)
- Click **Save**, then click **Next**, the Accident tab will open.
6. In the **Accident** tab, fill up the following details, [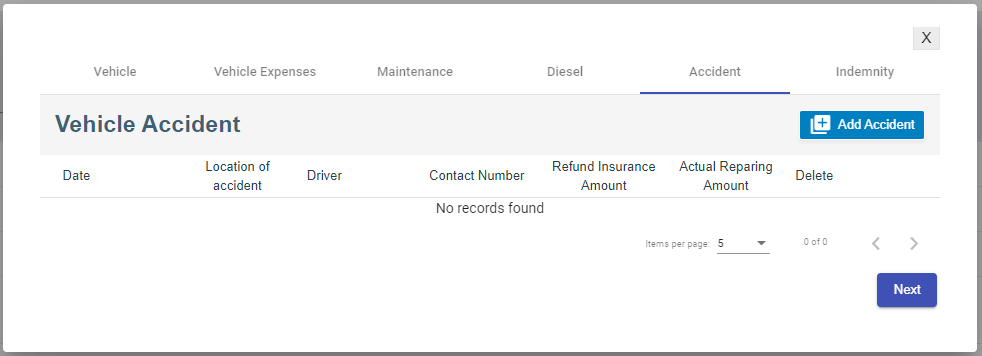](http://wiki.cuteinfocomm.com/uploads/images/gallery/2022-09/image-1663352451233.png)
- Click[](http://wiki.cuteinfocomm.com/uploads/images/gallery/2022-09/image-1663352538043.png) add accident icon, below window opens, enter the details of the accident [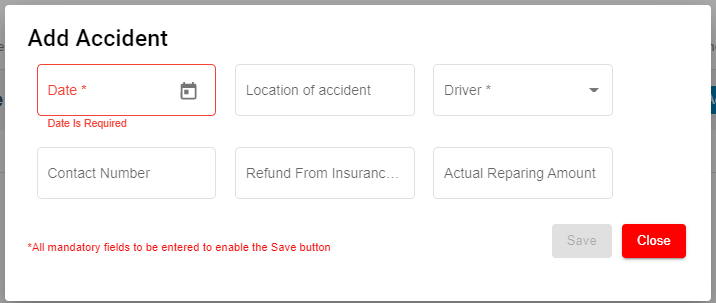](http://wiki.cuteinfocomm.com/uploads/images/gallery/2022-09/image-1663352813437.png)
- Click **Save** and then click **Next**, the Indemnity tab will open.
7. In the **Indemnity** tab, fill up the following details, [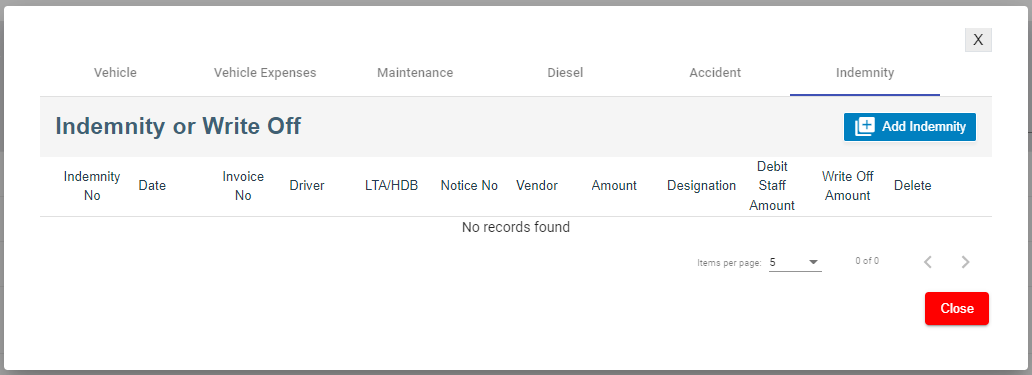](http://wiki.cuteinfocomm.com/uploads/images/gallery/2022-09/image-1663353086440.png)
- Click[](http://wiki.cuteinfocomm.com/uploads/images/gallery/2022-09/image-1663353135029.png) add indemnity icon, below window opens, enter the details of the indemnity. [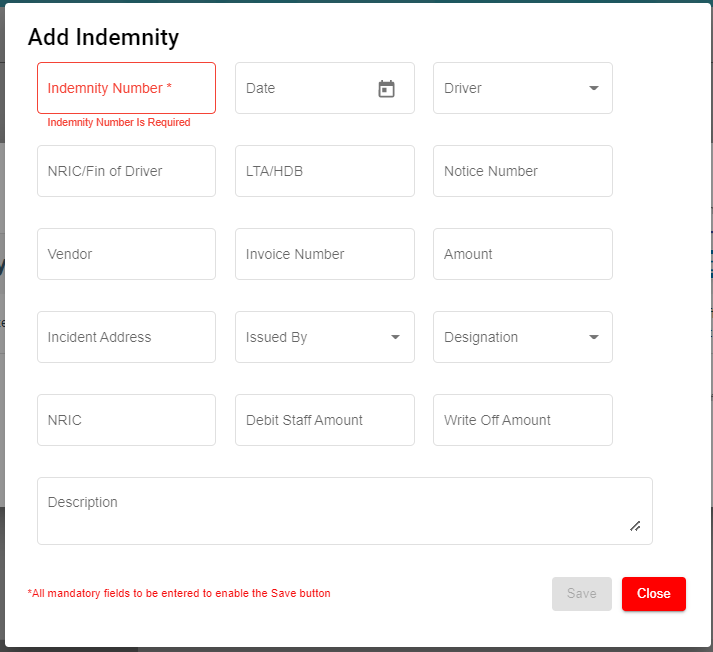](http://wiki.cuteinfocomm.com/uploads/images/gallery/2022-09/image-1663353228245.png)
- Click **Save.**
#### Edit Vehicle
You can edit the details of the added vehicle by using edit option provided in the **Edit** column of the **Vehicle** page. Click  (Edit icon) of the respective vehicle you have added. The **Add vehicle** window opens with the added vehicle details. Edit the vehicle details where you want. Click **Save**.
[](http://wiki.cuteinfocomm.com/uploads/images/gallery/2022-09/image-1662095366866.png)
#### Add/ View Attachment for Vehicle
If you want to add any new attachment for the vehicle or view any added attachment,
1. click (Attachment icon) of the respective vehicle for which you want to add or view the attachment. The **Add/ View Attachment** window opens. [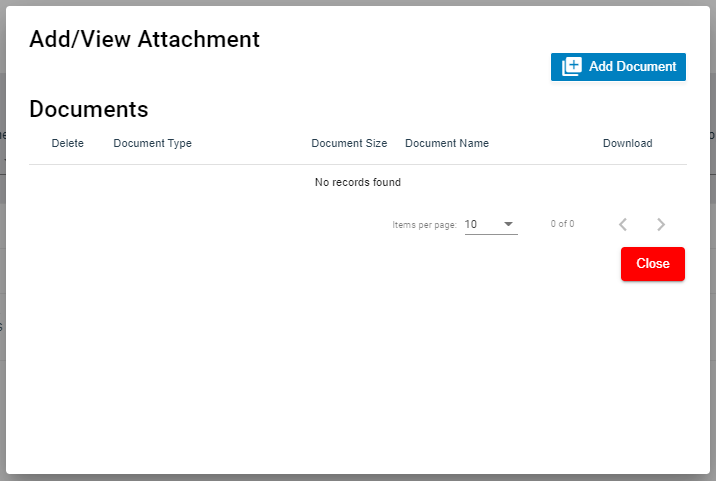](http://wiki.cuteinfocomm.com/uploads/images/gallery/2022-09/image-1663353629149.png)
2. Click [](http://wiki.cuteinfocomm.com/uploads/images/gallery/2022-09/image-1663353642362.png)(Add Document button). The file choosing and uploading option will be enabled. Click (Choose File button) and select the file which you want to upload. [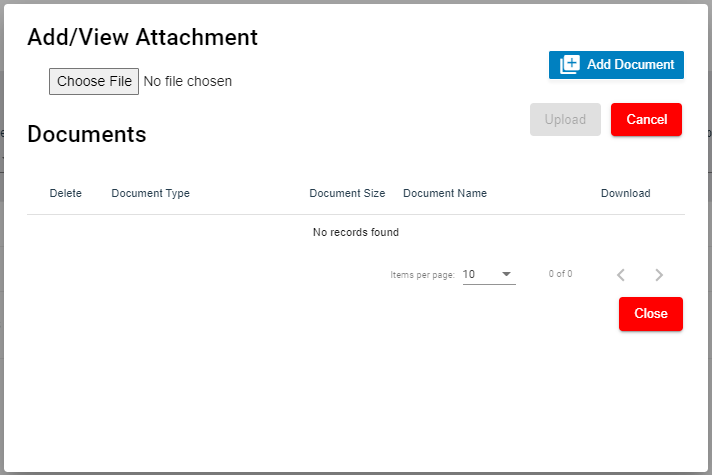](http://wiki.cuteinfocomm.com/uploads/images/gallery/2022-09/image-1663353963695.png)
3. Click **Upload.** The selected file will be uploaded and displayed in the **Add/View Attachment** window.
#### Delete Vehicle
You can delete the added vehicle by using[ ](http://wiki.cuteinfocomm.com/uploads/images/gallery/2022-09/image-1663353518509.png)(Delete icon) provided in the **Delete** column of the **Vehicle** page. If you want to delete the Vehicle Type, click **Yes** otherwise click **No**.
[](http://wiki.cuteinfocomm.com/uploads/images/gallery/2022-09/image-1663353560071.png)
#### Filter Vehicle
If you want to view any specific vehicle details among multiple vehicles listed in the **Vehicle** page, you can use the filter option provided in the upper right corner of the **Vehicle** page. Click[ ](http://wiki.cuteinfocomm.com/uploads/images/gallery/2022-09/image-1663353587313.png)(Filter button). The filter option opens.
#### Export Vehicle
The application has a feature to download the added vehicle details as an excel file. You can use (**Export Excel** button) to download the added vehicle details. Click[](http://wiki.cuteinfocomm.com/uploads/images/gallery/2022-09/image-1663354003972.png)(**Export Excel** button). The vehicle details in the **Vehicle** page will be downloaded as an excel file.
### Insurance
The **Insurance** tab in the **Others** submenu helps you to add the details of various insurance policy that is taken by the company. If you want to add an insurance, click the **Insurance** tab in the **Others.** The **Insurance** page opens.
[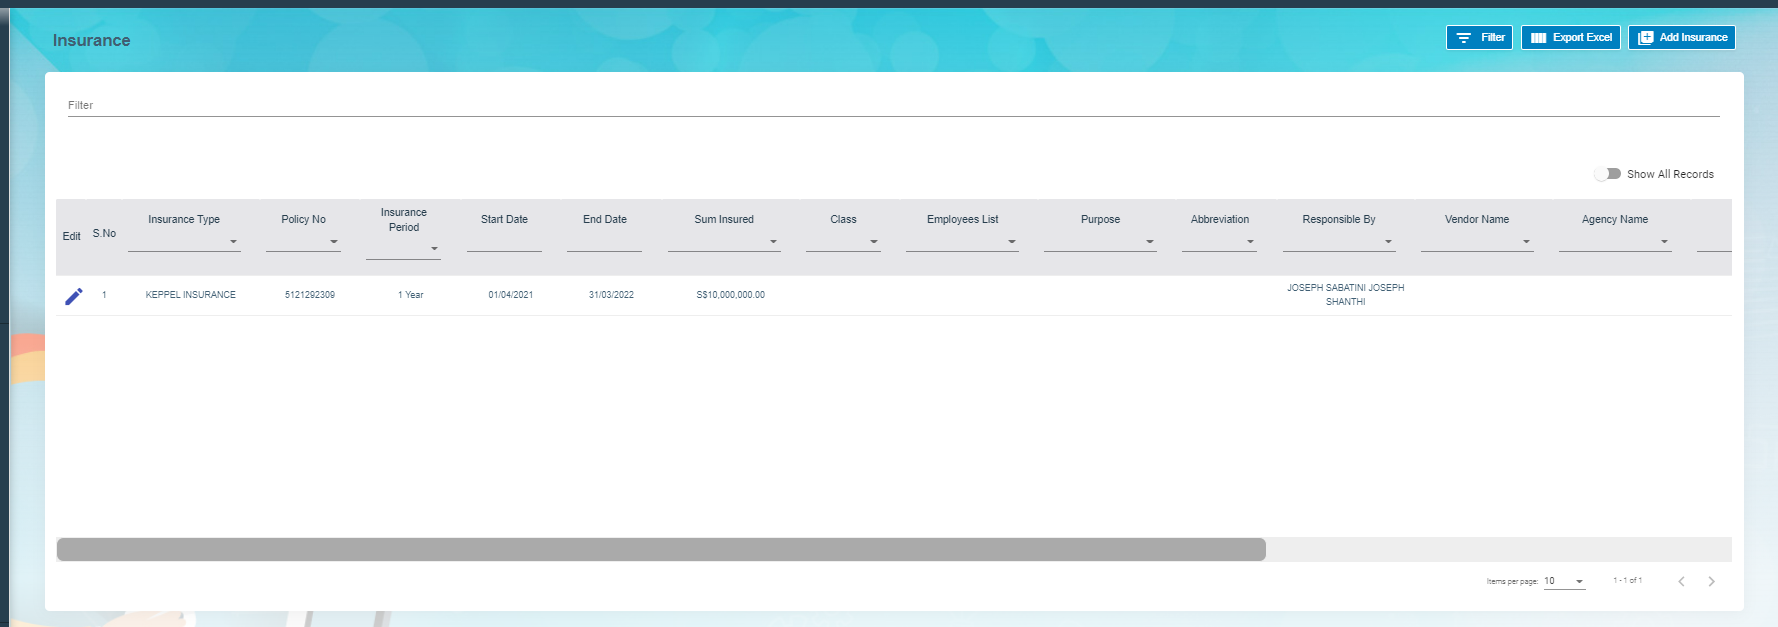](http://wiki.cuteinfocomm.com/uploads/images/gallery/2022-09/image-1663139258801.png)
#### Add Insurance
To add insurances,
1. Click[](http://wiki.cuteinfocomm.com/uploads/images/gallery/2022-09/image-1663354158316.png)(**Add Insurance** button) in the **Insurance,** the **Add New Insurance Policy Details** window opens, [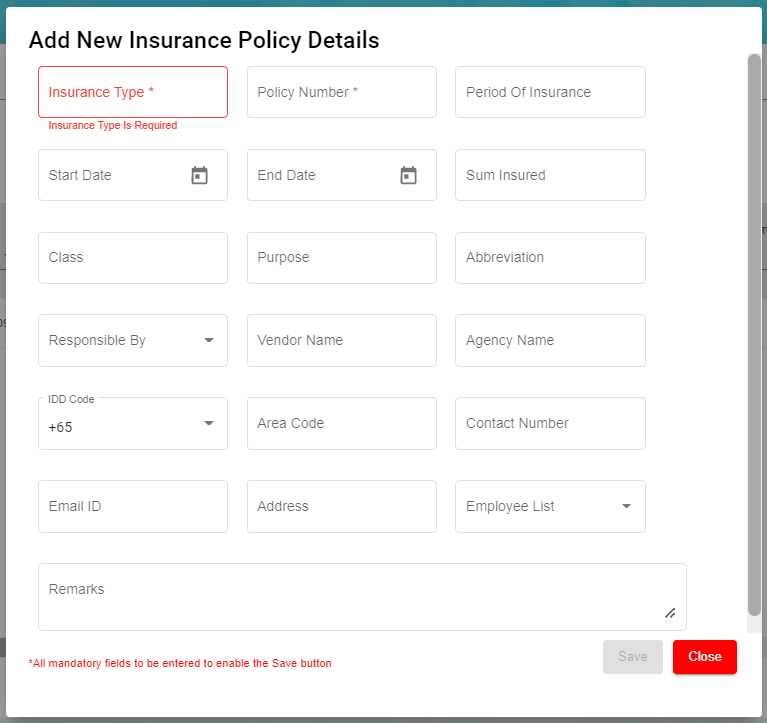](http://wiki.cuteinfocomm.com/uploads/images/gallery/2022-09/image-1663354129765.png)**Note**: The fields notified with a symbol (\*) are mandatory. You must enter the relevant details in that fields before saving.
2. - In the **Insurance Type** box, enter the type of insurance.
- In the **Policy Number** box, enter the insurance policy number.
- In the **Period of Insurance** box, enter the total insurance period.
- In the **Start Date** box, select the insurance starting period.
- In the **End Date** box, select the insurance end date.
- In the **Sum Insured** box, enter the insurance amount.
- In the **Class** box, enter the class of insurance.
- In the **Purpose** box, enter the purpose of taking insurance.
- In the **Abbreviation** box, enter the abbreviation for the class.
- In the **Responsible By** box, select the name of a person who is responsible for the insurance.
- In the **Vendor Name** box, enter the vendor name.
- In the **Agency Name** box, enter the agency name.
- In the **IDD Code** box, enter the IDD code.
- In the **Area Code** box, enter the area code.
- In the **Contact Number** box, enter the contact number.
- In the **Email ID** box, enter the email id of the employee.
- In the **Address** box, enter the address of the employee.
- In the **Employee List** box, select the employees from the given list. **Tip**: You can select all the employees if you have insured for multiple employees.
- In the **Remarks** box, enter your remarks if any.
3. Click **Save**. The insurance is successfully added and listed in the **Insurance** page.
#### Edit Insurance
You can edit the details of the added insurance by using[](http://wiki.cuteinfocomm.com/uploads/images/gallery/2022-09/image-1663354671200.png)(Edit icon) provided in the **Edit** column of the **Insurance** page. To edit the added insurance details,
1. Click (Edit icon) of the respective insurance you have added. The Insurance Policy Details window opens with the added insurance details.
2. Edit the insurance details where you want.
3. Click **Save**.
#### Add/ View Attachment for Insurance
If you want to add any new attachment for the insurance or view any added attachment, you can use[](http://wiki.cuteinfocomm.com/uploads/images/gallery/2022-09/image-1663354754354.png)(Attachment icon) provided in the **Documents** column of the **Insurance** page.
#### Delete Insurance
You can delete the added insurance by using [](http://wiki.cuteinfocomm.com/uploads/images/gallery/2022-09/image-1663353518509.png)(Delete icon) provided in the **Delete** column of the **Insurance** page.
#### Filter Insurance
If you want to view any specific insurance details among multiple insurances listed in the **Insurance** page, you can use the [](http://wiki.cuteinfocomm.com/uploads/images/gallery/2022-09/image-1663353587313.png)filter option provided in the upper right corner of the **Insurance** page.
#### Export Insurance
The application has a feature to download the added insurance details as an excel file. You can use (**Export Excel** button) to download the added insurance details. Click [](http://wiki.cuteinfocomm.com/uploads/images/gallery/2022-09/image-1663354003972.png)(**Export Excel** button), the insurance details in the **Insurance** page will be downloaded as an excel file.
### Employee Salary Addition/Deduction
**Note**: This section is linked with **Payroll**.
The **Salary Addition/Deduction** tab in the **Others** submenu helps you to add the details of any addition or deduction in the employee’s salary for each month. This data is synchronized with the employee salary and automatically processed for each month. To add the salary addition/deduction details, click the **Salary Addition/Deduction** tab in the **Others**. The **Employees Addition/Deduction History** page opens.
[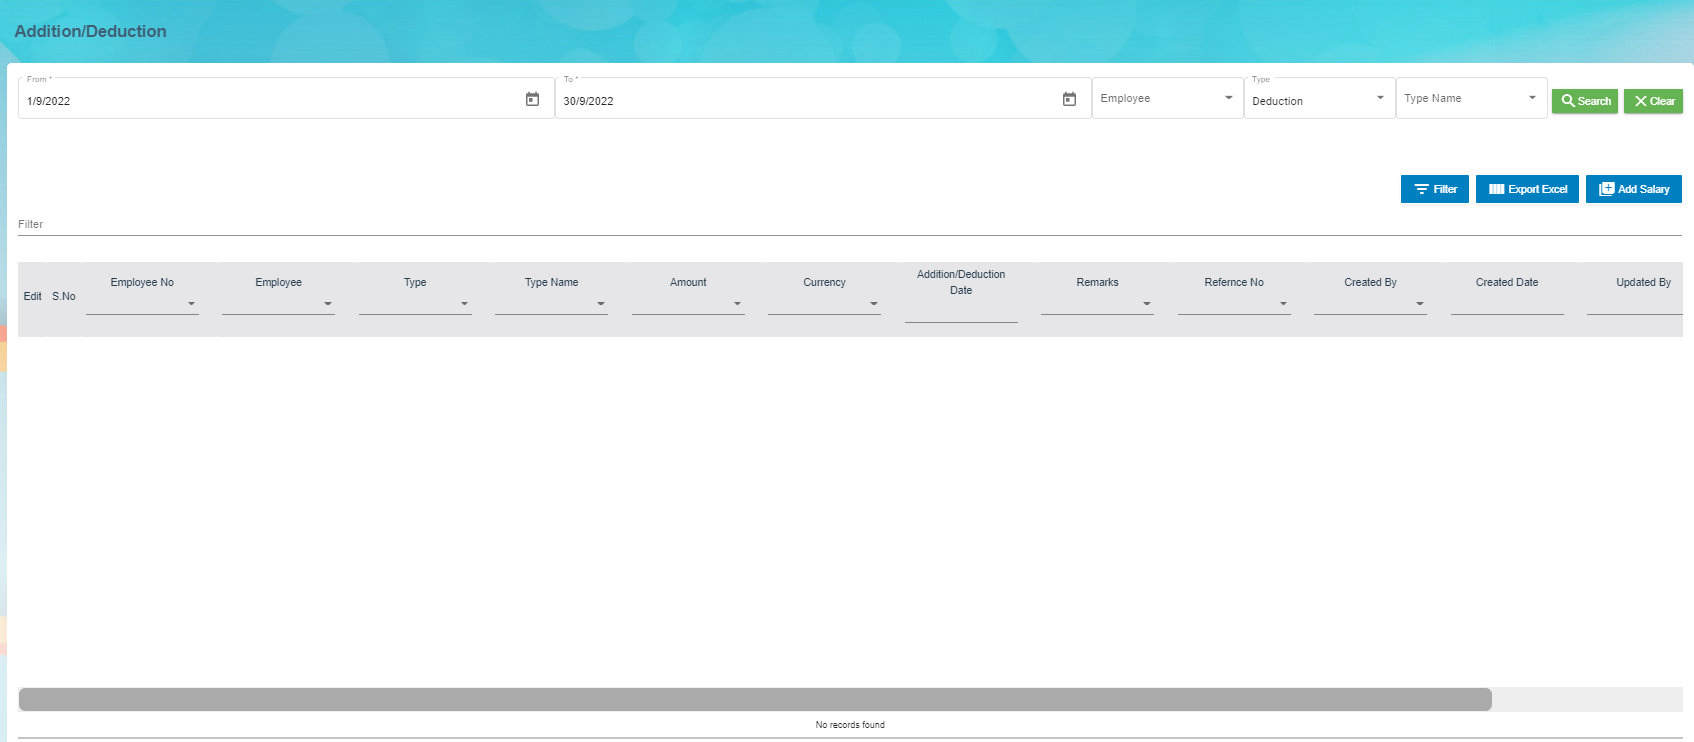](http://wiki.cuteinfocomm.com/uploads/images/gallery/2022-09/image-1663139472695.png)
#### Add Salary Addition/Deduction
If you want to add employee’s salary addition/deduction details, do the following steps,
1. Click [](http://wiki.cuteinfocomm.com/uploads/images/gallery/2022-09/image-1663354967344.png)(Add Salary Addition/Deduction button) in the Employees Addition/Deduction History, a new page for adding the details of salary addition/deduction open. [](http://wiki.cuteinfocomm.com/uploads/images/gallery/2022-09/image-1663139619963.png)
**Note**: The fields notified with a symbol (\*) are mandatory. You must enter the relevant details in that fields before saving.
2. In the **Employee selection** field:
- If you want to add the salary addition/deduction details for one employee, select the **Single**;
- If you want to add the salary addition/deduction details for more than one employee, select the **Multiple**
3. In the **Type** field:
- If you want add the salary addition details, select the **Addition**;
- If you want to deduct the salary deduction details, select the **Deduction**
4. In the **Employee** box:
- If you have selected the **Single** option in the **Employee selection** field, you can add only one employee from a drop-down list;
- If you have selected the **Multiple** option in the **Employee selection** field, you can add multiple employees by selecting the checkbox of the respective employees.
5. To select the **Addition Type**/**Deduction Type**, do one of the following steps,
**Note**: If you have selected the **Addition** option in the **Type** field, the **Addition Type** box will be enabled. If you have selected the **Deduction** option, the **Deduction Type** box will be enabled.
- In the **Addition Type** box, select the type of addition from a drop-down list.
- In the **Deduction Type** box, select the type of deduction from a drop-down list.
6. In the Currency box, select the currency type.
7. In the Amount box, enter the amount to be added or deducted.
8. To select the **Addition Date**/**Deduction Date**, do one of the following steps,
**Note**: If you have selected the **Addition** option in the **Type** field, the **Addition Date** box will be enabled. If you have selected the **Deduction** option, the **Deduction Date** box will be enabled.
- In the **Addition Date** box, select the date of addition from a drop-down list.
- In the **Deduction Date** box, select the date of deduction from a drop-down list.
9. In the **Remarks** box, enter your remarks if any.
10. Click **Next**.
11. Click **Confirm**. The salary addition/deduction details of employee are successfully added.
#### Delete Salary Addition/Deduction
You can delete the added salary addition/deduction details by using (Delete icon) provided in the **Delete** column of the **Employees Addition/Deduction History** page.
#### Filter Salary Addition/Deduction
There are two type of filter options provided in the **Employees Addition/Deduction History** page to view the detail of specific salary addition/deduction of employee.
**Filter option 1**
The **Employees Addition/Deduction History** page contains a filter option in the upper side of the page. To view the salary addition/deduction of the particular employee,
1. In the **From** and **To** boxes, select the from and to dates.
2. In the **Employee** box, select the employee you want to view the details.
3. In the **Type** box, select whether the addition or deduction.
4. In the **Type Name** box, enter the type of addition/deduction.
5. Click **Search**. The salary addition/deduction details of the employee you have selected will be filtered.
**Filter option 2**
If you want to view any specific salary addition/deduction details among multiple entries listed in the **Employees Addition/Deduction History** page, you can use this filter option[](http://wiki.cuteinfocomm.com/uploads/images/gallery/2022-09/image-1663355063095.png)provided in the upper right corner of the **Employees Addition/Deduction History** page.
#### Export Salary Addition/Deduction
The application has a feature to download the added salary addition/deduction details as an excel file. You can click [](http://wiki.cuteinfocomm.com/uploads/images/gallery/2022-09/image-1663354003972.png)(**Export Excel** button) to download the added salary addition/deduction details. The salary addition/deduction details in the **Employees Addition/Deduction History** page will be downloaded as an excel file.
### Document List
The **Document List** tab in the **Others** submenu helps you to add any documents that company needs to maintain with or without expiry date like ISO 9001:2015 certification and company’s product certification etc. To add a document, click the **Document List** tab in the **Others.** The Document List page opens.
[](http://wiki.cuteinfocomm.com/uploads/images/gallery/2022-09/image-1663139741261.png)
#### Add Document
If you want to add a document,
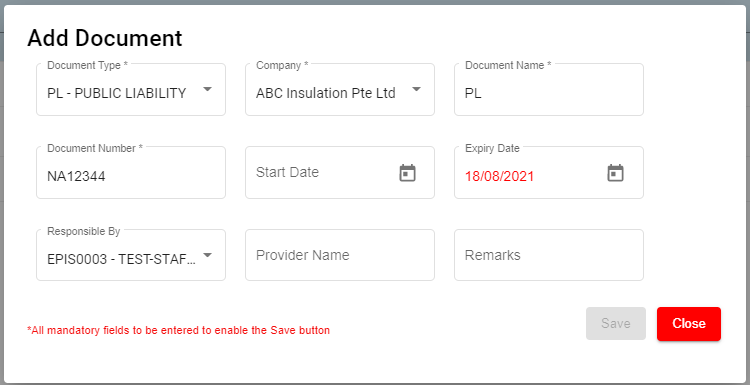
1. Click [](http://wiki.cuteinfocomm.com/uploads/images/gallery/2022-09/image-1663355137131.png)(Add Document) button in the Document List. The Add Document window opens. [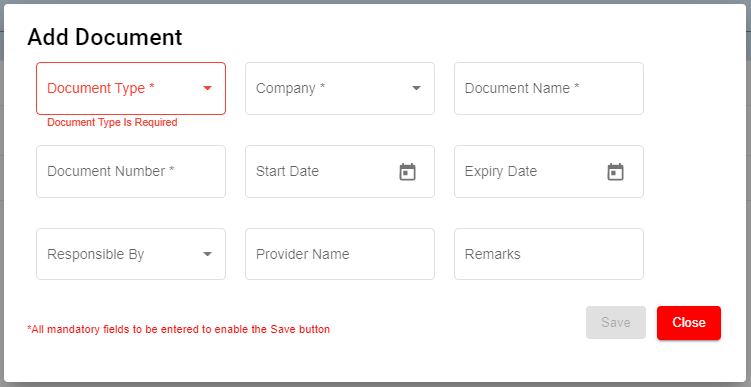](http://wiki.cuteinfocomm.com/uploads/images/gallery/2022-09/image-1663355175983.png)
- In the **Document Type** box, select the document type from a drop-down list. ( Selecting the '**Public**' document type will make the document available under the '**View Document**' page. The **"Public"** document type is added by default)
- In the **Company** box, select a company from a drop-down list.
- In the **Document Name** box, enter the name of a document you want to add.
- In the **Document Number** box, enter the document number.
- In the **Start Date** box, enter the validity starting date of the document.
- In the **Expiry Date** box, enter the validity expiry date of the document.
- In the **Responsible** By box, select the name of a person responsible for the document.
- In the **Provider Name** box, enter the document provider name.
- In the **Remarks** box, enter your remarks if any.
2. Click **Save**. The document is successfully added and listed in the **Document List** page.
#### Edit Document
You can edit the details of the added document by using (Edit icon) provided in the **Edit** column of the **Document List** page. To edit the added document details, click (Edit icon) of the respective document you have added. The **Add Document** window opens with the added details. Edit the document details where you want. Click **Save**.
[](http://wiki.cuteinfocomm.com/uploads/images/gallery/2022-09/image-1663355227328.png)
#### Add/ View Attachment for Document
If you want to add any new attachment for the document or view any added attachment, you can use (Attachment icon) provided in the **Documents** column of the **Document List** page.
#### Delete Document
You can delete the added document by using (Delete icon) provided in the **Delete** column of the **Document List** page. If you want to delete the Document, click **Yes** otherwise click **No**.
#### Filter Document
If you want to view any specific document details among multiple documents listed in the **Document List** page, you can use the filter option [](http://wiki.cuteinfocomm.com/uploads/images/gallery/2022-09/image-1663355063095.png)provided in the upper right corner of the **Document List** page.
#### Export Document
The application has a feature to download the added document details as an excel file. Click [](http://wiki.cuteinfocomm.com/uploads/images/gallery/2022-09/image-1663354003972.png) (**Export Excel** button) to download the added document details. The document details in the **Document List** page will be downloaded as an excel file.
**Note**: The documents with expiry dates will be tracked for its expiry date in **HRM dashboard** and in **weekly emails** alerts.
### Letter Generation
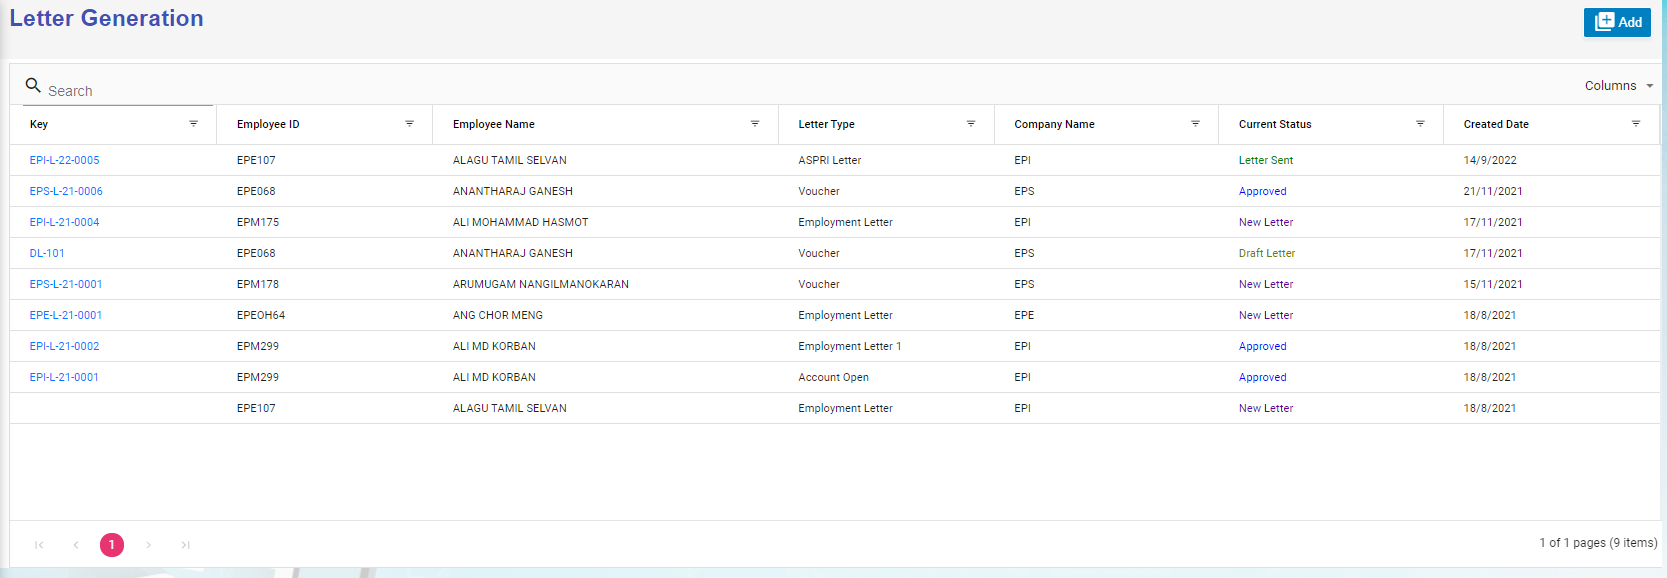
User can generate all different letters here that are defined in letter template master. Click Letter Generation, the history record of letter generated are listed as below,
[](http://wiki.cuteinfocomm.com/uploads/images/gallery/2022-09/image-1663355632688.png)
#### Generate A New Letter
To generate a new letter,
1. Click[](http://wiki.cuteinfocomm.com/uploads/images/gallery/2022-09/image-1663356302980.png) add icon, below add letter page opens,[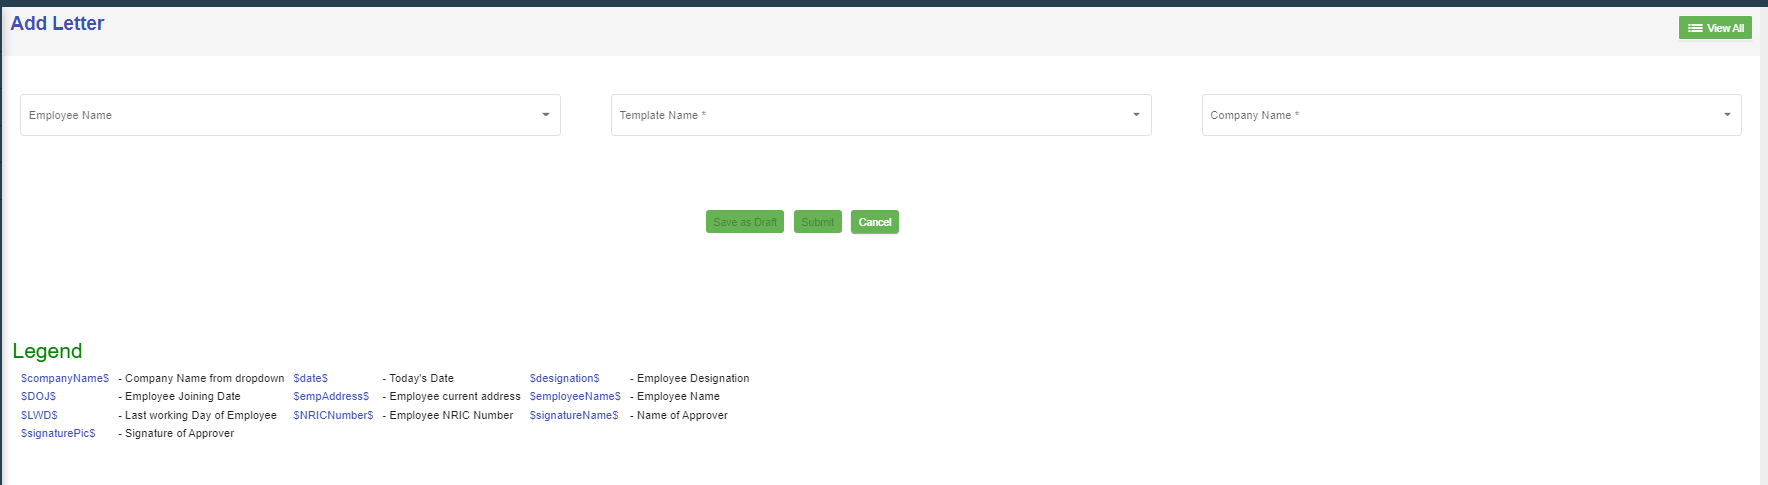](http://wiki.cuteinfocomm.com/uploads/images/gallery/2022-09/image-1663147497713.png)
2. Select employee name, letter template name, and company name, the selected letter template will opens as below,[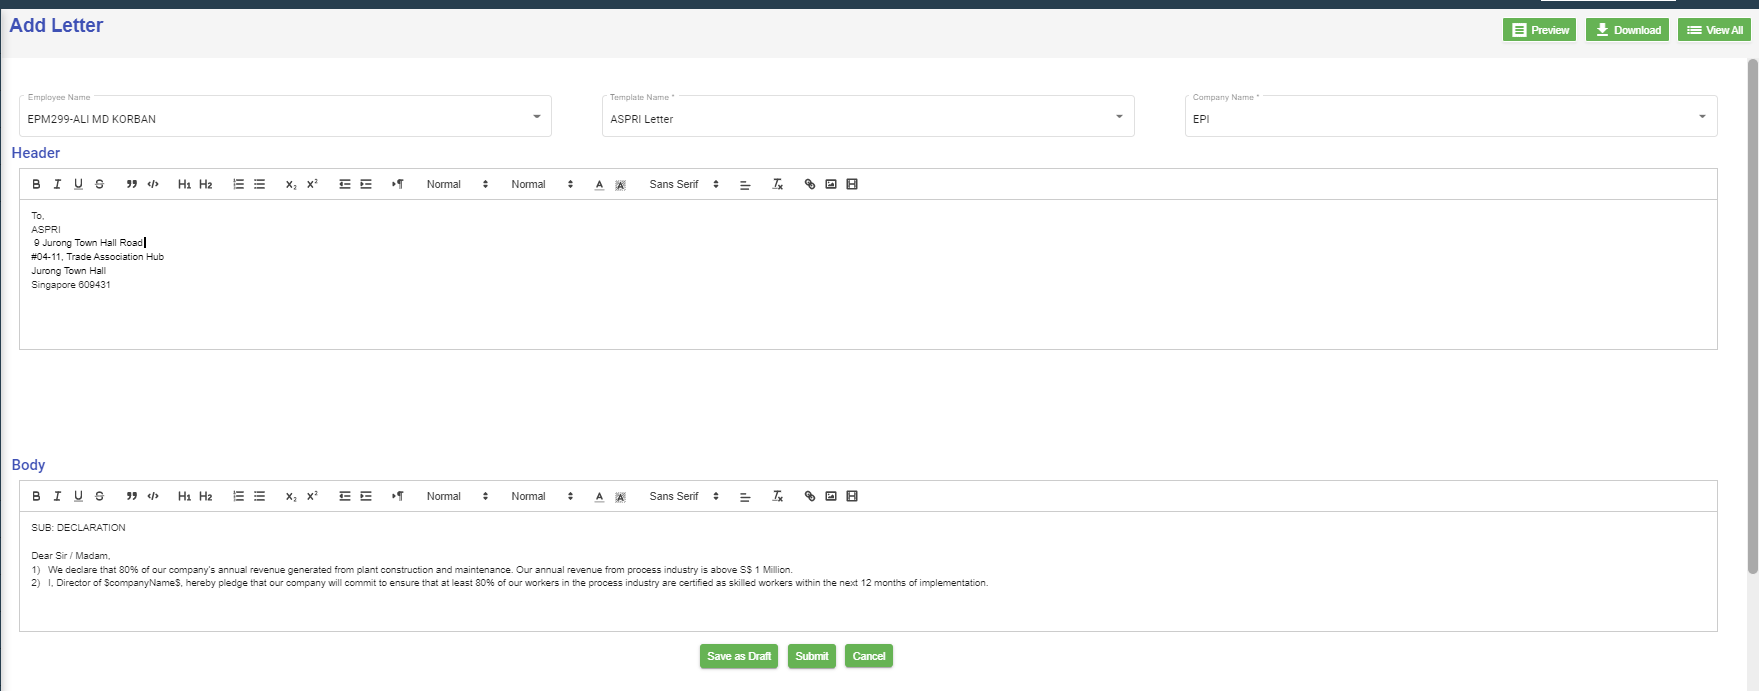](http://wiki.cuteinfocomm.com/uploads/images/gallery/2022-09/image-1663148099362.png)
3. Check and edit the content if needed,
4. Click **Submit,** below notification confirmation window opens,[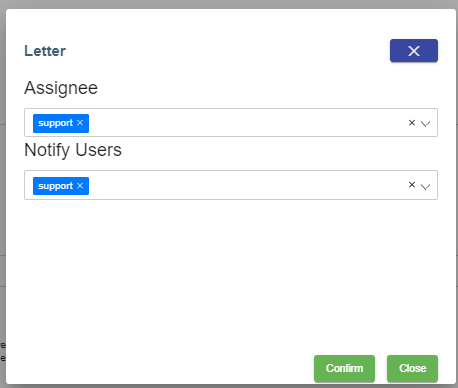](http://wiki.cuteinfocomm.com/uploads/images/gallery/2022-09/image-1663148594519.png)
5. Click **Confirm**, the letter will be generated and ready for preview and approve. Note: before approval, there will be watermark as draft.[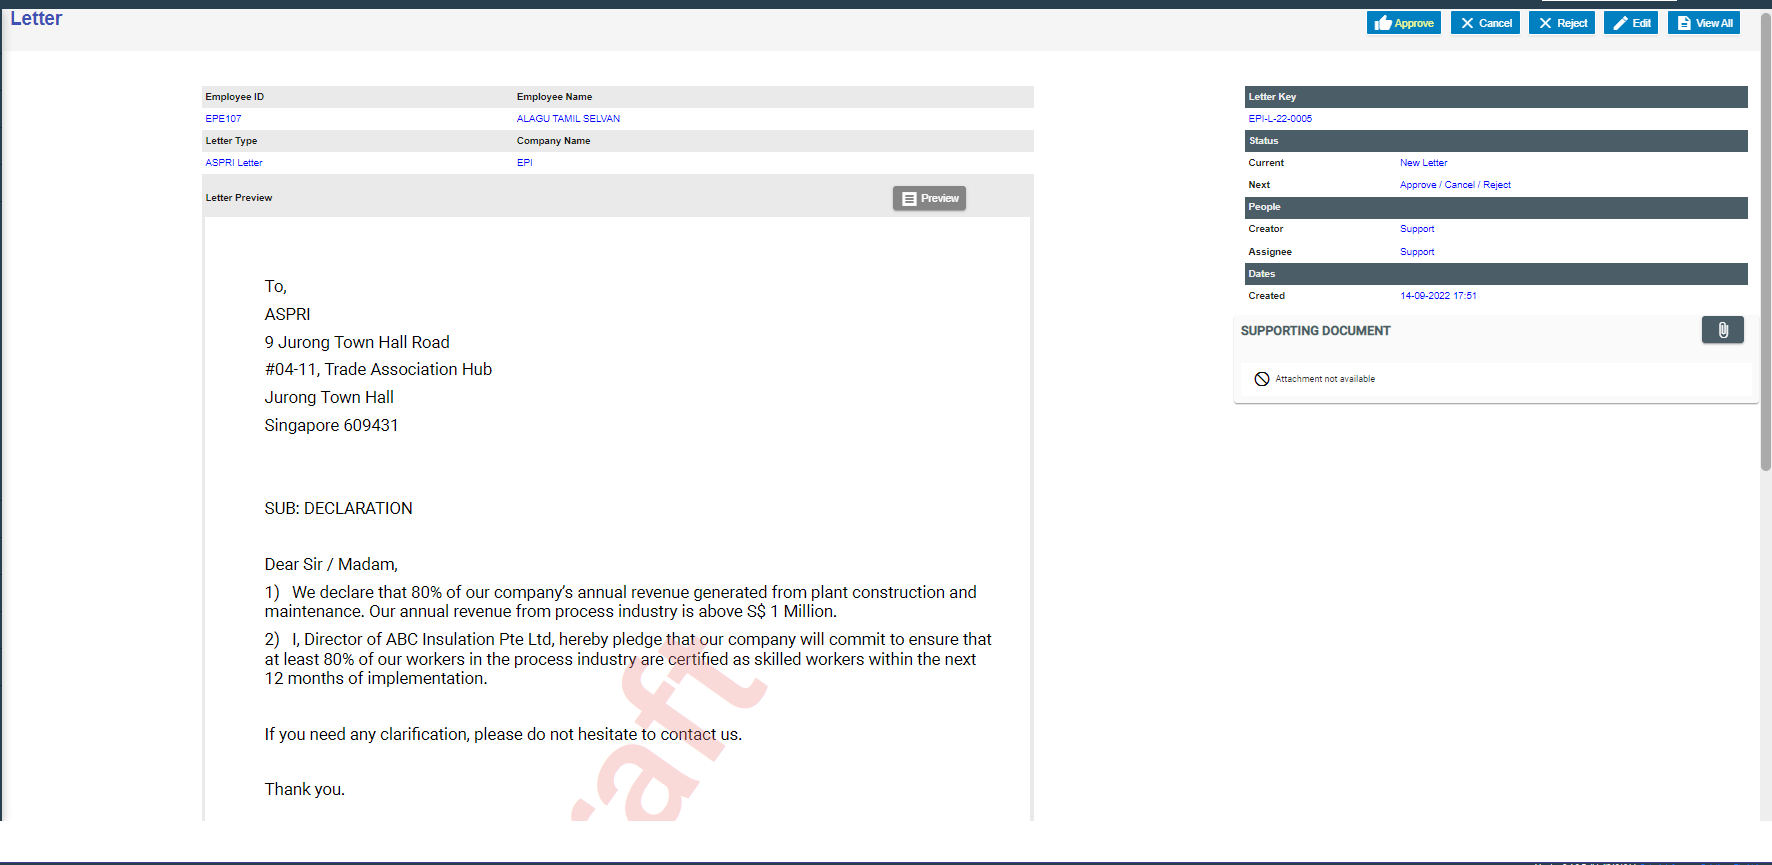](http://wiki.cuteinfocomm.com/uploads/images/gallery/2022-09/image-1663149301264.png)
6. To approve letter generation, click [](http://wiki.cuteinfocomm.com/uploads/images/gallery/2022-09/image-1663356632984.png), below notification opens,[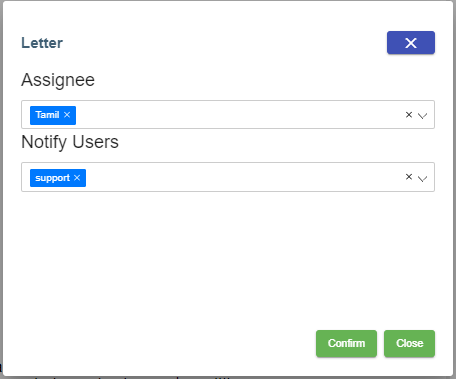](http://wiki.cuteinfocomm.com/uploads/images/gallery/2022-09/image-1663149647712.png)
Click **Confirm**, the letter is generated and approved. User can download for use.[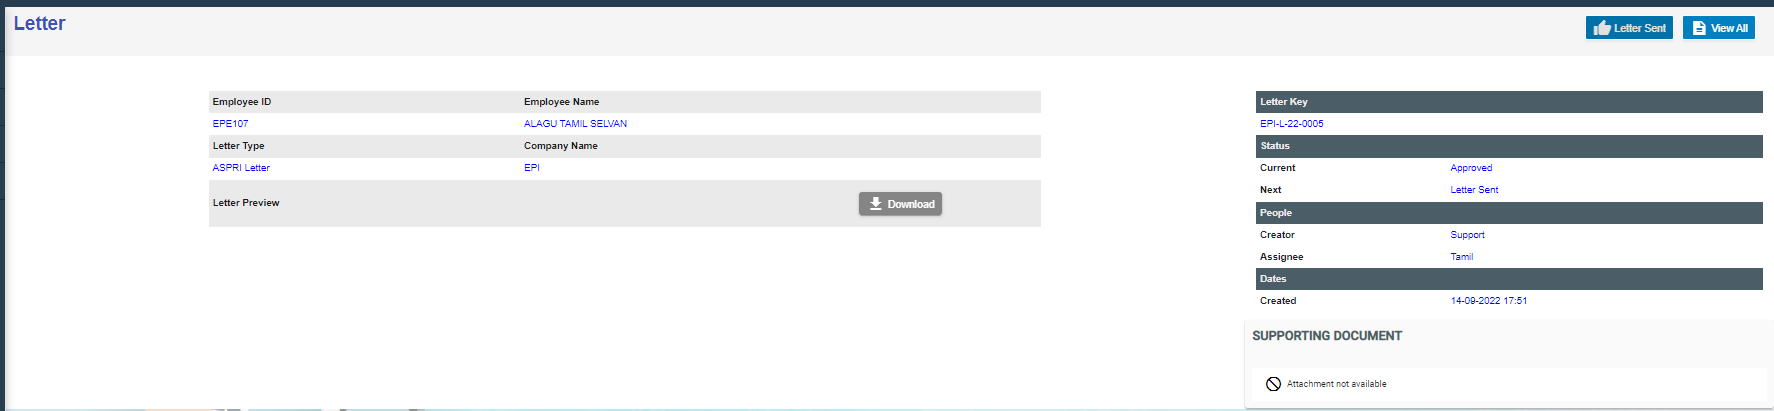](http://wiki.cuteinfocomm.com/uploads/images/gallery/2022-09/image-1663149928458.png)
### Broadcast
User can create broadcast message to a group of selected employees within the company. To view the screen, enable "menuNotification", "hrmNotificationCreator" and "hrmNotificationApprover" permission under HRM module.
[](https://wiki.cuteinfocomm.com/uploads/images/gallery/2025-03/image-1741845781877.png)
1\. Click [](https://wiki.cuteinfocomm.com/uploads/images/gallery/2025-03/image-1741845945971.png) to create new broadcast message.
[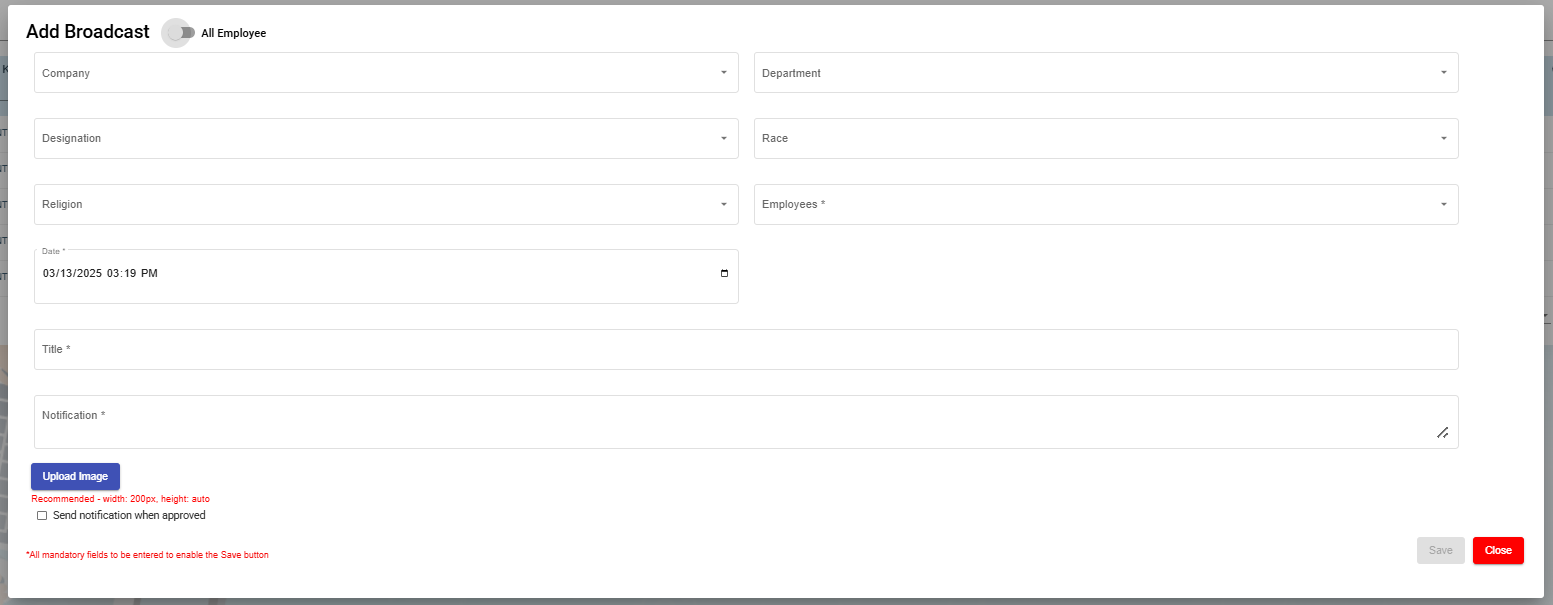](https://wiki.cuteinfocomm.com/uploads/images/gallery/2025-03/image-1741850372638.png)
- Change the toggle button [](https://wiki.cuteinfocomm.com/uploads/images/gallery/2025-03/image-1741846272692.png)to change to select All Employee.
- Select Company in the Company field.
- Select Department in the Department field.
- Select Designation in the Designation field.
- Select Race in the Race field (optional).
- Select Religion in the Religion field (optional).
- Select Employee in the Employees field and this is mandatory to select which employee(s) for this broadcast message.
- Select the date and time in the Date field using the [](https://wiki.cuteinfocomm.com/uploads/images/gallery/2025-03/image-1741850786207.png)calendar icon and this is mandatory to set the broadcast message to be delivered.
- Input the subject of this broadcast message in this mandatory Title field.
- Type the body text of this message in this mandatory Notification field.
- Click on the [](https://wiki.cuteinfocomm.com/uploads/images/gallery/2025-03/image-1741851522485.png) button if an image is required to be attached to the broadcast message. Note on the recommended file size of image file when uploading.
- Tick on the checkbox [](https://wiki.cuteinfocomm.com/uploads/images/gallery/2025-03/image-1741851688794.png) if the broadcast message notification needs to be sent to the selected employee(s) once the broadcast message is approved. Once broadcast message is approved, a notification will be sent to the selected employee(s)mobile. When the notification is clicked on a mobile device, it will open the cuteOffice 2B application's home page and the notification log will appear in the system in the Admin -> Notification Logs
Once done and the mandatory fields (marked with \*) are entered/selected, you will be able to see the Save button. Click on the Save button to record the broadcast message.
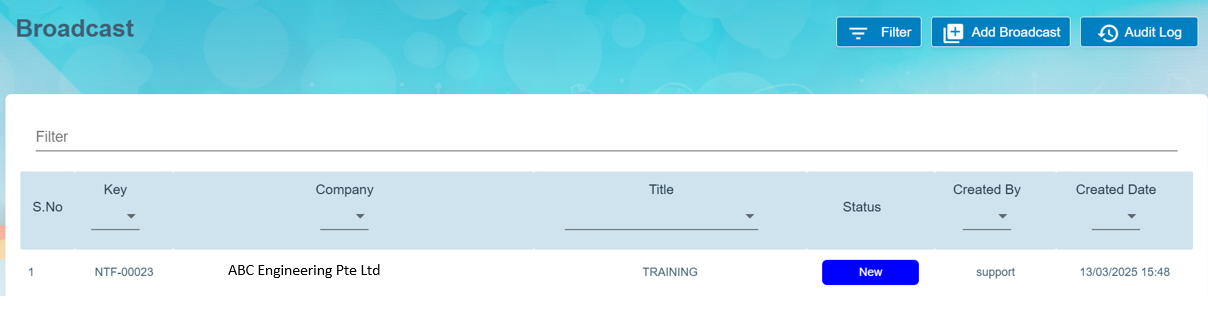
Below sample record with status = New
[](https://wiki.cuteinfocomm.com/uploads/images/gallery/2025-03/image-1741852342381.png)
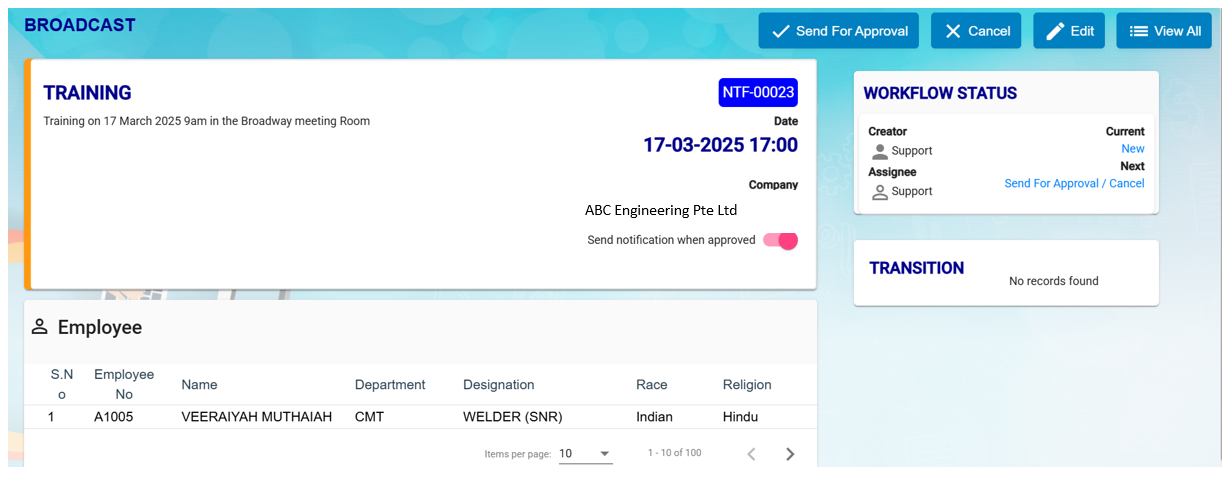
2\. Click on the key of the broadcast message (as shown in above pt 1) and click on the [ ](https://wiki.cuteinfocomm.com/uploads/images/gallery/2025-03/image-1741852911263.png)button to send to the required authorised person to approve this broadcast message before sending to the selected employee(s). The status will change from [](https://wiki.cuteinfocomm.com/uploads/images/gallery/2025-03/image-1741853161818.png)to [](https://wiki.cuteinfocomm.com/uploads/images/gallery/2025-03/image-1741853088376.png)in the View All page of the Broadcast page.
[](https://wiki.cuteinfocomm.com/uploads/images/gallery/2025-03/image-1741852783428.png)
[](https://wiki.cuteinfocomm.com/uploads/images/gallery/2025-03/image-1741853246902.png)
3\. To approve the broadcast message, click on [](http://wiki.cuteinfocomm.com/uploads/images/gallery/2022-09/image-1663356632984.png) button. You can click on the [](https://wiki.cuteinfocomm.com/uploads/images/gallery/2025-03/image-1741853461683.png) button any amendment and then send for approval again. Once Approved, status will show this [](https://wiki.cuteinfocomm.com/uploads/images/gallery/2025-03/image-1741853568431.png) of this broadcast message in the View All of the Broadcast page.
[](https://wiki.cuteinfocomm.com/uploads/images/gallery/2025-03/image-1741853614834.png)
#### MOM OED Submissions
The Occupational Employment Dataset (OED) is an ongoing registry where organisations in Singapore are required to provide the job and work location details of all employees. The below URL is usually used to submit the OED data.
[https://stats.mom.gov.sg/laboursurvey](https://stats.mom.gov.sg/laboursurvey)
Now with the help of cuteOffice, the data can be submitted with ease to MOM.
Enable the permission "HRM -> oedSubmissionMOM" to submit OED.
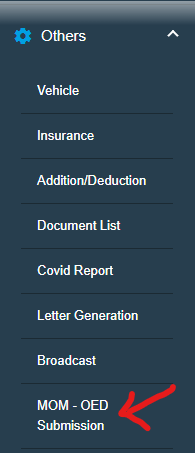
Click on MOM - OED MOM Submission menu to submit
You can also view the video on the process of submitting OED data here. [https://www.youtube.com/watch?v=pjiHbK\_gRFs](https://www.youtube.com/watch?v=pjiHbK_gRFs "Submit MOM OED data")
[](https://wiki.cuteinfocomm.com/uploads/images/gallery/2025-04/image-1743559298487.png)
[](https://wiki.cuteinfocomm.com/uploads/images/gallery/2025-04/image-1743561435519.png)
However, before submitting the data to mom from cuteOffice, we need to take few actions
There are certain mandatory data which should be sent to MOM and there are some optional data.
The mandatory data are
1. Full Name
2. Pass Type
3. NRIC/FIN
4. PW Job Title
5. Main Job Title
6. Standard Hours Work
7. Job Type
8. Date of Join
9. Date of Leaving (for resigned staff)
10. Total Working Days of Month
11. Actual Working Days of Month
Other than the above the below optional data can be sent which you can control whether to send or not.
1. Highest Education
2. Main Job Duties
3. Is Employee HR Role
4. Primary HR Role
5. Secondary HR Role
6. HR Job Level
7. Occupation Group
8. Employee Type
9. Department
10. Paid OT Hours
11. Payment Mode
12. Basic Wage
13. Gross Wage
14. Annual Leaves
15. Premise Type
16. Postal Code
17. Street Name
18. mode of Leaving
Trade Master has few important data that is required for OED submissions
[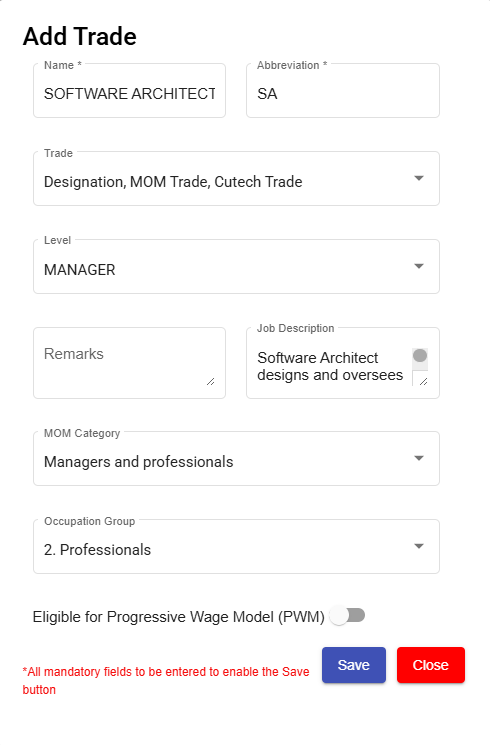](https://wiki.cuteinfocomm.com/uploads/images/gallery/2025-04/image-1743560219844.png)
**MOM Category** - For every one of your designation shall be mapped to MOM category.
Similarly Map the **Occupation group** with the trade.
**Job description** is optional data for **Main Job Duties**
**Note**: Only after approving the timesheet, you can submit the OED data as worked day is part of the data to submit.
The Highest education is sent from employee data. To update go to Educational Qualifications tab of experience
[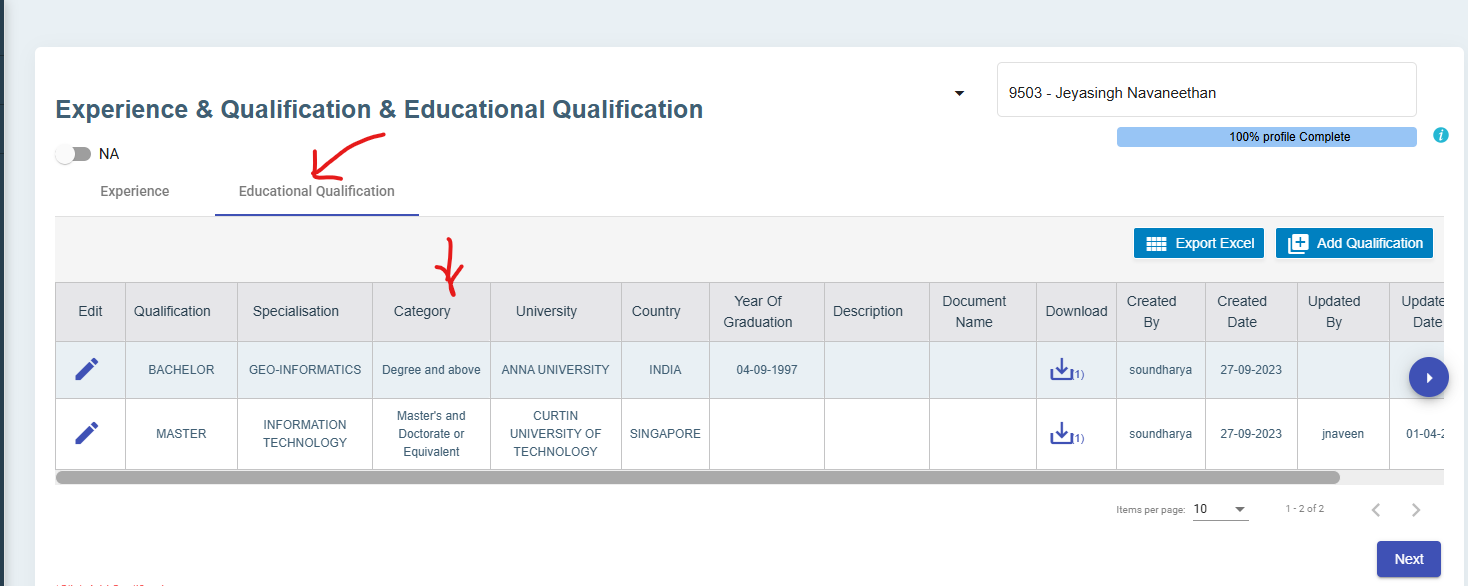](https://wiki.cuteinfocomm.com/uploads/images/gallery/2025-04/image-1743560657471.png)
Edit the highest education record and mark as highest an also make sure to select the category of education such as master , bachelor etc
[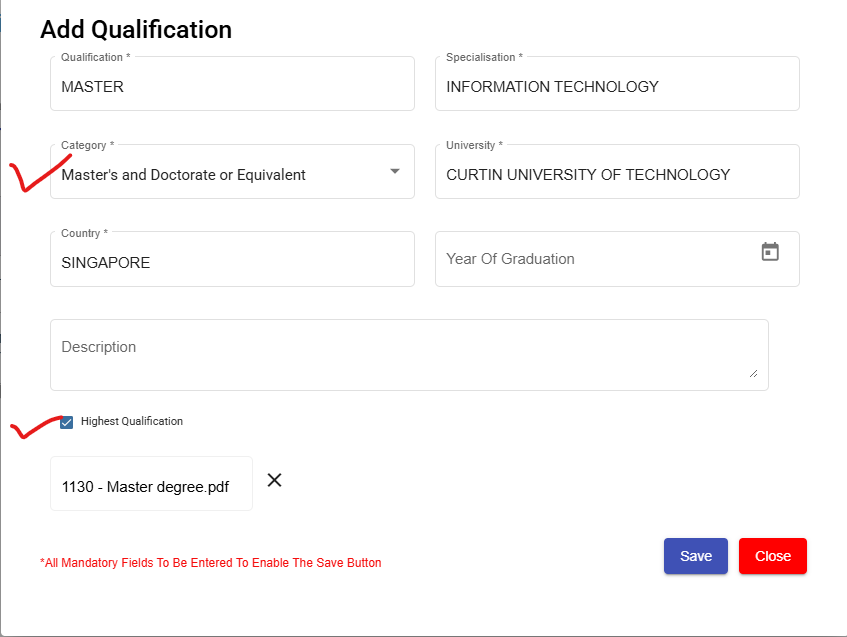](https://wiki.cuteinfocomm.com/uploads/images/gallery/2025-04/image-1743560774697.png)
In official information page, select the place of working Premise Type and also update whether the employee is in HRM role or not.
[](https://wiki.cuteinfocomm.com/uploads/images/gallery/2025-04/image-1743561027850.png)
If Employee is in HR role, select additional fields such as
1. Primary HR Role
2. Secondary HR Role and
3. HR Job Level
All are drop down data as per MOM and choose from the list.
[](https://wiki.cuteinfocomm.com/uploads/images/gallery/2025-04/image-1743561068852.png)
In -OED View All Submissions page, select New Submission to send data
[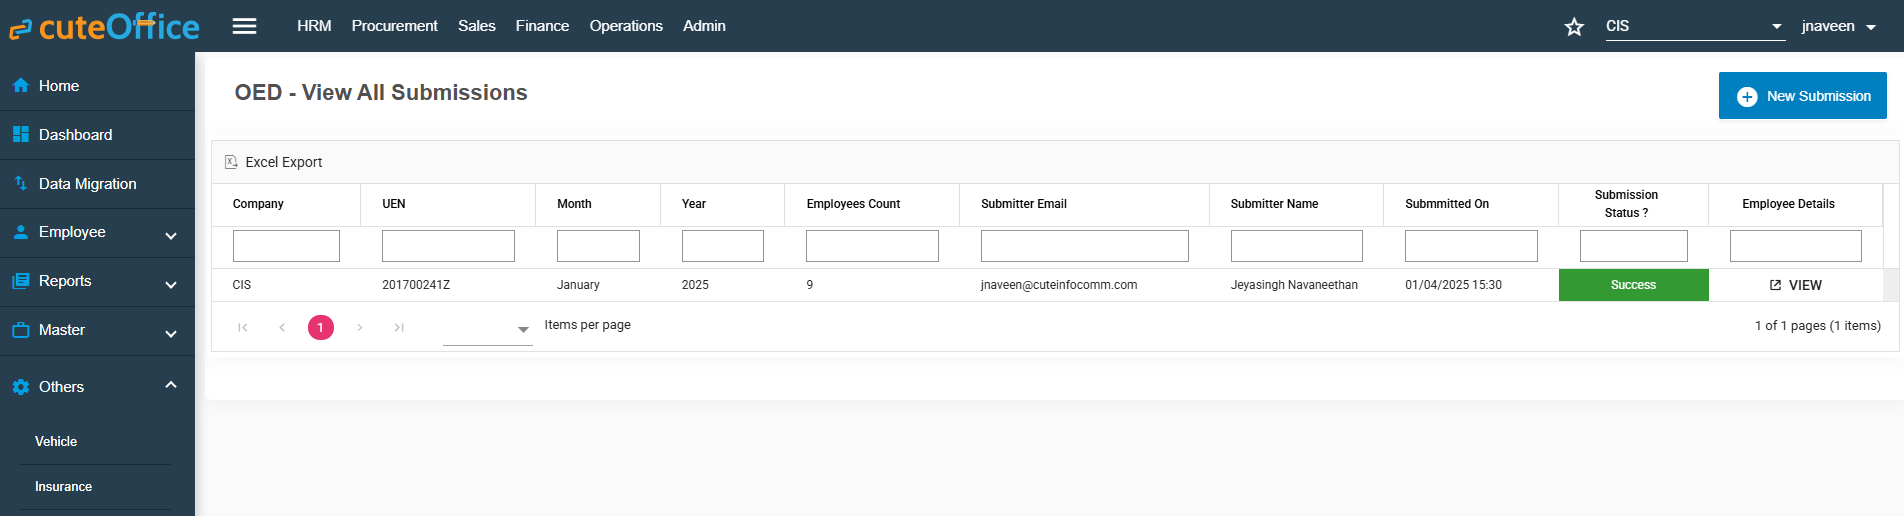](https://wiki.cuteinfocomm.com/uploads/images/gallery/2025-04/image-1743561418603.png)
The new submissions window opens up.
[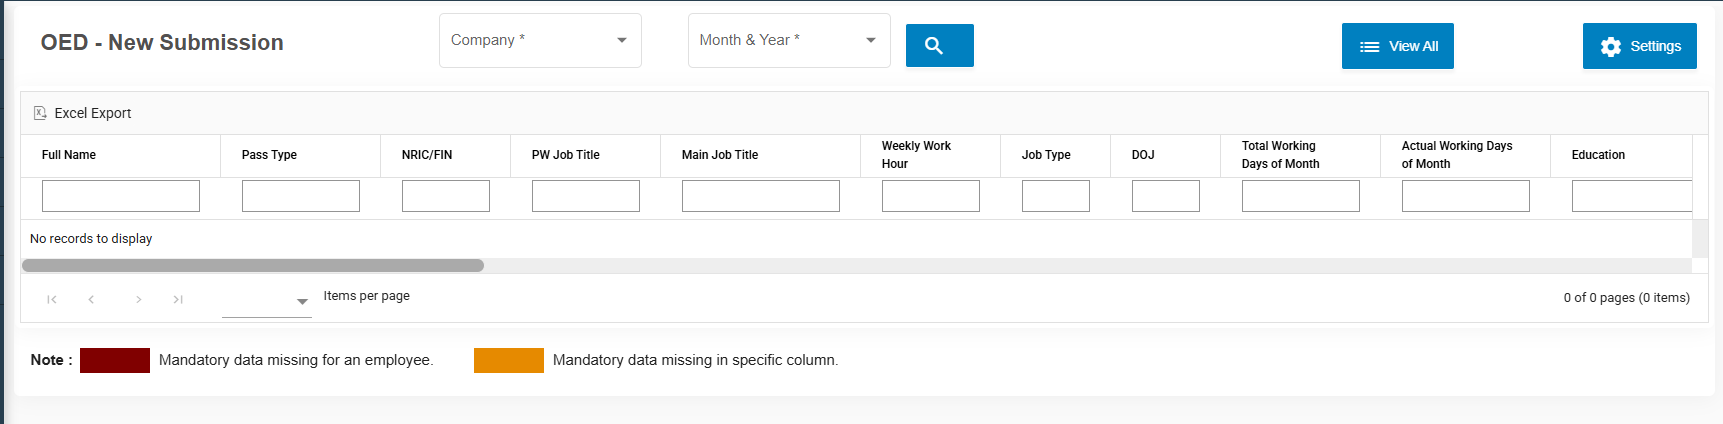](https://wiki.cuteinfocomm.com/uploads/images/gallery/2025-04/image-1743561511749.png)
Click on Settings icon on the right to choose which fields of data that you are planning to send to MOM
[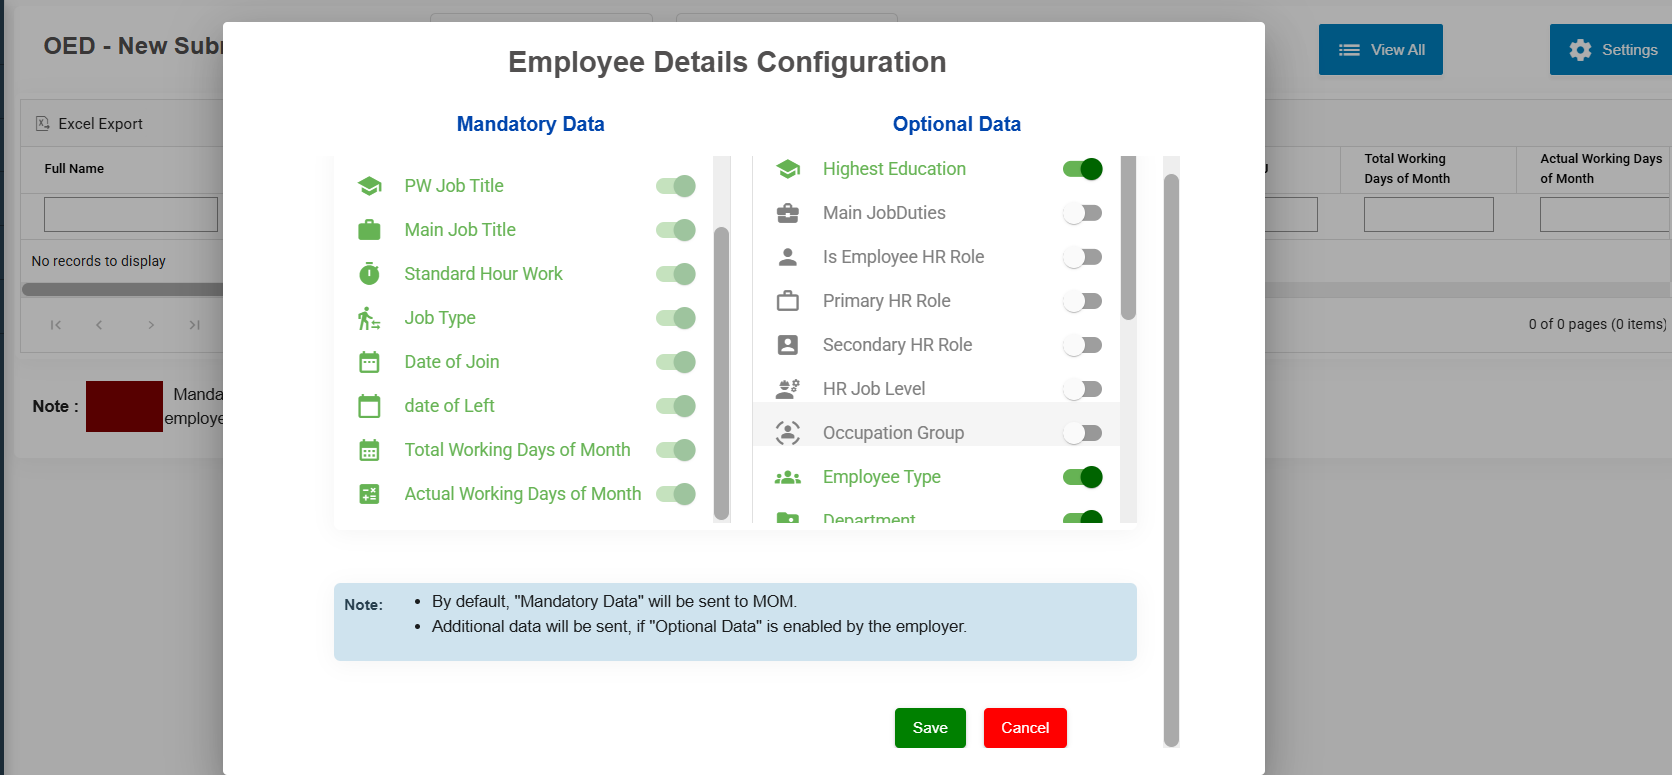](https://wiki.cuteinfocomm.com/uploads/images/gallery/2025-04/image-1743560028272.png)
Mandatory data fields cant be unselected.
Choose the company and period for which you want to submit the records. Click Search
All the employees with data that will be submitted will be showing here.
[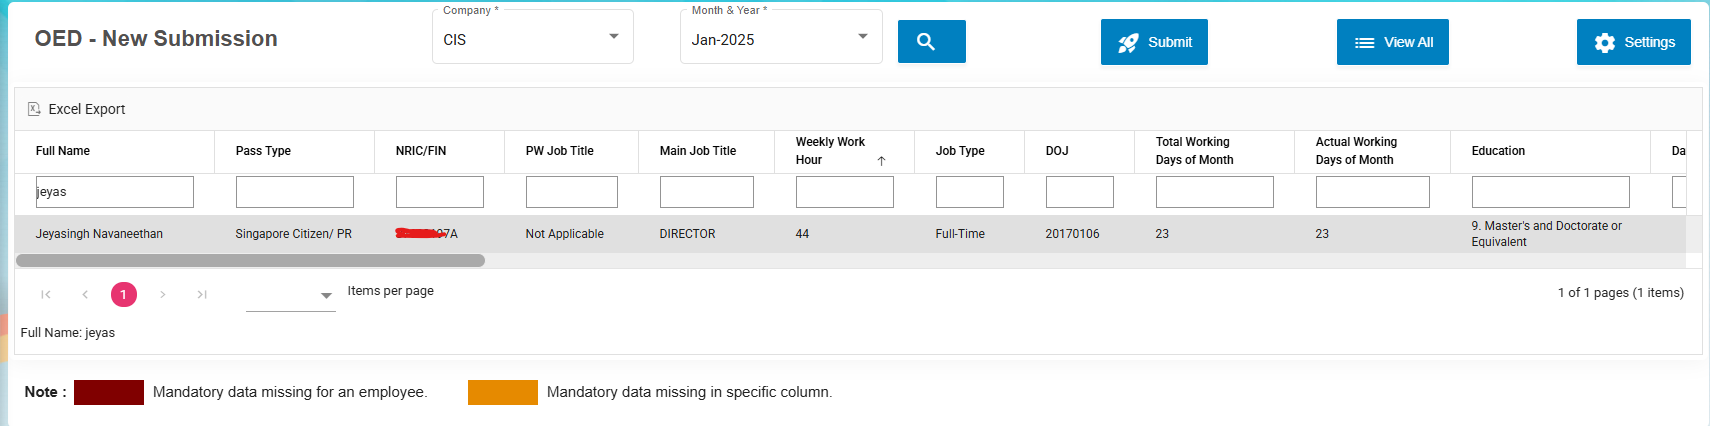](https://wiki.cuteinfocomm.com/uploads/images/gallery/2025-04/image-1743563206485.png)
If any data is not available, it will be highlighted. Do the necessary corrections in respective places.
Click the button[.](https://wiki.cuteinfocomm.com/uploads/images/gallery/2025-04/image-1743563414764.png)
The summary is shown and Click Agree & Proceed to login with SingPass and submit the OED data to MOM.
[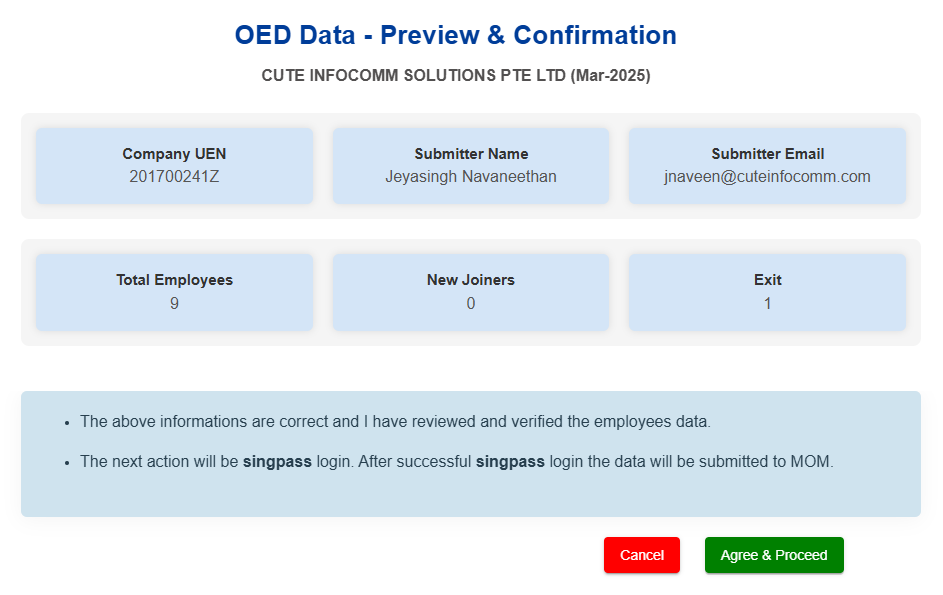](https://wiki.cuteinfocomm.com/uploads/images/gallery/2025-04/image-1743572933376.png)
Once authorised and selected the correct company name, Click Allow for cuteOffice to submit the data on your behalf.
[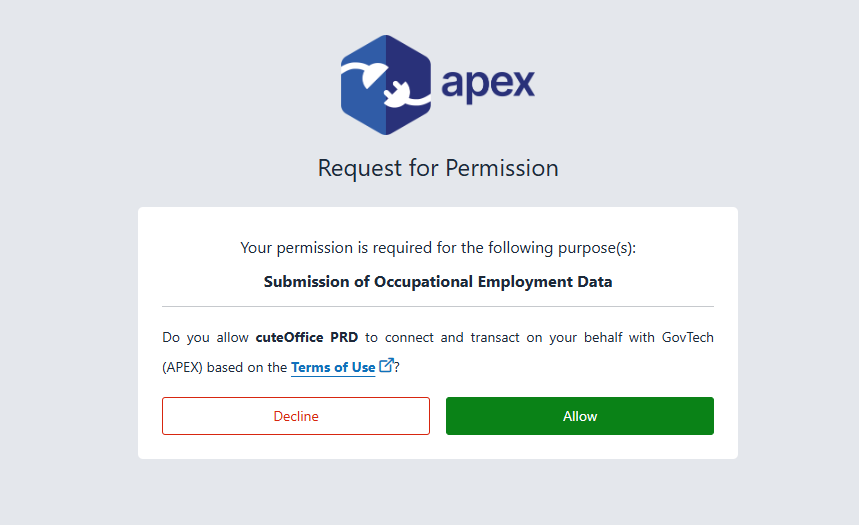](https://wiki.cuteinfocomm.com/uploads/images/gallery/2025-04/image-1743563524368.png)
The data will be submitted and it will show a confirmation message.
[](https://wiki.cuteinfocomm.com/uploads/images/gallery/2025-04/image-1743586885057.png)
The list of submitted data will be available for review along with the submission status.
[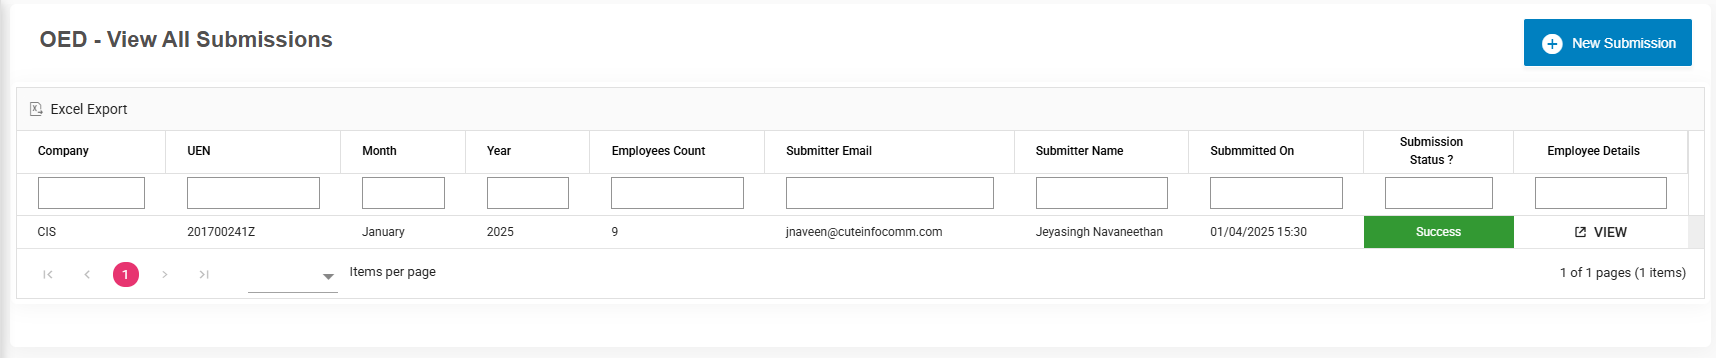](https://wiki.cuteinfocomm.com/uploads/images/gallery/2025-04/image-1743563676787.png)
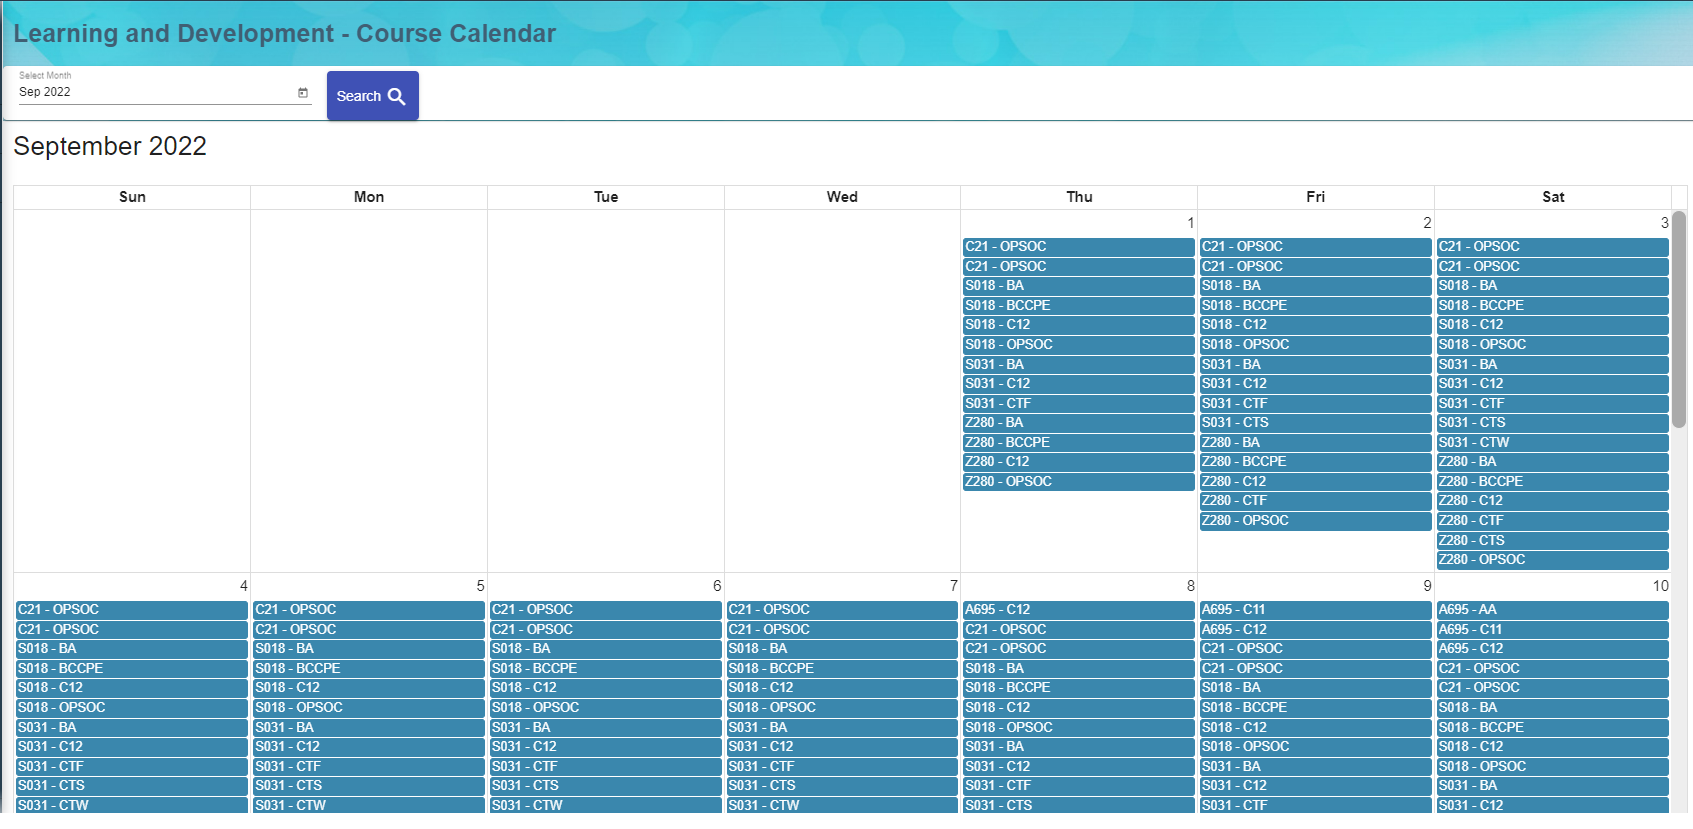
#### L&D Course Calendar
1\. Enter Month to view Learning and development calendar for the employee
2\. Hover the cursor near to employee, tool tip open to show L&D Course details
[](http://wiki.cuteinfocomm.com/uploads/images/gallery/2022-09/image-1664352090534.png)
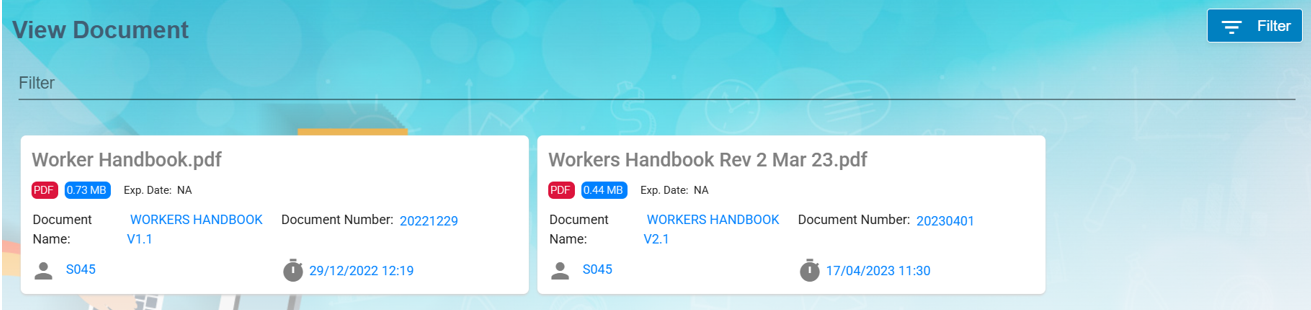
### View Document
User can view the document which was created for public view within the company. Click on the title e.g. Worker Handbook.pdf to trigger download of the document for viewing.
[](https://wiki.cuteinfocomm.com/uploads/images/gallery/2025-03/image-1741844860131.png)
#### Filter Document
If you want to view any specific document details among multiple documents listed in the **View Document** page, you can use the filter option [](http://wiki.cuteinfocomm.com/uploads/images/gallery/2022-09/image-1663355063095.png)provided in the upper right corner of the **View Document** page to search.
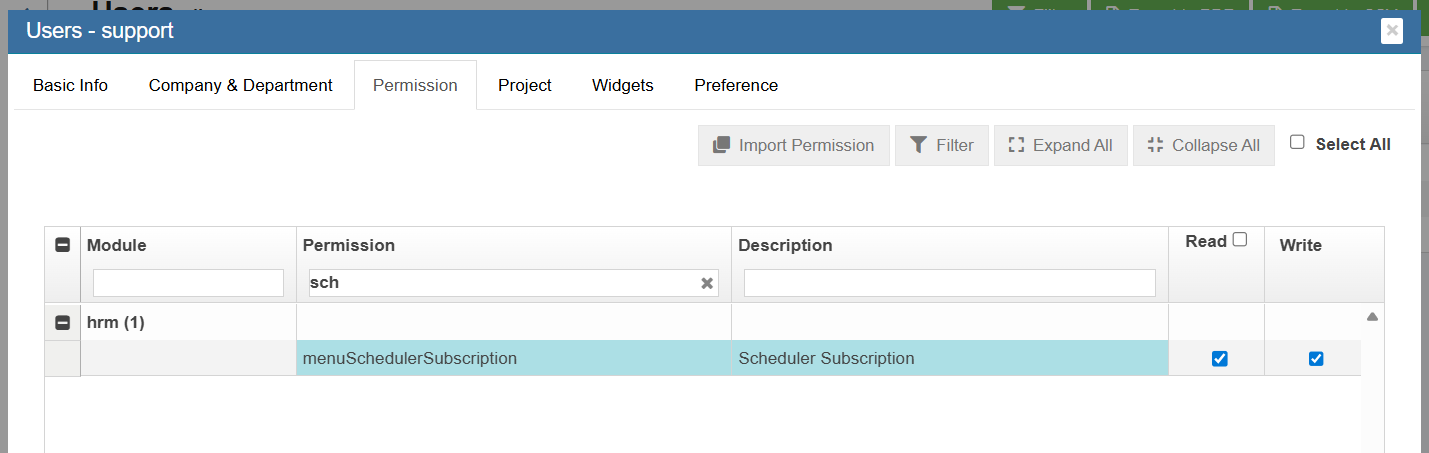
### Scheduler Subscription
To configure scheduler, enable "menuSchedulerSubscription" permission.
[](https://wiki.cuteinfocomm.com/uploads/images/gallery/2025-12/image-1766048811799.png)
User can view the menu under HRM->Others.
[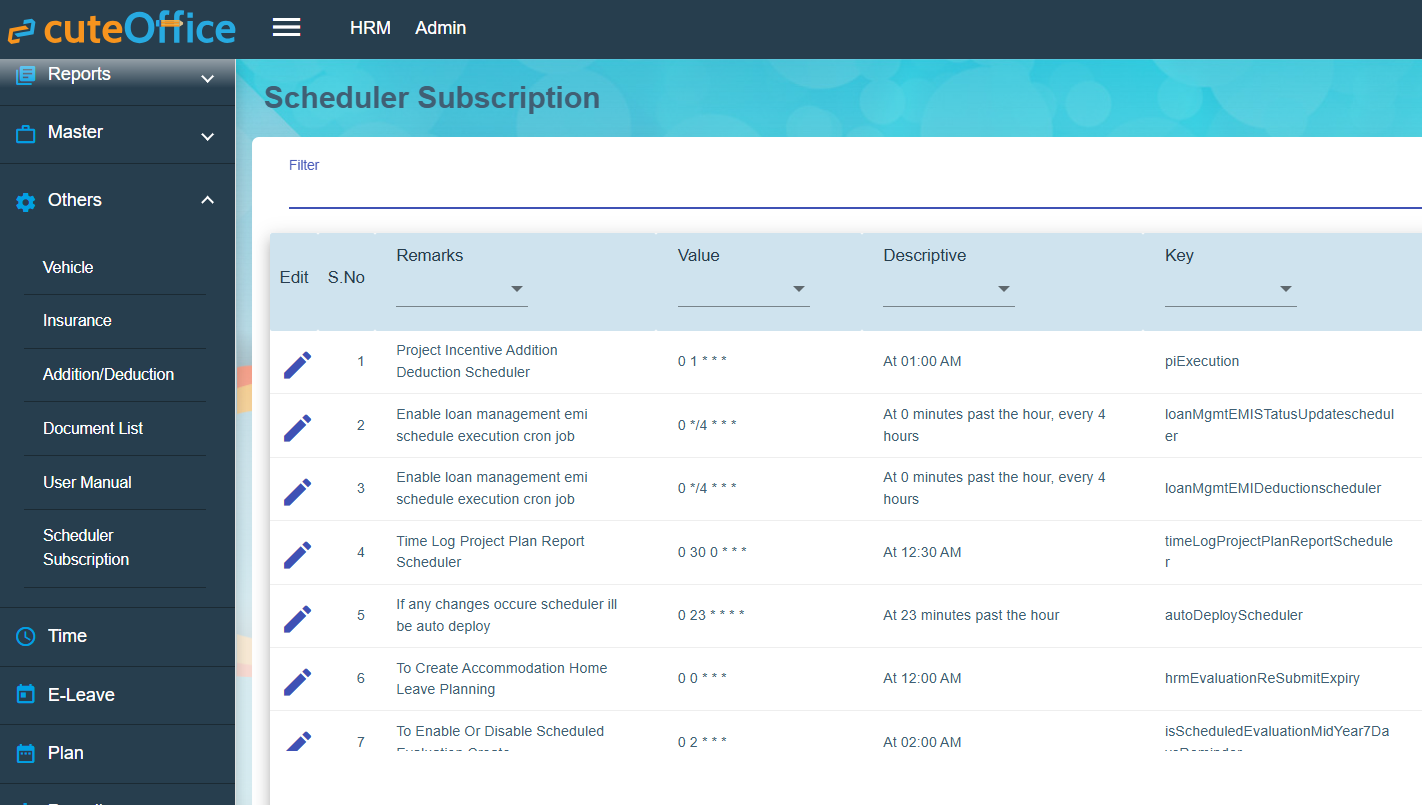](https://wiki.cuteinfocomm.com/uploads/images/gallery/2025-12/image-1766049516209.png)
Click edit and change the scheduler ( Hours, minutes and seconds) and save the record.